Showing posts with label Baccus 6mm. Show all posts

Thursday, 17 July 2025

Joy of Six 2025

It's taken me a couple of days to assemble this show review, partly as it took me a little time to decide on my view on how I found the event.  It's not the largest show on the circuit, in scale or in scale (if you see what I mean), but it is a nice little show within an easy sixty minute commute of Chez Elenderil.  Joy of Six is dedicated to all things 6mm, which makes sense as it is organised by Peter Berry and the team at Baccus 6mm.  It is held at Sheffield Hallam University right opposite the Sheffield rail interchange.  With good parking and transport links including a park and (tram) ride it isn't a difficult show to get to.


I haven't attended this show for a couple or three years and it is a bit larger than I remember it.  It's held in three rooms and a connecting hub where the lifts and stairs are.  One of the rooms also has catering facilities.  All of the games on show are (of course) 6mm as are all of the vendors apart from one who had naval stuff in even smaller scales (Three Deck Dockyards).  I almost bought some resin 1/4800 Russo Japanese war ships from them.  When I got home I took a look at their website and the models are 3D prints using licensed STL files from The Wartimes Journal and at a much reduced price to buying them direct from WTJ's online shop.  They do look rather nice too, even at 1/4800.

Commission Miniatures - Not bad for MDF

And cheap enough to use en masse

Sticking with the trade stands I have a confession to make, I didn't buy a single solitary thing!  Not one.  I know this is a bit of a shock and I think it must be down to the heat welding my wallet closed or something.  I did want some stuff from Heroics & Ros but couldn't get near their stand as it was really busy for the entire time I was there.  I did have a nice chat with the owner of Commission Miniatures, the chap who does the MDF 6mm figures.  It's the first time I have seen them in the flesh (or the MDF) and they don't look half bad given the material is almost 2D.  They have more depth than I expected and at arms length look almost as good as cast or printed figures.  They have the bonus of being very inexpensive at £2 for 96 foot figures.  Something that would make them attractive to me for a period I didn't want to spend a lot of time or money on (hint that's Napoleonic's).  They do some nice MDF railway tracks too.

Rob's Scenics trade stand with pre-painted very tempting models

Baccus were doing good business but I didn't need anything from them (want yes...need, not so much).  I also spotted Brigade Models in attendance with both 6mm and 2mm scenics on display.  I have quite a lot of their 2mm stuff but hadn't considered the 6mm offerings but they do look nice.  Another good set of terrain was on display from Rob's Scenics.  I had a look the Rapier Miniatures stand where painted and based 12 element DBA armies was retailing for around £85.00 which seemed fairly reasonable.

Baccus put on a fast play Battle of Lens 1643

Having wandered around the traders I turned my attention to the games.  These were of a high quality with some really nice terrain on display.  What was noticeable is that the vast majority were full scale battles and only two were not historical refights.  As usual there were a good number of participation games alongside the demonstration games. I missed spotting a couple of games and a couple which were advertised were actually missing.

Baccus' Battle of Lens was using big bases so the entire battle only had just over a dozen combat formation a side.  It's one way to make things move faster I suppose, restrict the number of units a side, but it doesn't really work for me as a concept.  It sort of turns a battle into something like a skirmish game when there are only a handful of combat units a side.

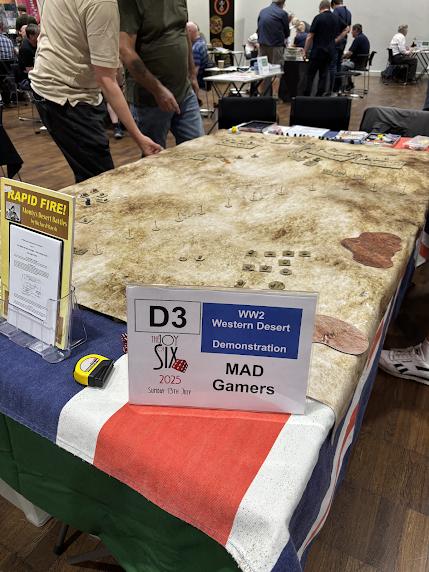
First El Alamein courtesy of Maidstone and District Gamers

The MAD display game was one of those who were keen to interact with passers by which was nice.  A good chat ensued about how after the real battle Rommel felt Montgomery wasn't playing fair as he refused to follow up into Rommel's AT gun lines.


Lovely terrain here probably my favourite table at the show

Total Battle Miniatures displayed the Battle of Lobositz 1756 Prussia v Austria and I think the opening battle of the Seven Years War.  The terrain was excellent and shows what can be done in a small space.


Those troops look like an army and sit well into the terrain

I spotted the Yarkshire Gamer taking part in Champion's Hill 1862 (I think).  Lots of Adler 6mm on displayin this game.


ACW action from The Yarkshire Gamer himself


Another rather nice table this time showing a Franco-Prussian war battle

Per Boden put on a Bloody Big Battles game from the Franco-Prussian war.  Again really nice terrain.

Meanwhile in 1960s Goa.  India v Colonial Portuguese


Battle of Bouvines 1214 (or so)

There were the obligatory strange hats on offer

A big cold war gone hot game.

Just after the time frame I set my cold war gone hot game in.  East Germans trying to move down the length of the table against BAOR opposition.  Whether they managed it I don't know.  If all they had were T55s I don't fancy their chances unless they had an awful lot of them!

Overall some nice tables but for some odd reason I wasn't really feeling enthused.  It may have been the heat but it seemed like a lot of the games had their own private force field around them that repelled spectators from getting involved with the players.  Or maybe I'm just getting old and grouchy, who knows.   At other shows I have friends who are running games or trading so I can have a chat but none of them are 6mm gamers so were not at this one. The jury is out on whether I will return next year.

Tuesday, 15 July 2025

I promised an Army parade

Well I suppose I should deliver then!  So here they are:

By my count this is a smidgen over 4,200 little lead warriors plus vehicles

If I ever do this again I'm going to need a bigger kitchen table!

By way of giving a vague idea of what's on the table

For World War Two we have 1940 Germans, some 1940 British Home Guard (the BEF are still waiting to be finished) and some Late war Soviet Armour and support.  The BCW troops are Covenantors, Montrose Highlanders and Irish and both flavours of English (good guys and bad guys you may decide which is which).  The rest are Late Imperial Romans, Justinian Byzantine, Goths, Huns, Moors, Dacians, Early Sassanid Persians, Picts, Strathclyde Welsh, actual Welsh, Scots-Irish, Middle Anglo-Saxons and Vikings.

It appears I have been a busy bloke these last few years.

Tuesday, 8 July 2025

Alan?, ALAN!......

Following on from the Goths are the Alans.  Both the DBA and ADLG lists give Alannic Horse Archers as an option in the Visigothic lists.  I thought they would make a nice change from Huns in that role, so I opted for them.  Having managed to confuse myself over the appearance of the Goths I was ready for even more confusion over the Alans.  

They seem to have originated as a fusion between a Sarmatian tribe and remnants of the Scythian Saka peoples,  They originally lived somewhere between the Black and Caspian seas.  The Romans knew of their existence as early as the reign of Augustus but didn't consider them as a threat as they were only raiding into Parthian territory.  From Hadrian's reign we have Arrian's 'Order of battle against the Alans' to fall back on for details of the tactics and by inference some evidence for their equipment.  This was written shortly after 135CE and describes Roman tactics and deployment against an Alanni raiding force which had entered the Eastern Roman province of Cappadocia, in what is now North Eastern Turkey.  There are other mentions of them in Cassius Deo and Tacitus and in Parthian and Persian sources.  Rome hired them as mercenaries and by the time the Notitia Dignitatum was drafted, had some regular cavalry units either made up of Alans or named for them and presumably equipped in a similar way.  Arrian terms them Scythians but the Parthians (who were of Scythian descent) said otherwise

The Alans were living in the south part of modern day Ukraine when the Goth's came along and settled slap bang in the middle of their lands.  This split them into two groups the eastern half were conquered by the Huns with survivors ended up in modern Ossetia.  The Western group eventually settled on the fringes of Brittany hence Alain being a common Breton name.  Along the way they seem to have hung onto their 'genetic' identity rather more successfully than the Goths as both groups are described as tall and blond with piercing blue eyes.  Even in the 21st century it is not uncommon for Ossetians to fit that description.  A third group settled in the north of Pakistan probably having moved with the White Huns who invaded that area, and have also kept their blond, blue eyed look.

I used a slightly heavier ink wash than normal...whaddya think?

And clearly I need to get a handle on the iPhones focal length

So we have a reasonable idea as to the background and physical appearance of the Alans but what of their clothing and equipment?  Other Sarmatian peoples had a liking for heavy cavalry in scale or lamella armour armed with a Kontos, sword and often a bow too.  The Alans seem to have followed that pattern.  Arrian certainly deployed his troops to deal with a frontal charge by heavy cavalry and made sure to anchor his flanks on higher ground. He instructed the first four ranks to use their pila as spears (some commentators seem to assume this means they had long spears but Arrian mentions the long iron shaft which sounds like a pilum to me) with rear ranks throwing 'javelins' and adding bow fire to the defence.  He notes that their horses lack armour and are vulnerable to missile fire but expects that they will always charge on sight.  That said they don't appear to have done so when faced with Arrian's deployment but why that was isn't certain.  Arrian's determination to have his flanks covered suggests that they had sufficient light cavalry to make an attempt to get around the flanks a real risk.  

I can't find much information on clothing for Alan light cavalry but I'd expect the standard steppe horse warrior tunic and trousers.  The tunic may still have had the overlap frontal fastening (a bit like a double breasted suit jacket) favoured by their Saka ancestors and Parthian light cavalry but the pointed three lappet cap seems to no longer be in use.  In 6mm I have gone for Late Roman horse archers rather than Saka/Scythian horse archers.  I went with pale tunics and bright coloured trousers as the main colour choice and of course lots of blond hair, blue eyes though are beyond me at this scale!  When I get around to adding heavy cavalry I will use a mix of armoured and unarmoured Sarmatian cavalry.

Oh and when I looked a bit closer it wasn't Alan at all, it was Dave.


Wednesday, 25 June 2025

How Goth were the Goths?

Before we start let’s just park my dodgy dad jokes about black eye liner and black clothes right here shall we?  Good call, as this post actually came about as I tried to decide what colours to paint some Baccus 6mm gothic infantry and led to a bit of an argument from Google's wonderful (not wonderful in the least) AI assistant.  Again no jokes about needing to buy more black paint eh?  More on the failings of AI later.

Goths, or Vandals or Ostrogoths and even possibly Visigoths

We don't have a huge amount of information on the earliest Gothic people and there is a still some “healthy” debate as to where they originated.  Most of our sources come from the 'civilised' peoples around the Mediterranean and have to be taken with a pinch of salt as they tended to be biased about the hairy barbarian types beyond the frontiers!  The usual wargaming view is that Goths come in two flavours Visigoths and Ostrogoths (aka Tervingi and Greuthingi).  However, the Romans just called them all Goths until Attila's time, as they didn’t really have any information on the sub-divisions amongst them.  It wasn’t until after the fall of the Western Roman Empire that the term Visigoths came into use so that term isn't entirely useful either.  I'd say that they are Goths, then Goths and Ostrogoths then Visigoths and Ostrogoths once the Toulousean Kingdom is established in the mid 5th Century

The Goth's first came to the attention of the wider world while living in modern Ukraine in the area either side of the Dneiper River.  by the time that  Jordanes was writing in the 5th century the Goths themselves seem to have believed that they originally came from an island far to the north of the Ukraine.  That gives rise to the idea that they originated in Scandinavia supported by the names of areas in Southern Sweden like Gothenburg and Gotland.  However this may be a bit of a stretch, it's like suggesting that the town of Reading had ancient inhabitants who liked to peruse the written word more than their neighbours!  Still there is some archaeological evidence of a people related to the Goths and Vandals moving south through Poland and Western Russia.  For this period there is no solid evidence for the appearance of the Goths other than some grave goods.

Once in the Dneiper region the Vandals seem to have settled to the north of the Goths and the Goths them selves to have divided into the Tervingi west of the Dneiper and the Greuthingi to the east. They seem to have taken over some Alannic  terriotory splitting the Alans into a western and an eastern group.  What we do know is that a large proportion of the Tervingi moved ahead of the expanding horse tribes displacing the Carpi (a remnant Dacian people) in Transylvania on the way and ultimately bumping into the Roman frontier in the first part of the third century.  The remainder of the Goths and the eastern Alans became subjects of the Hunnic empire and eventually moved west along with them.

So what has the above Tourists guide to Europe for travelling barbarians got to do with the appearance of the Goths?  Well in part their appearance is connected to the people they met and intermarried along the way.  The Ostrogoths stayed in Hunnic territory and probably mixed with both Alanni and Hunnic types and possibly Heruls and Gepids.  The Visigoths on the other hand moved into the area occupied by the Carpi and so picked up some Dacian genomes before moving further along the frontier and mixing with other Germanic peoples..  Eventually they joined with the Vandals in Spain and North Africa as well as that part of the Alans who had also moved west ahead of the Huns.

We have some documentary evidence that suggests that the Goths favoured furs and animal skins over 'civilised' clothing.  I have read some sources which state that they carried their swords hanging from a baldrick type shoulder belt rather than suspending them from a belt Roman style.  Shields were round or oval.  I noted that the coffin style shield is not mentioned.  One source mentions green cloaks with red edges as being popular.  All of the images show them as wearing late Roman style tunics and trousers as a base layer.  Lastly there is some archaeological evidence suggesting that some Goth's took up the steppe nomad practice of skull binding.

I was initially interested in hair colour and this is where Google's AI comes into the story.  This tells me that the Goths were generally fair haired, being blonde, light brown or red brown hair coloured.  It also states that Visigoths were also fair haired.  Ask about Ostrogoths and the confusion starts.  The Ostrogoths, it tells me were dark haired with mostly dark browns and black predominating.  What it doesn't do is say what the source of that information is or for what period this covers.  I kind of get the feeling that the AI doesn't rank information sources by quality when deciding what to report but rather goes with quantity of supporting web sites (be they good, bad or indifferent).  I couldn't find any detailed  information regarding shield patterns and or colours either so it’s going to be guess work for that.  

So I decided on mostly fair haired tones with linens and mainly subdued natural coloured clothing with an above average (for my painting) amount of green tunics and cloaks.  Shields will be derived from later Roman patterns especially those associated with Goths, Vandals and Alans.  So at least the Goths are progressing (probably westwards in some haste!).


Tuesday, 3 December 2024

More Moors

The Moors are coming along nicely.  As usual I'm starting by building a DBA3 army but will probably extend to a small L'Arte De La Guerre (ADLG) army later.  In part this is because DBA and ADLG have different ways of depicting the different parts of the army.  

With DBA there is a standard army of 12 elements which depicts the General, and his bodyguard, as one of those 12 elements and defines him as being a standard DBA troop type (with a bonus in combat).  ADLG on the other hand has generals either as a separate base that can be attached and unattached from any unit of the army or as an attached general permanently linked to a single unit (pretty much as in DBA).  On top of which many ADLG infantry units consist of the equivalent of two DBA elements.  That makes it easier (and cheaper) to start with the DBA version of an army, which is why I started where I have.  Come on you all knew I was a cheapskate!  ADLG also uses an army selection points system with standard games having a 200 point budget. There is a version closer to DBA army size using 100 or 120 points.  That said even at the lower point values an ADLG army is likely to have between 30 to 40% more bases than the DBA equivalent because of the infantry basing system.

Anyway back to the moors (cries of Cathy...Heathcliff in a strange North African tongue should now be ringing in your ears, No? OK maybe that's just me then?).  The General's element is now completed along with the additional infantry.  After some thinking and a query to the hive mind on TMP I decided to use Late Roman Heavy Cavalry castings to differentiate the General from his underlings...er... I mean brave fighting men.  I removed the Draco standard from the command figure group and replaced it with one based upon the Infantry standard.  Which may be wrong but at least it's a standard.


All the army to date, but...wait for it...there is moor to come

When it comes to painting horses I rather like liver chestnut and bay horses as the mainstay of my cavalry. To my eye nothing says 'horse' as much as the black tail and manes of a bay. I do throw in some pure brown, black and greys for variety and the very occasional pure chestnut and roan. I rarely do units in 6mm with all the horses in the same coat colours as these are troops on campaign not the parade ground. If you do spot a unit all of one colour watch out, it will be something or someone a bit special and probably has more oomph than other cavalry formations.

The general's element for DBA

As a final thought I realise that I should have created a Moorish army years ago, honestly the scope for puns is huge!  For a start they are almost all bare headed, not a cap to be seen, although I doubt many have been to Ilkley Moor.  I will leave you to work that one out. 😉

Sunday, 17 November 2024

The More the Merrier

Or in this case 'The Moor the Merrier' or Mauri, it's the North West African chaps who are the focus of this post.  I was looking through my lead pile and realised that I had bought a couple or three packs of Moorish Infantry.  These were used for various Dark Age types like the Welsh Princedoms and Dal Radian Scots.  The castings are bare legged and only have a tunic so they can be pressed into service as any number of lower class skirmishing foot types in that period.  I have sufficient of those for the time being so I decided to use them as Mr Berry intended, well I had quite a lot of them more (or should that be moor) than enough to cover the DBA3 infantry requirements for a Later Moorish army.

With very little variation in clothing choices, which meant a restricted palette, painting looked like it was going to be easy.  White(ish) tunic,  some dyed cloaks dark skin tone and then just animal skin shields in a mid brown, hair in a dark colour and weapons.   Well at least it it looked easy!  Moors didn't have the really dark skins of Sub-Saharan Africans  so getting that shade right took a few goes and as for the white tunics....Arghh!  White is one of those colours which is difficult to shade (I really must try a contrast type white paint at some point) and it took me a few attempts before I came up with an system that I was happy with.

I started with a white undercoat courtesy of Halfords ever reliable rattle can automotive primer.  I pre-shading on that but didn't like the contrast it gave.  So I had a cup of tea and a bit of a think ( but didn't take off any handles or things what hold the candles*) and decided on a new approach.  I painted all the tunics in Vallejo Bone white which is more of a pale coffee brown and all the flesh in Vallejo German Camouflage Brown a darker mid brown with a hint of something else in the mix possibly blue.  Only then did I apply a thinned wash of GW Agrax Earth Shade.  After which I dry brushed the tunics in Vallejo Ivory and then picked out some high spots in Vallejo Pure White.  It sounds like a lot of work but it doesn't take as long as you might think.  Adding some variations between black and chocolate brown for hair and some pale brown for javelin shafts pretty much completed the main paining.  A coat of varnish and the final touch of silver for spear points and bronze to officers' helmets and that was job done.

A gratuitous close up so you can see the final effect on those pesky tunics

Basing is my usual block paving sand and fine flock patches.  I used less flock than normal as Moors live in the Semi-Arid lands of North West Africa.  I will have to order some Moorish cavalry next time I'm buying from Baccus, then the Moors can be off to the races (see what I did there?). I have completed 44 of the infantry to date and have a further 36 on the painting table nearing completion.

A few more Moors (sorry I couldn't resist it), there are more to come (sorry, not sorry) 

The Moors are an interesting army in DBA, a general who is either cavalry or light cavalry, five Light Cavalry and six javelin armed foot who can be a mix of  light infantry or fast auxilia. Not a lot of punch but a whole lot of nuisance value.

As an aside, and I may already have posted about this.  I read something on a blog a while ago which has been a game changer in terms of brush care.  The occasional use of alcohol based hand sanitiser gel to clean brushes!  The gel means it sticks to the brush and it removes acrylic paint a treat, being clear also means you can see what is being shifted too.  It doesn't seem to damage the glue holding the hair in place, although I take the precaution of washing them out in warm water with a drop of Mrs E's shampoo in it afterwards.  After a second rinse they get a bit of hair conditioner then a final rinse and dry.

* For the education of younger readers go look for Bernard Cribbins' song "Right Said Fred".  It's a tale of the trials and tribulations of two removal men.  As an aside we had a second hand upright piano when I was very young that had both handles and things what held candles!  Life eh?

Edited 24 November 2024 to remove some typos I spotted

Tuesday, 5 November 2024

Mixed emotions!

 A number of years ago I added a plea onto the Baccus forums for the esteemed Mr Berry to create a range of early Byzantines so I could replace my venerable Irregular Miniatures army.  At the time the response was that it may happen but not in the immediate future.  However, I wanted a Byzantine army, specifically one for the 5th - 6th centuries, so I decided to proxy other Baccus figures to that very end.    Sassanid regular infantry had a suitably large shield so I started there and though I say so myself they don't look too bad, yet they were not perfect.  In my mind's eye I had an image of the old Hinchcliffe 25mm figures but in glorious 6mm, but needs must and all that.  At 'The other Partisan' last month I bought some of Mr B's Hunnic Noble to serve as, well, Hunnic Nobles, but also to proxy for Boukellariioi for Belisarius or Narses.  This week in a fit of enthusiasm I started to work on a second unit of Skoutatoi.  No sooner had I started then 'bingly bong' goes my mobile phone to alert me to the fact that Baccus 6mm have launched a new range for a new period.  Yes you guessed it the period is 'Late Antiquity' and the range 'Early Byzantines'.

So this is the cause of my mixed emotions the infantry are exactly what I was dreaming of but I already have proxy troops for that role.  I almost wish that they were not what I wanted, but the entire range is perfect!  Damn you Mr Berry, now I think I may be falling prey to some form of compulsive behaviour disorder.  This is caused by knowing that the exact figures I want are out there so my lovingly proxied Sassanids are no longer ticking the right boxes.  I must have proper Byzantines, I need proper Byzantines!!!

Not 'proper Byzantines' but I was happy with them until.....

So in due course I will, of course, weaken and buy said 'proper Byzantines' the only question remaining is what to do with the demobilised Sassanid proxies, other than use them as Sassanid regular infantry (well that would be too easy wouldn't it).

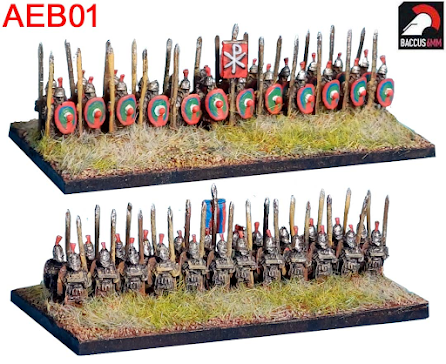
Proper Byzantines!  (image from the Baccus 6mm catalogue)

Other than the above mixed emotions the new range looks really useful.  It will cover Justinian Byzantines and Maurikian Byzantines, it has the Avar influenced half armoured cavalry (drool)) as well as lance and bow armed heavy cavalry.  At a push it would cover Byzantine armies through to the introduction of the kite shield in the late 10th Century.  The castings look excellent, you can see them here Baccus 6mm and the later Byzantines from the early Medieval range are here Baccus 6mm.  I now have a terrible stabbing pain in my wallet!

Wednesday, 18 November 2020

Dal Raitia 799AD - Pictia attacks Comgail (Dal Raitia)

The Pictish Forces are advancing from the North East and near an insignificant settlement called An Cladach they clash with the Dal Raitian royal army.  The Dal Raitian Scots are defending and the invading Picts are being run by the AI rules.  I am again using De Bellis Solitarius which are available as a free download from the Fanaticus and other, websites.  Versions are available for DBA 2.0 and 3.0 and I find that they give an interesting game by virtue of setting constraints on what the AI side is allowed to do while allowing player input within those constraints.  Before the game started I decided on the Scots deployment.  I then rolled up the Picts overall tactical stance for the encounter and then their deployment.  Think of that as the commanders pre-battle briefing from the CinC something like:

"Right settle down and listen up,  here is the plan.  We outnumber them almost two to one so they either have to hit us hard and fast before we have the line properly set up or they will want to defend and use the ground to their advantage.  If they attack their initial charge is a problem but if we stack the spearmen deep we should be able to absorb the impact.    

Moravin, you have the larger command so act aggressively, I'm putting you out on the right flank with Mar.  You have the majority of the mounted lads so if you get a chance to get around their flank, take it. Especially if you see a chance to attack their camp.  Nothing like having your women attacked to take a man's mind off the fighting eh?  

I will be in the centre with the rest of the Army, so that's you three, Strath Erin, Athfotla and Monath.  Your boys will hold the centre and cover our camp.  Nothing too clever required there, I think we can hold back in a defensive posture and see how things develop on the right.  If they attack us then all the more space on the flank for the mounted lads to use.  I'm pretty sure their entire strength is in the field against us but I'm not ignoring the risk of them trying to land behind our flank from boats.  Moravin the beach is on your flank so have a think about about what you might do to cover that eventuality will you. 

Everyone happy?  Excellent well grab what sleep you can and we shall see what the morning brings."

Or as the dice rather more prosaically gave me; place the camp as near the centre line as possible and behind any available bad going.  Command 1 (The King with  8 elements) deploy in the centre with a defensive stance.  Command 2 (11 elements) deploys on the right flank and takes an aggressive stance.  Pike form up two deep if facing warbands.  Fastest troops deploy on the end of the line.  

The Scots have 11 elements to deploy including the King.  There is nothing to loose and a defensive strategy just will not cut it.  The Scots will probably never have more men in the field than they have today, so they have to take the fight to their Pictish cousins.  Accordingly I have decided to go with a littoral landing.  That will be on the Pictish Right which it turns out are under orders to be aggressive and so with any luck it will land behind their flank.

The Scots briefing is an altogether more downbeat affair.

'Alright then sit down and take a drink it may be the last one you get from me.  You all know the Picts outnumber us and have a point to prove having had a beating from the Strathclyders of late.  They have crossed the mountains to get at our heartlands so I doubt they just want to talk.  Tomorrow is going to be bloody, the only question is whose blood will be on the heather?

We don't have the luxury of giving up this ground and there are no reinforcements coming. What we do, win or loose, we do with the men we have, here, at this place.  They will come on fast and that is our one advantage as it will give us the option of turning their flanks.  I will have the main body but  you Comgail,  you will lead a small group to land on the beach behind them.  Hit them in the flank or rear and hit them hard.  Make them rue the day they came to Dal Raitia.  You will be the hammer, we will be the anvil and between us I intend to crush them.  Now go see to your men, tell them of certain victory on the morrow and, remind them that they are fighting for their homes and families.

The Day of Battle

'The day of battle  dawned and looked set fair so the fight commenced almost immediately. Our landing party sprang into action as soon as the Picts were in reach and charged up the beach into the end of their line.  Two units of Pictish light horse turned to meet the threat.  Meanwhile our main line advanced as quickly as they could but it was clear that the landing party would be on their own for a wee while.  We could tell that the attack from the beach had the Picts rattled as their advanced stopped dead on that flank.'  

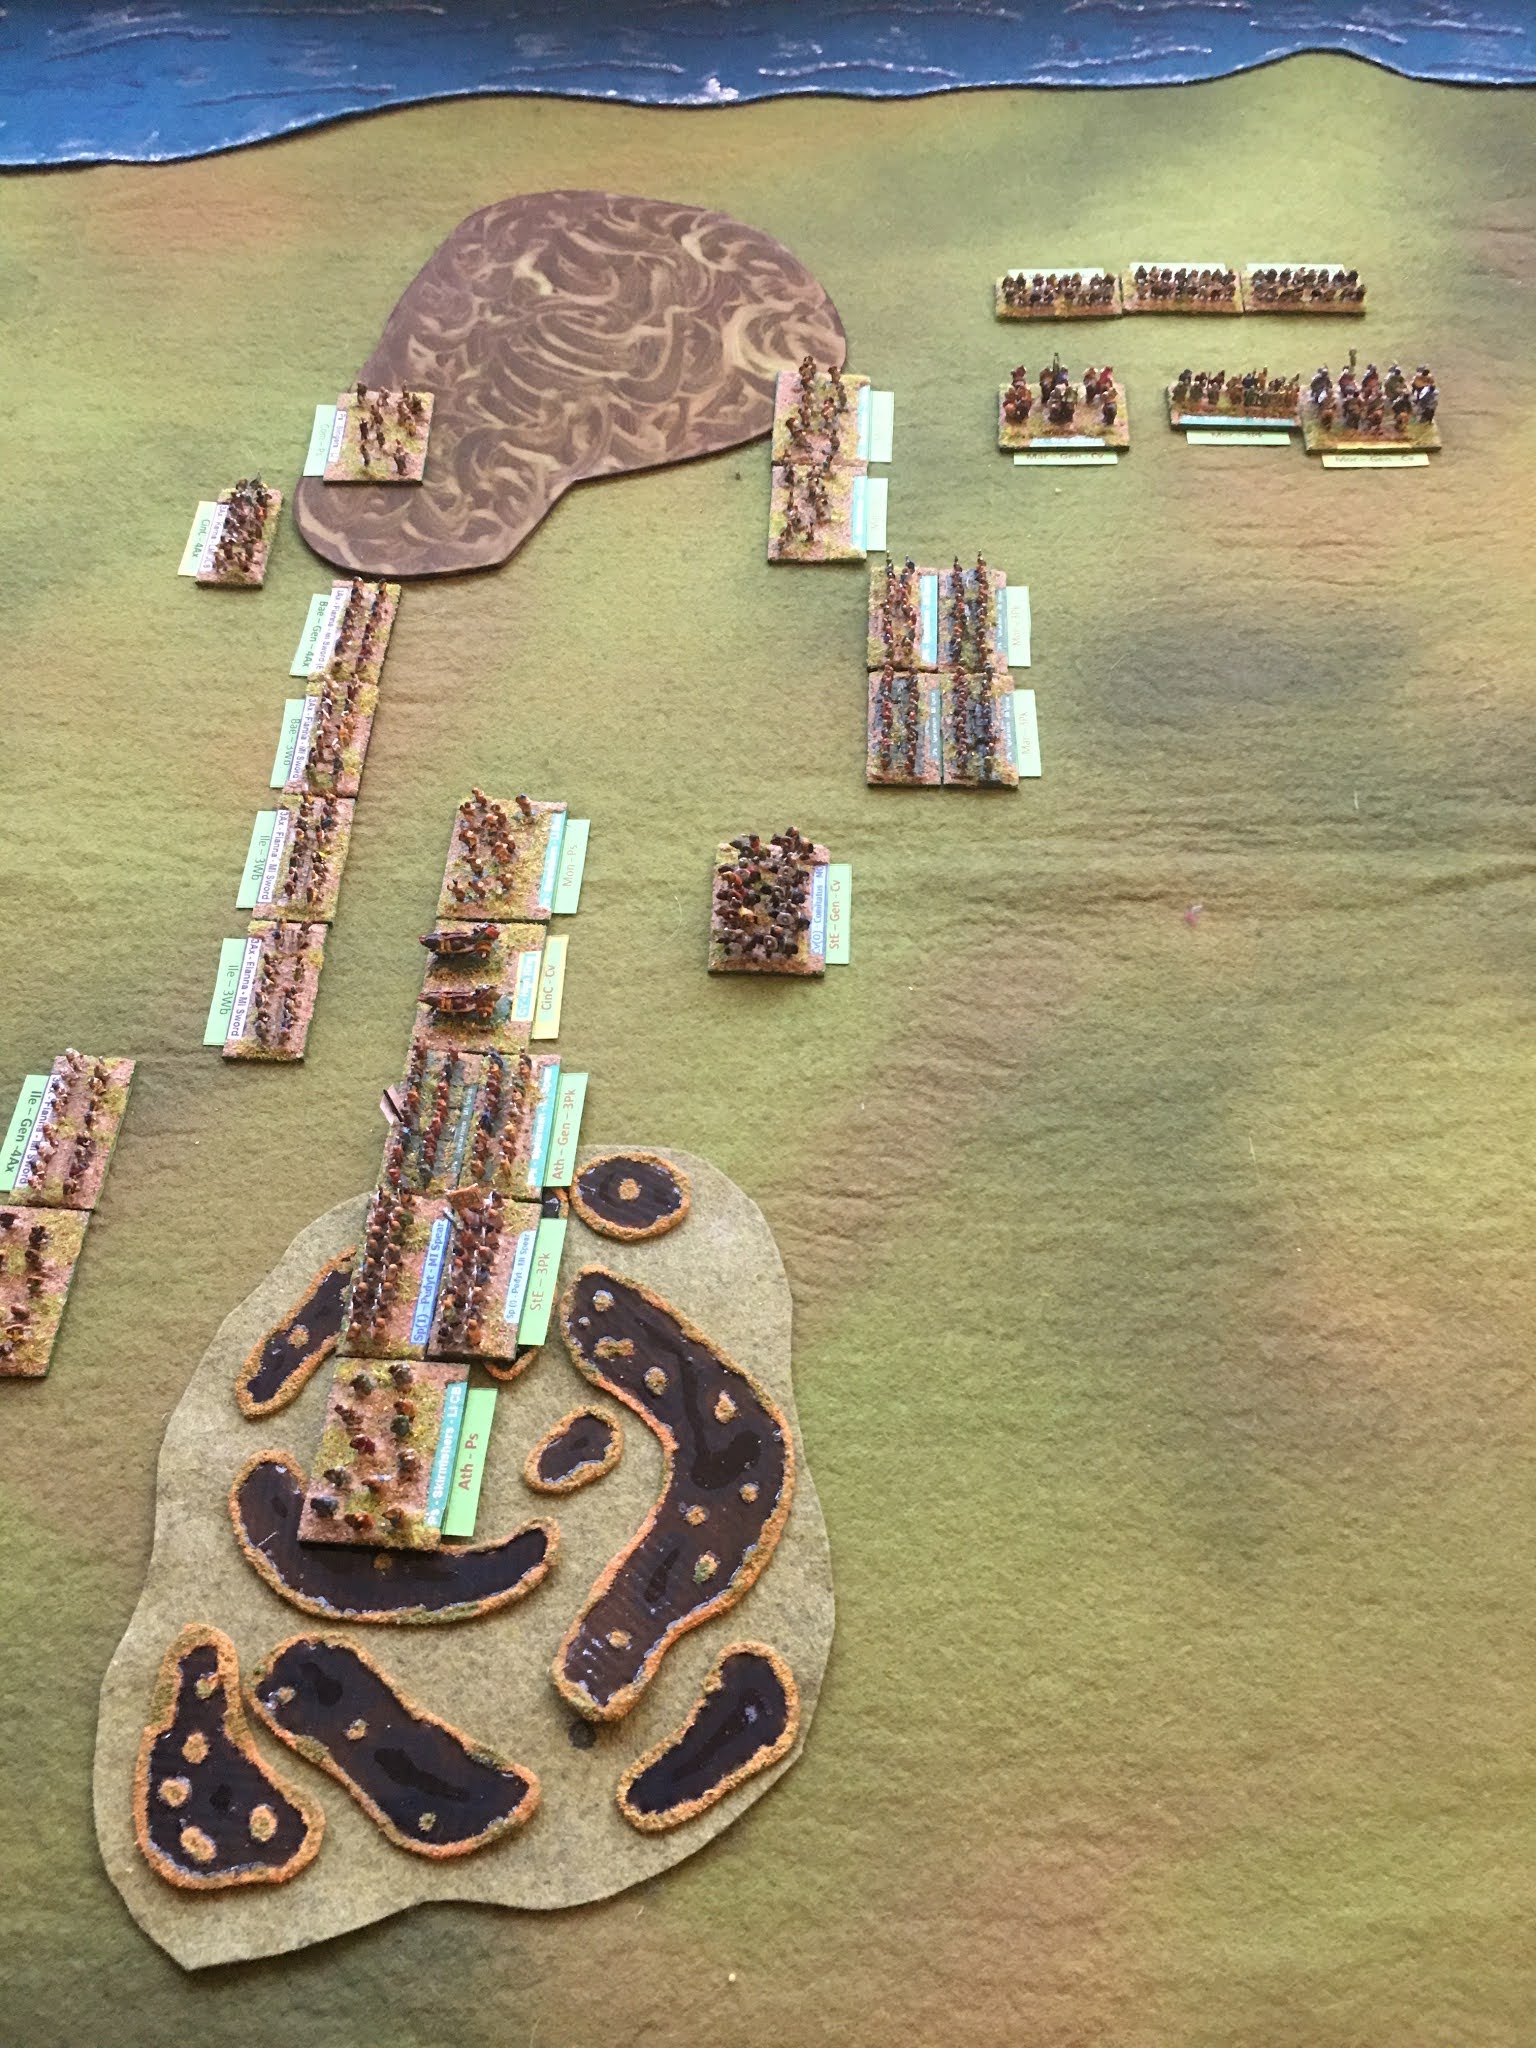
1. The armies deployed -landing party ready to storm up the beach!

A good opening pip score allows the out of command littoral landing to get into contact with the end of the Pictish line.  In their turn both Pictish commands get abysmal pip scores and low aggression scores meaning that the right hand command who are meant to be moving up stall as their flank units have to deal with the Scottish attack. The left hand command does manage to advance to occupy the boggy ground to their front.  This was repeated for the next two turns where the Picts consistently rolled single pips for both commands.

'We couldn't believe that the beach attack had thrown the enemy into such confusion, we could see that the fighting was muckle fierce on that flank and one group of Pictish light horse was soon destroyed.  The rest of that wing seemed incapable of reacting to the attack.  Our main body continued to push forward towards the enemy with our wilder tribesmen leading the advance.'

2. Picts in a pickle - down one LH already

I roll two dice for each Pictish command the large dice is the aggression for this turn the smaller the Pip score.  The aggression roll is adjusted based on the starting aggression and the pip score.  The photo below shows just how bad the Pictish rolls were!

3. On the defensive. Awful dice mean the Picts cannot put attacks together!

As the day rolls on the landing party takes out a second light horse unit it had pinned back against the end of the Pictish line. The poor Pictish command rolls are really hurting them and the right wing is only one unit away from becoming demoralised.

4. It looks better than it really is for the Picts (on the left here)

The terrain is helping the Scots.  The aggressive Pictish right wing has to overcome the flanking attack and get through the woods to to turn the Scot's left.  The other flank, which is wide open, is facing the defensive Pictish wing who are less likely to take advantage.  The boggy ground is doing nothing to slow either side but it is preventing the Pictish spearmen gaining the rear support bonus  Fast Pike would gain in clear terrain.

5. The Scots have a decent defensive line at least

It isn't until turn five that the Picts get a decent pip and aggression roll and with the Scots racing forwards to the attack with their main force it isn't a moment too soon.  They bring more troops up to the fight on the right wing and push forwards in the centre where the two lines come to close combat.  There the fighting leads to a first casualty for the Scots and the usual confusion as the neat lines dissolve.  At this point you would have thought that things are about to improve for the Picts, they are in contact all along the line and should be able to bring the advantage of numbers to bear.  You might have thought that but, the dice gods really have it in for the painted people and in the first combat they loose another unit.  Even worse this is from their right wing command which pushes them over the edge into demoralisation.  There is a single ray of hope now as a second scots unit was destroyed in the combat round, so the Scots are edging closer to their break point. 

6. A turn later and the battle is slipping away from the Picts

The next couple of turns have the Picts attempting to keep their right wing on the table by using pips to force unit's hold their ground.  Because they are demoralised that wing can't do anything but hold or retreat and it takes a pip to have a unit hold in place, they can't initiate combat although they can defend.  Their biggest problem is that if they hold the units closest to the edge of the table in place then those who are pinning the Scot's beach landing in place have to retreat and that opens the way for a camp run.  On the other wing I successfully override the standing orders for a turn and send a Pictish light infantry unit sprinting for the Scot's camp but with my Scot's cap (should that be bonnet?) on I counter that with a Scots light infantry unit in the following turn by bringing close enough to pin the Picts in their threat zone.

7. Although the Picts' left is holding men a streaming to the rear on the right wing

Things are looking bleak for the Picts now as the only command that can act has defensive standing orders so is going to struggle to advance to combat.   Poor dice rolls on the other wing are allowing units to head to the rear there.  Although the Pict's have managed to get into a good position for an attack the defensive stance stops them from capitalising on it and I failed the override dice roll for them.  A poor pip roll for the demoralised command sees four elements leave the table and that is game over.

Although not particularly heavy, the losses will have an impact on both sides the Picts have lost three elements and the Scots two.  At least the King of Picts was able to escape the disaster.

The Pictish chronicles simply recounts 

'The fury of the Scotsmen knew no bounds'

This game taught me a few things about these troops.  Fast pike are capable troops but only if well deployed the +3 rear support bonus would have made a huge difference had I been able to use it.  It was only the poor initial deployment that worked against them and I should have redeployed the line to get them into good going.  The terrain made no difference to movement for the infantry as both sides have fast foot or solid auxilia who are not slowed in bad going.  Still the Picts are not going to let a little thing like two defeats in one turn change their ambition and they will be be back.

Wednesday, 30 September 2020

Mercia 798AD - The battle of Wudiandum continued

At the end of the last post things the West Saxon centre was finally in action, their right was potentially in trouble as the Mercian command facing them was getting it's act together and the left was starting over the river to come to grips with the Mercian right wing.  As far as I can tell (I haven't started to play the rest of the game as I write this introduction) the key to this battle is the fight in front of Wudiandum village.  If this goes against the men of Wessex the flank of their main command will be open.  Although they have a few troops in reserve in a second line in the centre the time needed to get them into a new line to cover this risk may not be granted them.  The fight over on their left is almost a separate battle as even if they should win over there it would be a big ask for those troops to re-enforce the centre because of terrain restrictions.  No pressure then!

Its the start of the third hour of this battle (in game time).  The Mercian shield wall pushes back in the centre but make little headway.  They are slowly and methodically setting up a shield wall on their left and have rushed what troops they can towards the river bank on their right.  It would help if they could roll well just once.  The West Saxon reply is to keep the meat grinder going in the centre and to push more troops across the river on their left.  On their right where they really need to disengage they roll 1 pip!  It's not just the Mercians the dice have it in for.  The only good news for the hard pressed West Saxon right is that the Mercians just can't get a decisive attack in to push the command over the edge, all they achieve is a series of recoil results which helps the West Saxons by opening up some space between the lines. 

1. Fighting on the river bank as the Wessex Left command attempts to cross

The next few turns see the West Saxon left slowly chip away at the Mercian command facing them.   The Mercians are hampered by inconsistent dice rolls, whenever they have the chance to be aggressive the pip dice is against them.  As a result they are forced to give up the defence of the river bank allowing the West Saxons to gain a toe hold.

2.  It's soon more than a toe hold, but the Mercian defenders look to be ready for the onslaught

Once the West Saxons are over both sides face off against each other but the Mercians are soon on the back foot.  How are things over on the other flank?

 
3. On the Mercian left things look better, for the Mercians!

With a couple of good dice rolls in succession the Mercian left wing recovers from it's earlier confusion and continues to advance.  The West Saxons seem to have the same problem the Mercians have on the other flank.  They are slowly pushed back but the Mercians just can't seem to get their act together and fight as well as they manoeuvre.

4. The king glances towards his threatened right flank

The centre is getting messy with recoils on both sides fragmenting the shield wall.  The Mercian's manage another kill here but its anything but decided as yet.

5. The central commands pushing and heaving

The West Saxon right proves remarkably resilient and despite being one element loss away from demoralisation hangs on in the face of repeated Mercian attacks.  All the Mercians can do is create recoils.  This goes on for another four turns until they manage to hard flank an isolated Wessex spear element.  This tips the West Saxon command over the edge.  Now they are demoralised and all the Saxon Sub General can use his pips for is to hold elements in place. Where he doesn't have the pips to hold elements in place they flee towards the rear base edge each turn.  Even then he gets decent pips and manages to fight a reasonable withdrawal action.

6.  See that gap between the two units facing each other?  There were West Saxons there a moment ago!

The fight in the centre continues to be a mess.  The threat zones prevent any serious reorganisation of the front lines and overall the West Saxons are getting the better of things.  This continues until the Mercian centre is one element away from demoralisation with the West Saxons nowhere near that state.  Both sides are throwing their reserves forward but the Mercians are trying to fill holes in the line while the West Saxon's are hunting for overlaps.  The two Kings are both in the thick of things now and in danger of getting isolated.  They tend to have the better of combats because of the plus one for a general in combat and as they are blades they pursue while any spear elements around them don't.

As the Mercian left continues to push the demoralised West Saxon command facing it slowly backwards options for detaching elements to go to the aid of the beleaguered centre start to present themselves.  However on the other wing a disaster is unfolding.

7. The Mercian right: a lone element of spears is in deep trouble attacked frontally and in flank

Over the last few turns the Mercian right has taken steady casualties until it is only one element away from collapse.  The West Saxons exploit the gaps created by defensive tactics and low pips and pounce on an isolated element of spears. Unbelievably the dice off is a draw on the first round and it is in the following Mercian combat round that it is killed.  The command is now the second to become demoralised.  The next two turns are inconclusive the centre has no decisive fights but gaps are opening up and the Mercian left is slowly hooking around onto the exposed flank of the West Saxon's centre. 

8. The Mercians teeing up the flank attack against the centre

It takes a while for the Mercian left to move into position against the open flank of right flank of the West Saxon Centre.  Part of the command is shadowing the fleeing West Saxons (aka not enough pips to bring them over to join the preparations for the attack).  In the centre of his command I imagine that King Beohtric is having a Wellington at Waterloo moment "Give me Bearruc Scir or give me dark" kind of thing. and the day is dragging to a close after close to 4 hours fighting but dark is still a ways off.  However over on the West Saxon left the men of Bearruc Scir and Dorseate have finally broken the Mercian command facing them and a racing through the woodland to the aid of the central command.

The Mercian assault goes in, but trouble is brewing at the other side of the field

Things are now very close the Mercian left made up of the Fyrds of the Wrocensaetan and Hendrica slam into the open flank of King Beohtric's centre In the first moments of the attack aa west saxonlight infantry element is destroyed and the end of the line is forced to recoil.  It is only the fragmented nature of the line that prevents major casualties as there are no units to the rear of the recoiling troops for them to break against.  In the West Saxon turn the dice are kind to their left wing but less so to the centre command where a paltry one is rolled.  I use this to pull the King's element back thinking he may be needed to help bolster up the right flank.  Both central commands are at breaking point one element away from becoming demoralised and ending the game.

The next turn starts with the Mercians continuing the assault on the West Saxon centre but the central command is handed a defensive tactical stance and the best they can do repair their line the left is aggressive but has only one pip and can't make any significant contact with the enemy.  King Beohtric breathes a sigh of relief.  There is one final roll of the dice now for the West Saxons, literally so in fact!  Another high roll for the left allows the men of Bearruc Scir to crash into the Mercian centre.  They lose an element but the second attack kills a Mercian spear and then to add insult to injury the central command kills the Heathtroop of Ealderman Aethelmund of the Hwicce.  Dicing for the command casualty shows that the Ealderman died with his men.  This ends the West Saxon turn and the game.  It was a close run thing the Mercians could have, should have won it the turn before if the dice had been kinder.  The final casualty count was 10-11 in favour of the West Saxons.  A pyrrhic victory that badly weakens both kingdoms for the rest of the campaign turn. 

The end of the affair but both sides have suffered heavy casualties
 

This was the biggest game I have yet fought using DBA and I found that the BBDBA rules have a few wrinkles which need to be ironed out.  The demoralisation rule is one of them.  I like the concept, in fact I like it a lot, but is assumes that the commands will always be 12 elements, or more accurately, that they will be exactly divisible by three.  At least I assume that to be the case as the rule is that a command becomes demoralised once a third of it's units have been lost.  The rules have no mechanism for coping with commands not divisible by three, nothing to say round up or down for example.

So I have introduced a house rule.  Divide the number of elements by three and if it is not a whole number round down to reach the trigger loss number.  However the demoralisation trigger point is 'once that number is exceeded' not once it is reached.  So a command of 14 elements divided by three gives a demoralisation trigger of 4.66.  Round that down to a value of 4.  So that has to be exceeded so hitting a loss of 4 elements equals it but doesn't exceed.  Hitting 5 does exceed the trigger point (and for completeness sake also exceeds 4.66) so that's sorted then.  I also think that the standard DBA rule of Hordes not counting as a loss and perhaps extending that to light infantry as well.

I also decided after the battle that demoralised troops should take a minus one to combat dice if they ever end up having to fight in close combat.  I don't think I will extend that the troops who can shoot though, although that won't be a problem in this campaign as there are no archers or artillery to worry about.

The other issues is that the maximum size an army is set as three times the size of a standard DBA army.  For BBDBA historical refights the rule is use the actual number of troops converted to elements.  This means some really large commands can be created.  In the current game the two opposing central commands are both 19 elements in size.  I ignored my previous rule of capping command sizes but I think this was a mistake and will reintroduce it in any future large scale actions.

All that said I do rather like the BBDBA version of DBA3.0  it feels more like a historical battle, not that I have ever been in one to know for sure!

Oh and I almost forgot: the mandatory chronicle entry.

798AD Mercian chronicle

And in this year did Beohtric of Wessex basely break from his allegiance with his sworn lord Coenwulf and come in arms to Mercia.  There he did ravage the land of the Hwicce until at length he was met by the King and all his host in battle.  There was slain Ealderman Aethelmund of the Hwicce and a multitude of others with him as well and the West Saxons had possession of the field.


Thursday, 24 September 2020

Dark Ages Campaign - 798AD Battle of Wudiandum

So to battle.  As previously posted I have the men of Wessex with the Mercians being run by the solo play rules.  I have decided that each command will have its own pip dice to reflect the poor command and control of the period so co-ordination between commands will be more difficult.  I’m also going to move the centre commands first for each side as they are the ones commanded by the two respective kings.


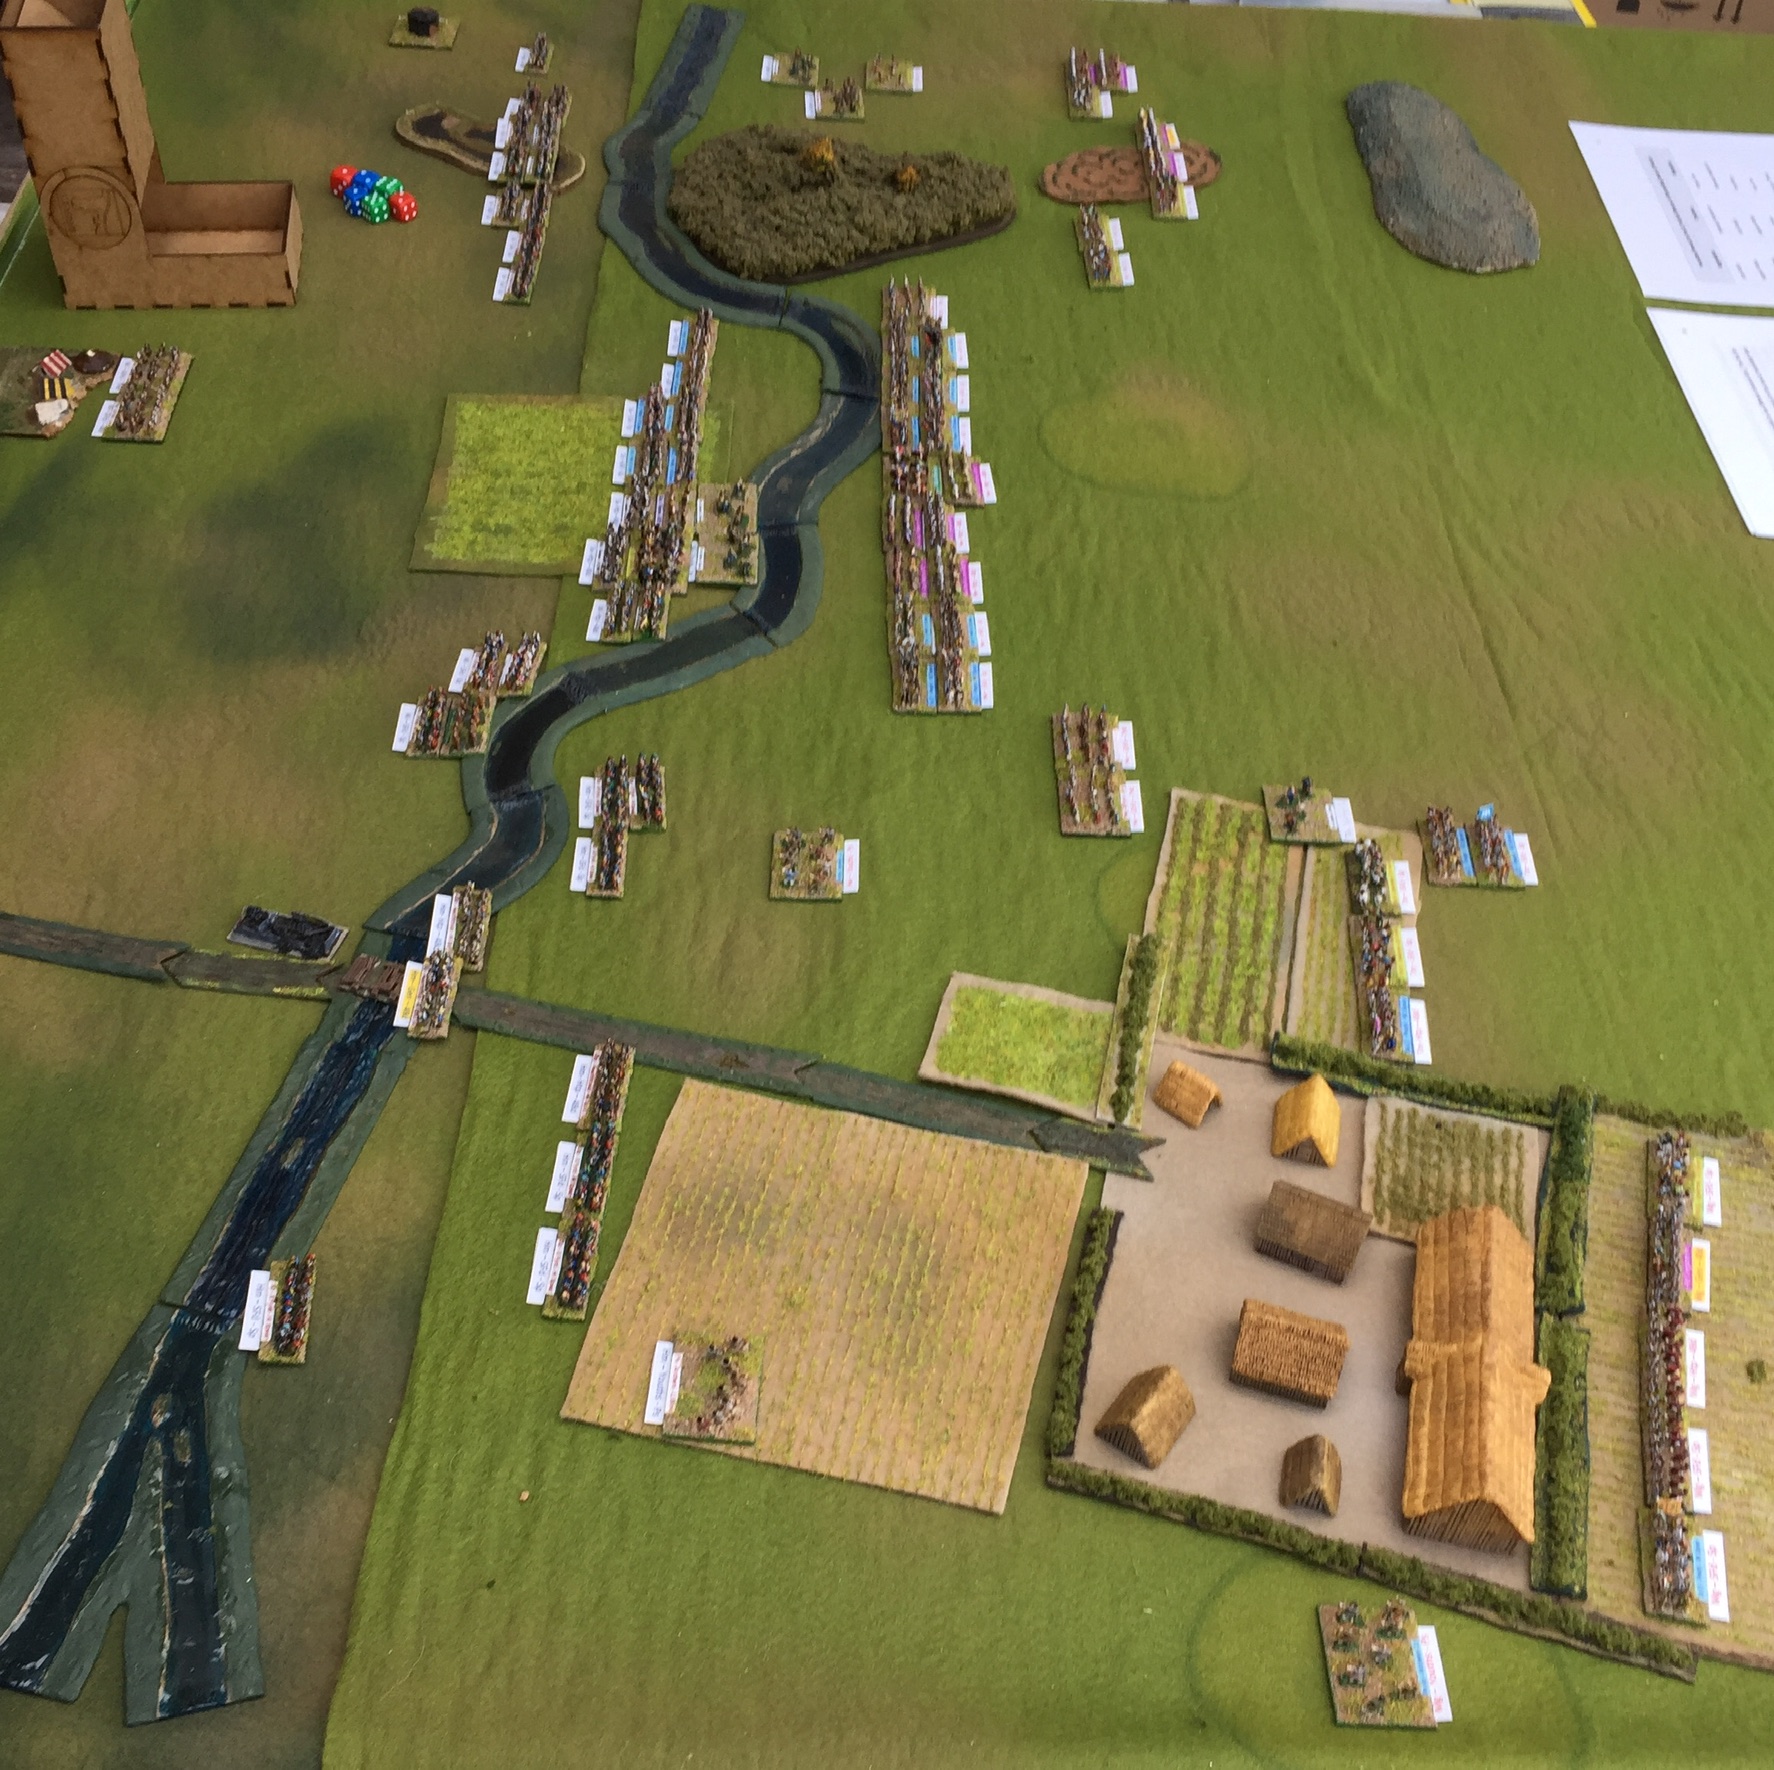
1. The initial deployments, Mercians furthest away

Both sides deployed with a strong centre and weaker flank commands.  The AI placed its troops to the front and centre of the deployment box, but it wasn't possible to fit them all in so I over ruled it and mirrored the West Saxons while staying as far forwards as possible.  It looks  neat, but trust me that's not going to last.  The Mercian pre-battle dice rolls gave their right command a defensive stance and the other two commands received neutral stances.  This impacts on the tactical choices of each command by pulling the dice result towards that overall stance each game turn.  It is still possible for a defensive command to take aggressive action but it is less likely.  The Mercians will move first each turn which may or not be of benefit.

The first couple of turns see both sides pushing forwards.  The west Saxons are the first to have their formation come apart as the rush to get across the river before it turns into a contested crossing.  The river turns out to difficult to cross.  This means that only single elements or columns of elements can cross for each pip expended, movement is slowed and defenders gain an advantage against troops crossing.

2. West Saxon start crossing the Coln

The first to start crossing are the troops on the right of Wessex's line.  The light infantry are not slowed but the shield wall's tight formation breaks up and the close order infantry are slowed.  In the centre the line is moving up towards the river in a race to get there before the Mercian's can line the far bank and contest the crossing.  Middle Anglo-Saxon's may not be the most tactically clever armies but even they know a disputed river crossing is not a good thing!

3.  The crossing continues on the West Saxon right.

The crossing on the West Saxon right is unopposed as the Mercian command facing them is in disarray!  They rolled aggressive but couldn't easily follow the instruction and became tangled up in the approaches to the village.  Their line fragmented into a number of small groups.  In the centre the Mercians are also rushing forward towards the river having rolled an aggressive stance and decent pips.  On the far side of the table West Saxon light troops are over the river and fronting up to their Mercian opposite numbers. On that flank the Mercian command is slowed while they are traversing woodland.  


4. The view from the Mercian right wing.

By the next turn the Mercians have reached the river with their central command but are unsure about what to do (a low pip score limited their options).  Light Infantry are exchanging arrows and insults on the right and the Mercian left is in a real mess.  The nice neat line has broken up around the village and with instructions to take aggressive action they are throwing small groups of men forward to attempt to come to spear thrust and sword stroke with the enemy before they can reorganise their shield wall after the river crossing.  As a result they close as fast as possible but as the line attempts to move around the left of the village the formation ends in total confusion.  This is one of the points with the solo rules, orders from the AI can result in odd decisions and if the dice swing back and forth between aggression and defence it can result in this kind of chaos.  Players have the right to ignore results three times under the rules but I'm not using these yet in case I need them later.  Probably a mistake to be honest, after all how much worse could a situation get than this?


5. A closer view of the Mercian left wing, it's chaos over there

Its one of the interesting things about solo games the AI mechanics create situations and as a player I like to create a narrative to make sense of it, it also gives me a story for the AAR here on the blog.  

In the next turn the Mercian centre is following a second aggressive stance but on limited pips the entire command simply surges forwards and starts to cross the river, only for them to get a defensive stance and limited pips the next turn.  So they retreat to form a defensive line on the river bank.  I rationalise this as a rush of blood and a desire to come to grips with the invaders followed by the nasty shock when the water is cold and realising that there's a solid looking shield wall over on the other bank, so maybe we should stay this side and defend the river bank instead!  Something similar happens on the Mercian left a defensive stance roll and maximum pips allows form defensive line to be an option and the fragmented line starts to reform.  Possibly older more experienced heads have prevailed over there.

There has also been the first few clashes light infantry facing off over on the Mercian right saw a psiloi doubled by their West Saxon opponents and killed with the same thing happening on the other wing but with a West Saxon psiloi destroyed to even the score at one element lost each.  Else where West Saxon Light Infantry are recoiling and fleeing from the Mercian shield walls.

The two armies have been facing each other for over an hour in game time now with no significant fighting yet.  As you can see below the Mercian left wing is regaining some kind of cohesion and their West Saxon opponents are over the river but disorganised.

6. The Mercian left starts to reorganise while their opponents are still struggling to reform their line

This would be a good turn to get good aggression scores and high pips.  Which is probably a good point to show how I'm handling the AI dice.  I roll red for the left (port in nautical terms), green for the right (so that would be starboard) and blue is the central command.  The relevance of the nautical terms is that boats and planes show red lights to port and green to starboard so the colour s help me remember which dice goes to which command.  The larger dice give me the aggression (before adjustments) and the small ones the pips.  These need to be thrown together as the pip score adjusts the aggression score low pip reduces aggression high pips increase it.

8. The Mercian dice, red for port, green for starboard,  blue you can guess.

So having said this would be a good time to roll lots of sixes what we get is the above!  Its about typical for the Mercian dice so far.  The left and centre are feeling like attacking but don't have many options other than go straight in while the right has decent pips but is feeling a touch nervous.  Hey ho (or what ever the Mercian equivalent is) you do what you can with what the dice provide.  Its enough to start a moving into the village on the left and consolidating in the centre.


9. The Mercian left more organised but still tangled up in the village

Now the West Saxons take the bull by the horns and with a decent pip score their central command storms over the river and slams into the Mercian shield wall.  The Mercians are pushed back with recoils but only one casualty.  The flank commands continue to slowly advance and the first troops from the left hand command cross over the Coln to the Mercian held bank.  This is getting to look like a fight now.

10. Wudiandum still in Mercian hands

The Mercians still hold the village, mainly because the West Saxons have been slow to move against it, but there is a fight coming.  The fighting in the centre is hanging in the balance both Kings have been fighting alongside their household warriors.  So far with no risk to either of them.  The shield walls a pushing and shoving but there have been few casualties as yet.

11. The aftermath of the attack in the centre both Kings in the thick of it.

Which is where I am leaving it for this post.  I will finish the game and post the last part of the AAR in a day or two.