Showing posts with label DIY. Show all posts

Friday, 8 July 2022

Fun with cardboard - a low tech storage boost for 2mm figures

As you will have gathered I'm a fan of the Really Useful Box as a storage solution. My go to boxes are the four and nine litre capacity ones as they take two or four hobby trays respectively. The hobby trays each have fifteen spaces measuring just over 60mm by 60 mm and 30mm deep. For two millimetre figures it's that last dimension which is problematic. Well not really problematic, more overly generous. I simply don't use the entire depth of the tray to maximum benefit. For the 2mm Altar of Freedom project two nine litre boxes don't quite give me enough storage space and a lot of the space available is wasted. This vexed me as I needed more storage while at the same time I had unusable storage capacity staring me in the face!  The question was what to do about it.  As always I turned to a do it yourself solution.  I considered a few options, I dismissed cutting trays down to allow extra trays per box as too costly and probably impossible to do neatly and turned to my old stand by ...cardboard.

The thing about my homemade 2mm figures is that even with a 2mm MDF base and standards mounted on top of the matchsticks the average height of an infantry base is well under 1cm, nearer to 6mm in fact.  So there is space to double up in each compartment in a tray.  What I didn't want to do was damage the flags of the lower layer by standing a second base directly on them so I came up with a cunning plan.

The aforementioned cunning plan in the flesh

A quick bit of basic mathematics told me how many more compartments I would need to free up.  This was assuming that I could only stack infantry, artillery and cavalry bases two deep (Generals and HQ's have oversized flag poles and won't stack).  Then it was out with the scissors and Stanley knife and straight edge.  Trebian at Wargaming for Grown Ups will be proud of me I'm doing proper grown up craft stuff with sharp tools and still have all my own fingers!  The idea was to create a 60 x 60mm surface supported all round on 15mm 'legs'  (these would sit around the MDF bases of the first layer of troops)  a small hole in the centre of the 60 x 60 surface allows the mezzanine floor I'd created to be easily removed to get at the lower tier of troops.  The first one was carefully measured and test fitted before being used as a template for the rest (that's high tech talk for 'you draw around it and then cut more of the same shape out').  Four score lines later and a bit of gentle bending and hey presto.

The master copy for use as a template


The final rough shape

These work exactly as wanted and have given me a low tech, low cost storage extension solution, which pleases me immensely, especially the low cost part.  

The final item in use ...Simples!

In other news I am still testing positive for the 'Rona but the viral load must be dropping off as the line is much thinner on today's test.  Hopefully I will be clear tomorrow and can rejoin polite society (if they will have me).

Saturday, 18 June 2022

How - to make a light box for photographing miniatures

I have a been interested in photography for most of my life, ever since my Grandfather gave me an old box brownie when I was a child (no they had not just been invented, thank you very much!).  I worked my way up to shooting slides with an SLR camera before digital became a thing.  Mostly I use my phone now a days which is simply for convenience.  I do have an old Fujifilm digital SLR that does everything I need but I only use it for special events, or when I want to look like I know what I'm doing!  All the pictures to date on this blog have been taken on various mobile phone cameras.  Because I have an interest in photography and toy soldiers both, I tend to read about anything to do with taking shots of miniature subjects.   That's when I became aware of the idea of a light box.

A light box is exactly what it sounds like, a box that lets light in.  More accurately it controls the way light falls on the model by diffusing the light to give a more even light across the subject.  Studios do that with big lamps, reflectors and similar expensive kit.  We don't need that, all we need is a cardboard box, greaseproof paper and some sticky tape.  If you want to go high tech you can buy cheap(ish) LED daylight strips as a source of illumination.

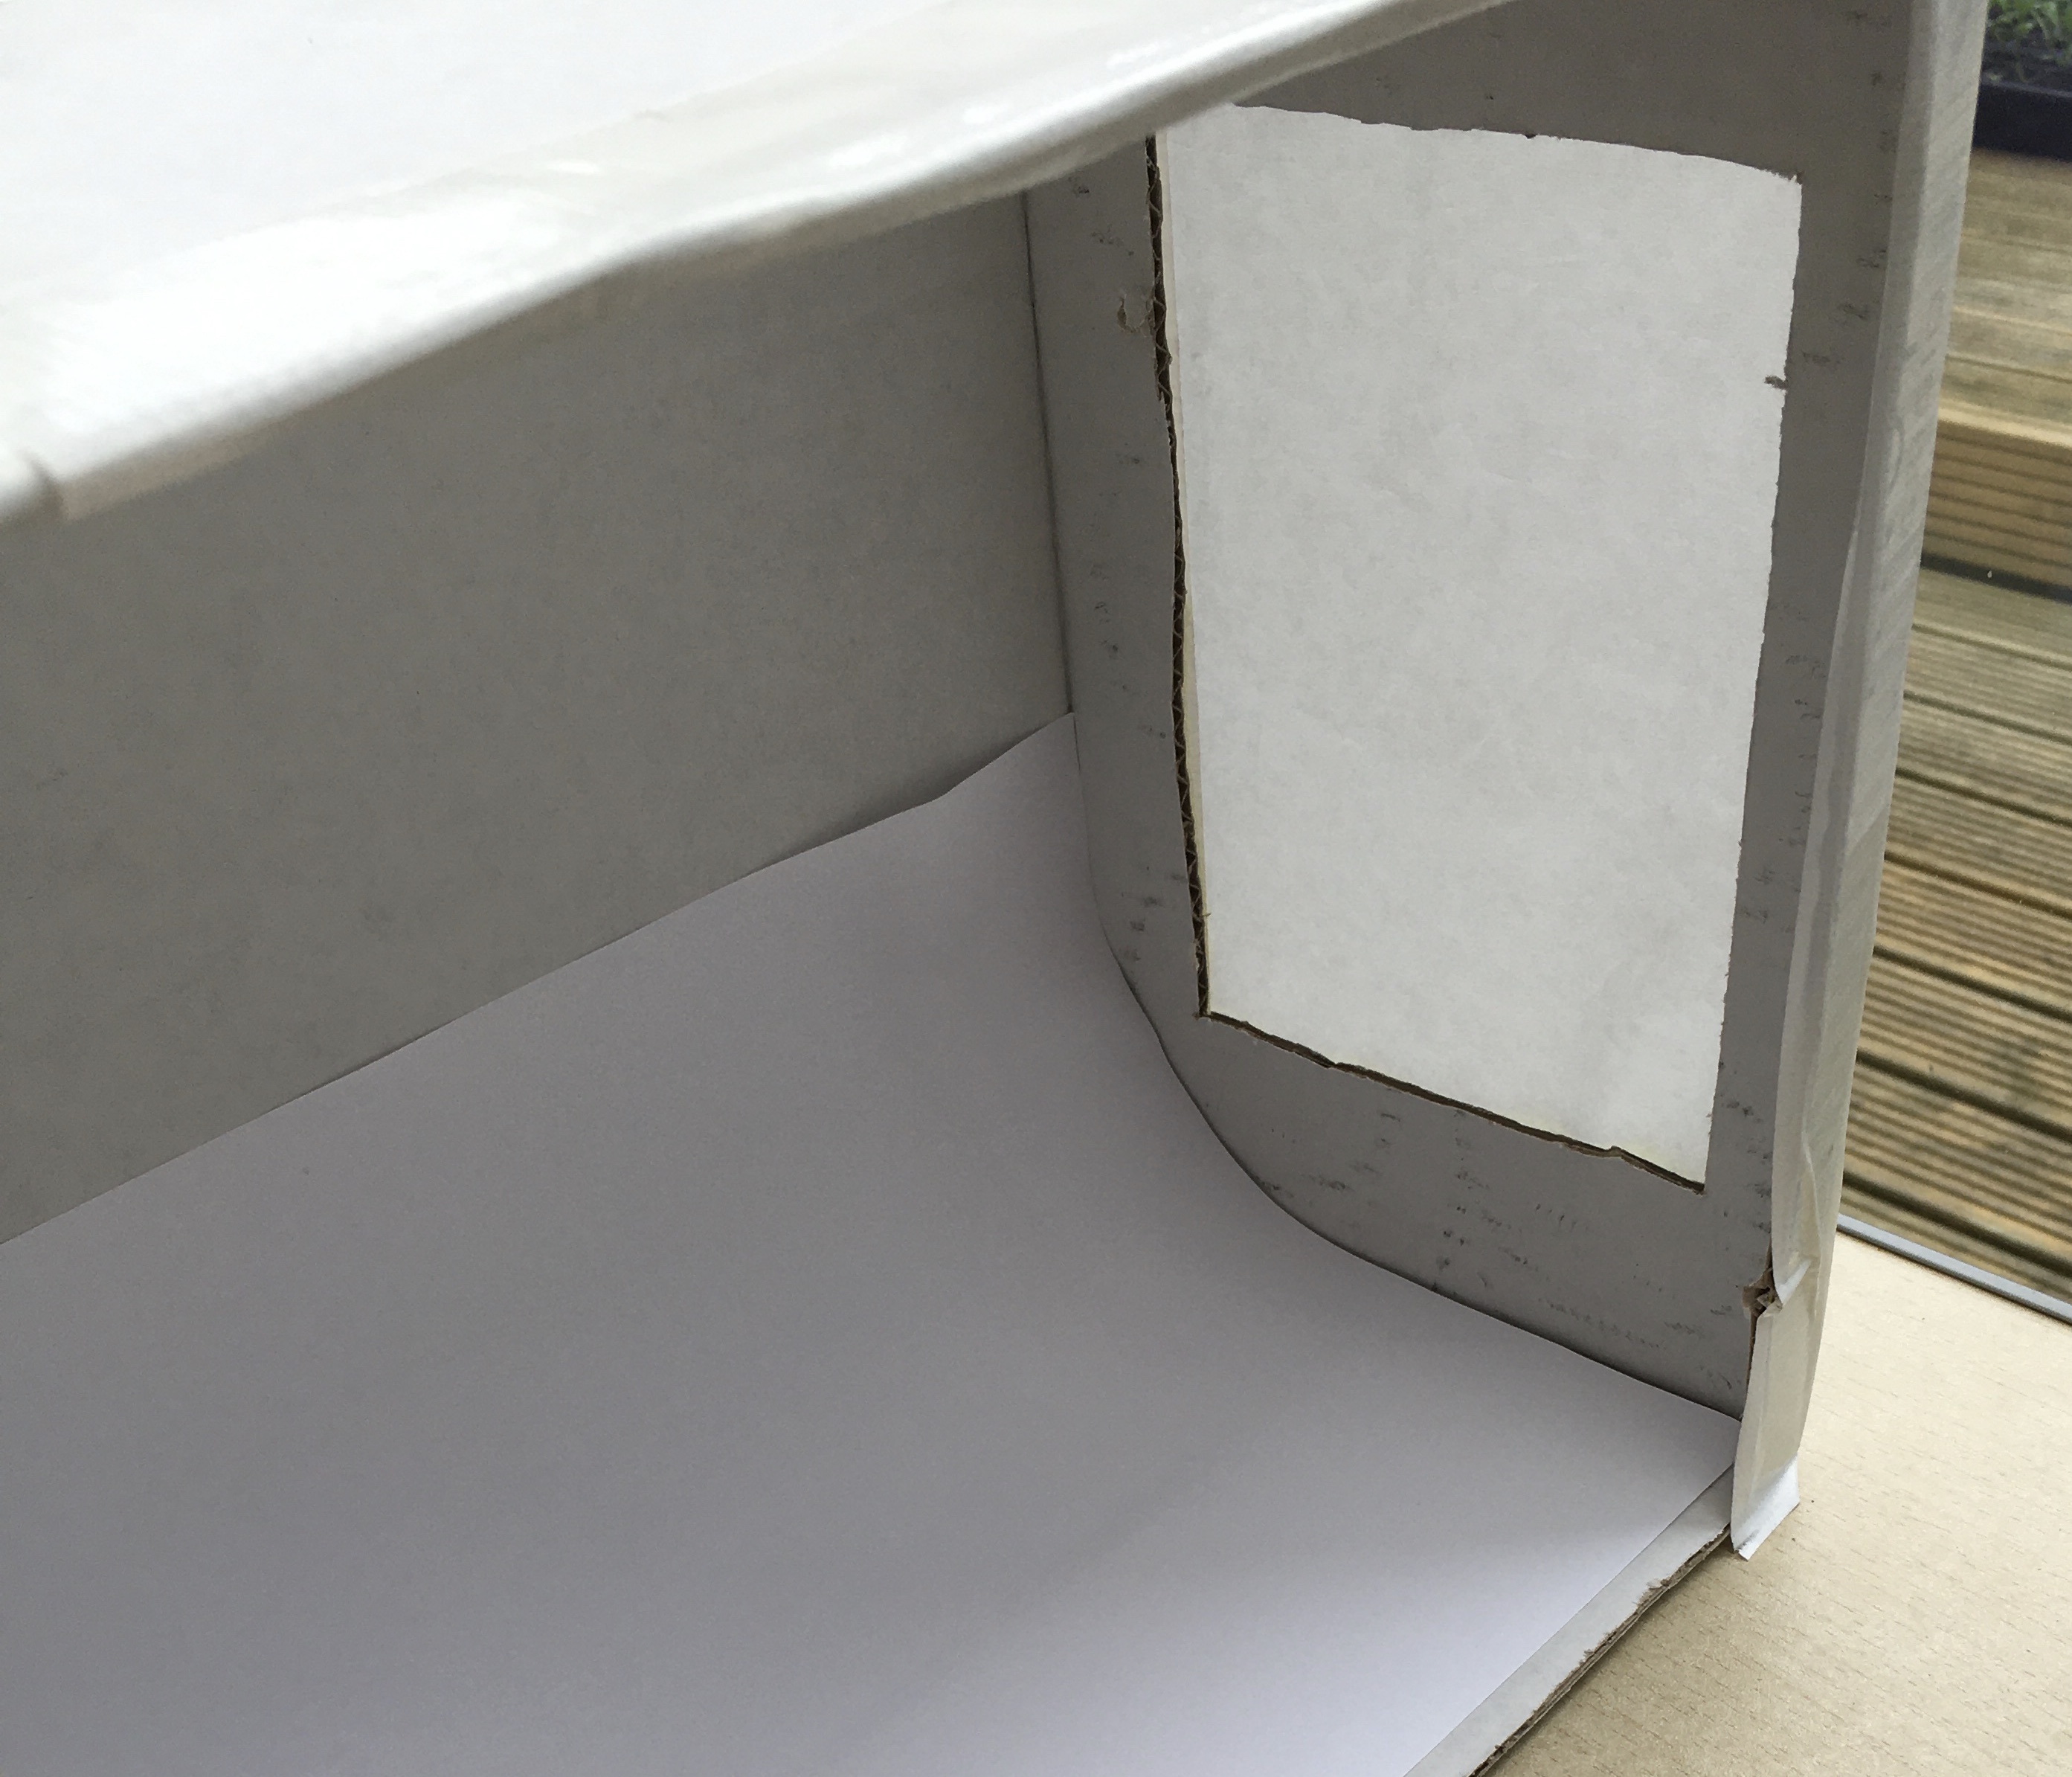
I used a cardboard box I found at the supermarket that was roughly the size of a box of printer paper.  To start cut the front off the box (assuming it hasn’t already been done.  You will want to get a good clean cut flush to what will be the base so it doesn’t interfere with photographing the model sat inside.  Next cut windows in the sides and top but not the back, so that’s three in total.  Mine are roughly 7 inches by 4 inches which is around 80% of the area of the sides of my box.  Cover these with grease proof paper and secure with the sticky tape.  Last but not least use a sheet of printer or artists paper to create a monochrome back drop.  This should line the base and back of the box but not be pushed into the right angle between those two walls of the box.  You want a nice curve between the two surfaces so that light reflects evenly.  I currently use a sheet of white printer paper which is why I wanted a box about the size that printer paper comes in.  I have also seen black paper used which works really well.

The 'windows' are to the sides and top.

The front has two edges left as supports

The paper diffuses the light as you can see here.  The curve in the backdrop is also visible

The result is not exactly pretty (see above) but it does what it needs to do.

The monochrome background removes anything the camera might auto focus on so that it should latch onto the model as the thing to focus upon.  The box will give you even illumination with no harsh shadows the rest is down to you.

6mm figures taken from a distance by camera phone

Taken closer in with the same phone

To take your photos place a decent light source over the box.  I use my daylight painting lamp.  If you buy a set of LED daylight lamps place one shining into each window so the are all roughly the same distance from the model.  With a 'proper' camera try using a long lens from a distance so that the entire model is in the field of focus.  With a camera phone you might have to play around to get everything into focus.  Then crop the resulting photograph to get a good tight image with your model in pride of place.  You will find the right distance and light level with practice.  As you can see from the two shots above I'm still playing with distances to get the look I want.


Thursday, 16 July 2020

Altar of Freedom in 2mm - The cavalry

Creating infantry units is fairly easy, after all they are pretty much a simple rectangular block of men.  Cavalry are more difficult as they are not regular shapes.  I have tried to create cavalry units in the past using bits and bobs I had to hand,  they never really convince me.  Its the look of the frontage that spoils the attempt I think.  Cavalry form up with slight gaps between each individual horse and I am not going to sculpt dozens of individual 2mm horses, that way madness, or more accurately further madness, lies.  On the other hand creating the files rather than the ranks causes issues with the look of the flanks as there are also gaps between the ranks.

The side profile I can live with
The current solution is to use two matchsticks glued together along the long edges as the body of the horses in the unit.  This creates the start of a single rank of horsemen.   Glued between those is a slightly taller  bit of card with  a printed rank of riders glued to  it.  The heads of the horses are then created by gluing a long strip of card along the front edge of the resulting block.  This is the bit that spoils the look of the thing for me.  It doesn't look like a row of individual horse heads.  That said I really don't want to have to cut and glue lots of individual heads on, even assuming that I could cut them out in the first place!

Its that one big horse head that I don't like!
Ideas are to try some kind of pinking shears to create a zig-zag edge, but I have concerns that the angles will not be right and the distances from point to point (I'm sure there is a really bad horsey pun to be had there) will be too large.

I don't need huge numbers of cavalry and I could always buy some but having started so well with Infantry I'd like to find a solution to making the cavalry.  I'm open to ideas here.

Friday, 13 March 2020

Making transfers (Decals) for 6mm Late Roman shields

I have tried freehand painting shields for 6mm figures in the past but  I decided that I didn't like the results.  What I needed was a different approach that would look OK at tabletop distances or if possible closer.  The obvious solution was to use a water slide transfer but I couldn't find any in 6mm scale.

I have been down this road before when I needed some World War One lozenge camouflage for my 1/300th German aircraft.  No one seemed to make it  for that scale so I made my own.  I found a site that had details of the actual  colours used and examples of the patterned fabric and I was able to import an image into paint, brighten the colours slightly and resize it.  I was really surprised and pleased with how it looked.  So when I needed Late Imperial Roman shield patterns, transfers seemed like a workable option.

A work in progress but look at the detail on the lozenge pattern.
To be honest creating transfers is not difficult. The key things to keep in mind are:
  • Transfer paper comes with either a transparent or a white backing.  For most modelling uses white backing is best.
  • Do a test print of the transfers onto ordinary printer paper to test the size and colours are as expected.  Transfer paper is about £1 a sheet ordinary printer paper is about a tenth of that cost, so make your mistakes on the cheap paper!
  • Home printed transfers are not on individual pieces of transfer film.  Instead the entire A4 sheet is one big piece of transfer film.  You will need a good sharp pair of nail scissors or similar (small pointed blades) as you are going to need to cut the printed transfer to the shape you want.  One benefit of the clear transfer paper is that you don't have to be too accurate with this stage, the down side is that a home printer doesn't print in white so any areas that will be white have to painted in before laying down the transfer.
  • As printed the transfer isn't water fast until it is sprayed with a varnish.  Two or three light coats of acrylic varnish is best.  Make sure it is really dry before using them.
  • Placing the transfers is not any easier that it used to be on those Airfix kits of yesteryear!  In fact it is even more difficult as (in my case) the eyes are not as good as they were back then and the models are a lot smaller.  A couple of fine probes helps get the transfers where you want them.  I use an old paint brush handle with a pin glued and lashed to the end and some probes (like dental probes) I got from Maplins to help place them.
  • Even using the standard MS paint software that comes with a windows PC some quite detailed designs can be created if you design at a much larger size that the final product.  Resizing to the required size and re touching the shrunk version can give remarkably good results.  The resizing doesn't create a perfect copy of the larger item hence the need to edit after shrinking the image, but it does capture 90% of the layout and colours.  This might be easier on a more advanced graphic program such as Paintshop Pro.
  • Using a specialist product like Decalfix softens the transfer and helps it mold around the model which is useful in dealing with shield bosses. I also hand paint more varnish over the applied transfer when it has dried to ensure good adhesion and to protect the transfer.
  • Last but not least experiment with the best way to apply the transfers before going for the final attempt on what will be the finished models.  For very small items I tend to slide it off onto my fingertip to ensure it stays flat then carefully work a probe under the transfer to lift it,  
Insignia of the Magister Peditum praesentalis
Example page from the Notitia
Details of the patterns are easy to find on line from the Notitia Dignitatum.  There are no original copies in existence and what we now have available are medieval copies so we cannot be certain of the accuracy of the designs or colours.  In fact there are some discrepancies between the surviving examples.  Another point to be aware of is that the shields are depicted as round but all other evidence shows them to have been oval.  The use of circles was probably to make copying easier.   The WRG book Armies and Enemies of Imperial Rome illustrates all of the shields for the western empire but only as black and white outlines.  Life is a lot easier now we have internet images in colour to work from.

Because I was working with 6mm figures I could simply hint at the finest details of the patterns as they really don't show up that well.  A small dot of colour in the centre of shield boss will probably be a single pixel on the final transfer, so either exaggerate it it or leave it off.

Armegerii Propugnatores Iuniores - those shields are around 5 x 3.5mm

The results I have got are more than good enough for me and are far better than I could have achieved by hand painting the designs.

The entire unit


Monday, 4 November 2019

More little things

Just a short post today.  On Friday Mrs E spotted a desk in the local Red Cross charity shop.  Its an office computer desk which although basic is like new.  Saturday was spent moving some of the existing bookcases around in my home office to  make space for it.  It assembled without any issues and gives me probably double the desk area I had before, all for £20!  Well done Mrs E.


I know desks are not all that exciting ...but
As a bonus at the same time as spotting the desk she also bought two pristine Ikea Billy bookcases at a bargain price.  Ikea price is £55 plus I would either have to rent a van to collect them or pay £35 delivery.  These are £35 each and £10 delivery!  In effect I am getting an extra bookcase for less than purchase and delivery of one from IKEA, oh and they are already assembled too. Those are being delivered next week.  That is a bit of a result as I had two of the same bookcases and one collapsed recently when we tried to store LPs on it.  These are even the same colour as the one I have left.  So that will give me a 33% increase to my book space.  As a bonus our local Red Cross charity shop makes a wedge of cash for use in exceptionally good causes.

At the moment the office is totally topsy-turvy but once the new book cases arrive I will be able to move the existing bookcases around so everything fits into the room and get things back onto shelves where they belong.  For now I have space to work and paint soldiers so all is well with the world.

As you can probably tell little things do please me, especially when there is a significant saving in cost to be had.

Thursday, 22 August 2019

Fields of Fire

Well it's actually flock in this case not fire. A chance conversation with Phil Steele from the Northamptonshire Battlefields Society brought me back to a project which has been on hold for a while.  That project being the making of some Ridge and Furrow fields for the Medieval to 17th Century period.  Phil needs some for the 1469 Edgecote Battlefield model the Society is currently displaying at events.  I had what I thought might be just the thing, courtesy of Hobbycraft.  Its a brown corrugated rubber/plastic sheet, A4 size.  The ridges are about 3 to the centimetre and stand a couple of millimeters high so ready made ridge and furrow for smaller scales.

Sorry about the sideways image.  This is the Hobbycraft sheet.

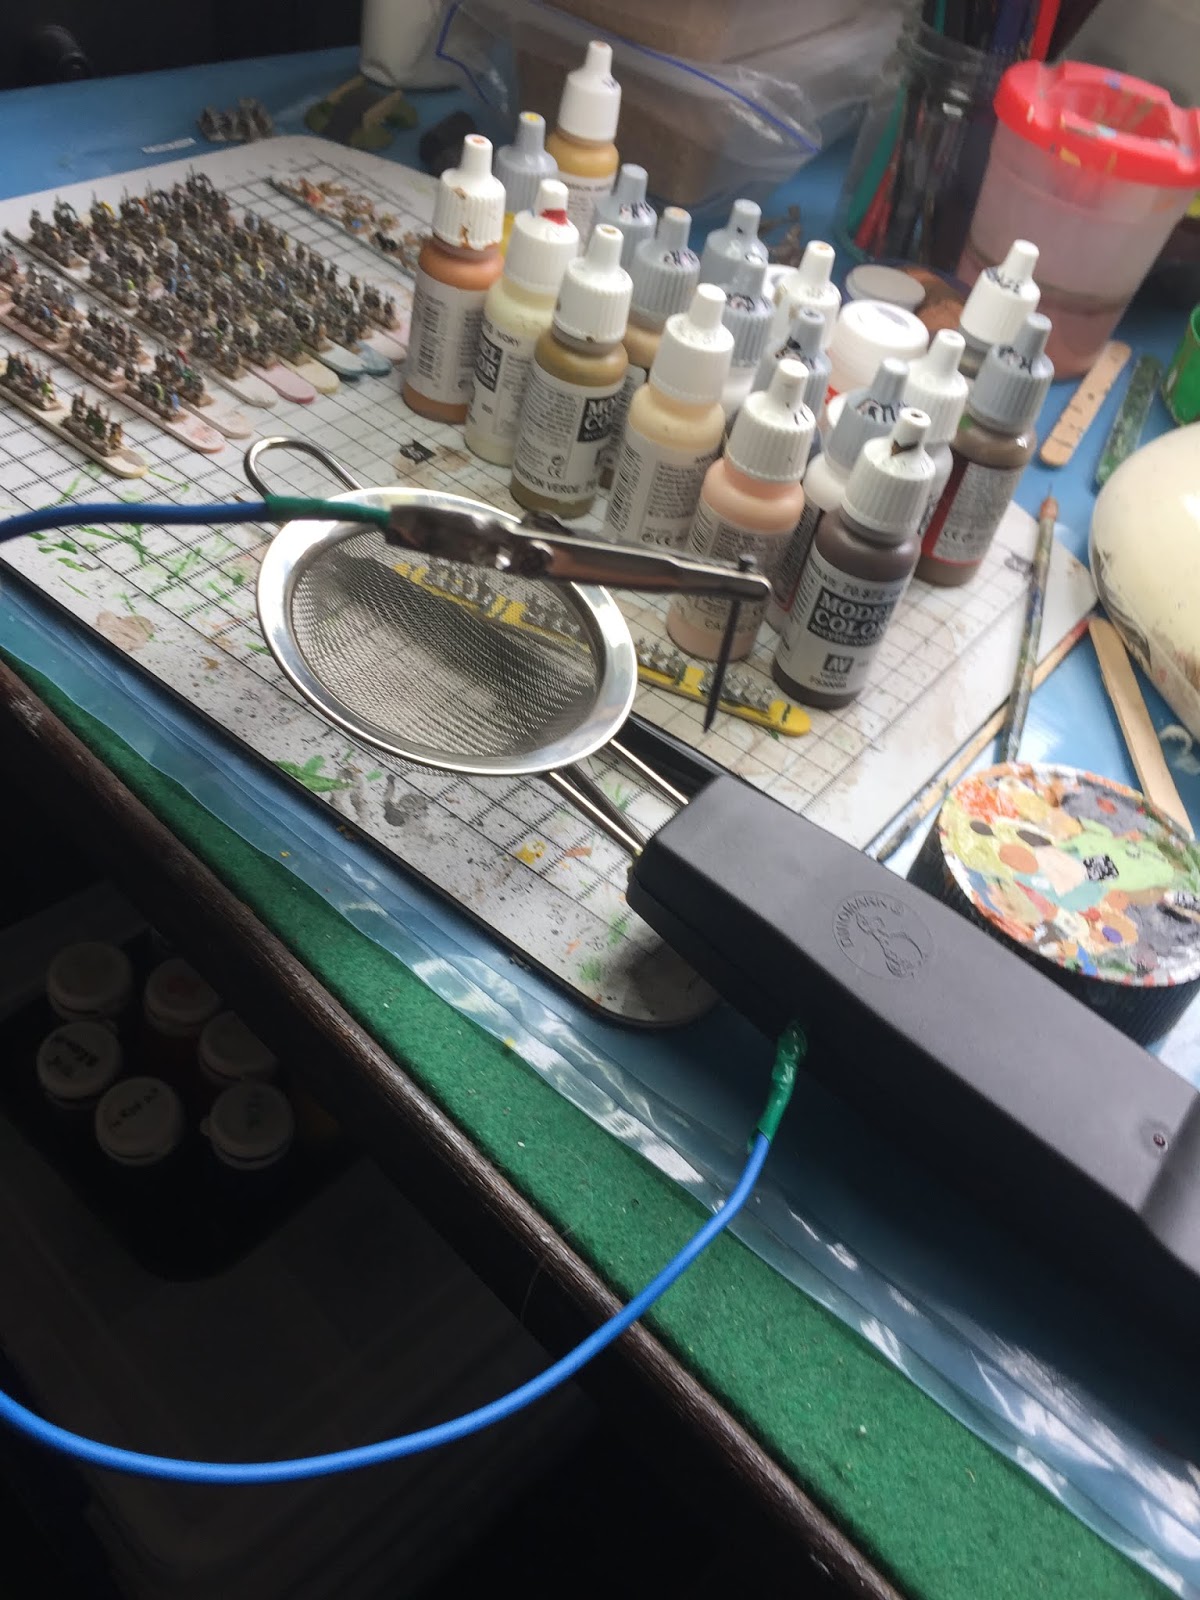
All that is really needed is to cut the sheet to the required size and then glue some flock to the top of the ridges.  Of course as with a lot of my projects I needed to go back an additional step and make my own static grass applicator before I could do the flock application! It was a really easy job using an electric fly swatter and a small seive as the main components.  The trickiest part is the soldering of the wires coming out of the circuit board of the fly swatter to the sieve on one side and a length of additional wire on the other.  Mind you if I can do it anyone can so not exactly rocket science.  I'm not going to provide any detailed instructions as there are any number of good tutorials only a Google search away.

The completed applicator.  Its a bit Heath Robinson but it does the job.
I was a bit concerned about getting the flock to stick to the corrugated sheet.  I needn't have worried it stuck fine. Simply place a thin strip of PVA on the top of the raised ridges and sprinkle the flock and Bob's your mother's brother!  Well not quite, the thin school style PVA does tend to flow down into the grooves rather than stay where it was meant to be, but the strands do stand on end!  Still its part of a learning curve and a second test with woodworking PVA was more successful.  I will take some photos of the finished article when its, well, finished!

Its off to the wars for me this weekend.  The Sealed Knot has its largest event of the year just outside Scarborough this coming bank holiday weekend so I will be shooting at the ever romantic but commonly wrong supporters of that man of blood Charles Stuart for a couple of days.