Showing posts with label 15mm. Show all posts

Friday, 1 May 2026

A foray into Napoleonic's

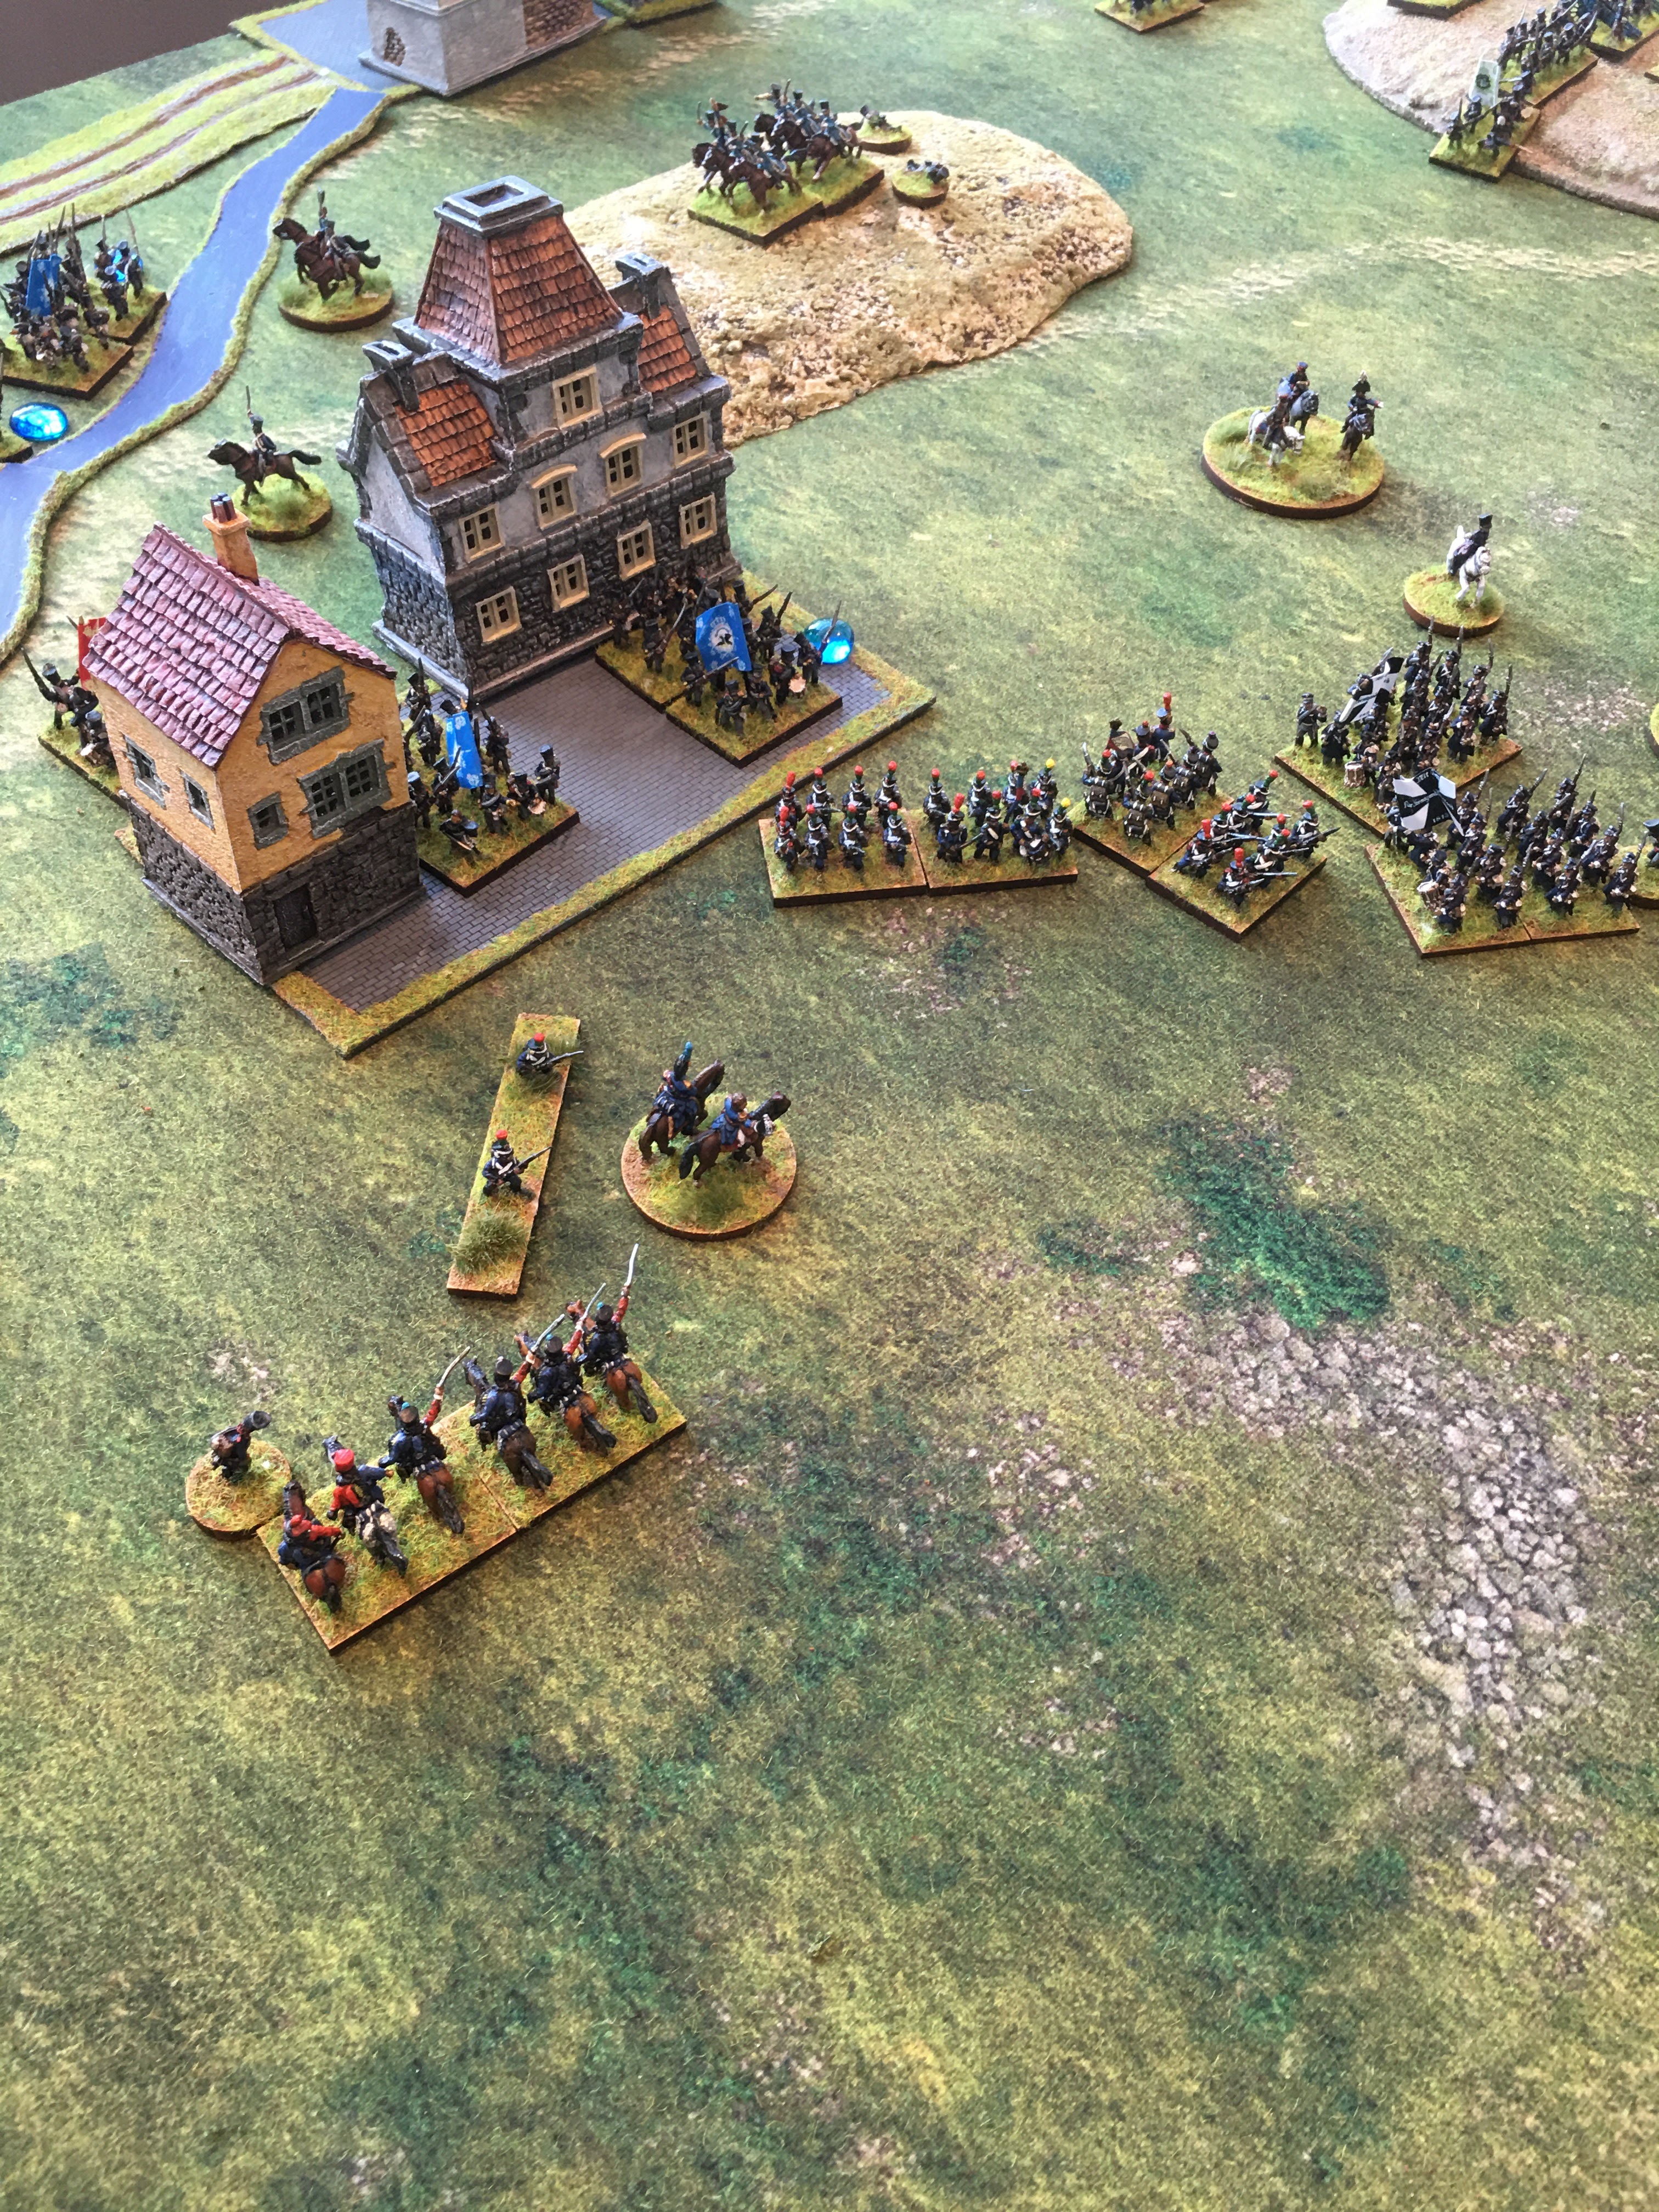
I have told you before that Napoleonic's are not really my thing.  So of course my most recent gaming outing was a remote Napoleonic game run by Jonathan Freitag.  This was the Battle of Montebello in 1800 part of the campaign that led to Marengo.  It's not that I don't find the period interesting it's more that I don't understand the tactical niceties and can't handle painting the detail of the uniforms to the standard I'd want to achieve.  And yet, I have really enjoyed those games I have played, and so it was this time.  I suppose what I need is to find a set of rules that hit the spot for scale, tactical feel, rules complexity and required figure count.  It's not like I don't have the figures as I inherited some 15mm Minifigs a few years ago (details are here Small but Perfectly Formed: 15mm Napoleonic photos) so all I really need are a set of rules I like.  Shako 2 seemed a decent set but they look to be out of print, the set Jonathan used might be worth a look though.

So on to an after action report?  Sorry that's a bit tricky as I was having fun and neglected to get any screen grabs so you will have to wait for Mr F's write up or for one of my fellow generals to tell all.  The high spots were (in particular order):

  • The Austrians overturned the historical result and won quite convincingly
  • We poor French players had the most diabolical dice rolling luck
  • and, our re-enforcements were delayed until the last possible moment by which time the Austrians were in full control of the objective!
That Bonaparte chappie was not happy with us!  Still it's another game under my belt.

Monday, 14 August 2023

A Napoleonics game at Chez Dawson

Long term readers will have gathered by now that the one period I have really struggled to come to grips with are the Napoleonic Wars. So it may come as something of a surprise to find me driving to York, last Wednesday, for a game of Shako 2, Arty Cunliffe's rules for that period. This was all due to Paul Dawson commenting on the fact that some aspects of Altar of Freedom reminded him of those rules during our AoF game of First Manassas earlier this year. This was enough to intrigue me and intrigue crystallised into a suggestion that we give the rules an airing at our next get together. Which was why I was off to fight the Battle of Abbach (22 April 1809).

While I understand a little bit about the Peninsula War (thanks to the Sharpe Novels) and something about the 100 days I'm pretty hazy about the rest of the Napoleonic Wars.  So a game set in Bavaria in 1809 is not playing to my strengths.  Fortunately the rules were pretty easy to pick up and for a non specialist like me seemed to give a reasonable feel for the period.  I especially liked the command and control system and the really straight forward combat and morale rules.  The game is set at Corps level with manoeuvre units being infantry battalions, cavalry regiments or artillery batteries (lets call these units).  Each unit has a morale value which is the number of 'Hits' the unit can take and also the base score it has to roll under to pass morale tests and do other stuff.  In this game that value ranged between 3 and 5.  The Austrians also gained a bonus for having large units, not that we had any actual Austrian troops on the table instead Prussians proxied for them.  Large units take one more hit to destroy than their actual morale value and the Austrians have a number of these.  If you want to read a review of the rules by an actual Napoleonic gamer this link will let you do that: Mad Mac's Attic: Search For The Holy Grail - The Best Napoleonic Rules, Part 6 (madmacsattic.blogspot.com) 

The game scenario came from Michael Hopper's "Eagles over Bavaria" which is a set of scenarios for battles in the 1809 campaign written for Shako 2 but actually pretty much rules agnostic.  A French force initially consisting of two commands (which I think were roughly division sized) is on the table.  This consists of Boudet's Division of seven average battalions (Morale 4), two skirmish units and 1 Field Artillery battery and Pajol's Division of 2 elite battalions (Morale 5), 1 skirmish unit and three regiments of light cavalry.  Reinforcements will arrive on turns three, seven and nine.

The Austrians have superior numbers at the start, organised in four Divisions (IIRC).  They certainly had a lot more troops on the table than the French.  In total they deployed 16 Infantry Battalions, 4 cavalry regiments and 4 artillery batteries.

1. The Battlefield.  One square equals on foot on the table

The initial French plan was to defend all along their frontage.  The Austrian's were attacking.  Command and control in Shako means defending units cannot move more than 12 inches away from their formation commander while attackers must move towards the enemy at a minimum of half speed.  Orders cannot be changed without a direct order sent from the Commander in Chief to the formation commander by ADC, who may not get there on time or at all!  Lines of attack must be defined on a map by drawing an arrow showing the route and objective.

When I arrived at Paul's the table was already set up and initial  deployments were being made.  Paul  had also invited a second wargaming friend to take part, who to prevent me becoming confused has cunningly arranged to be called Paul as well!  This latter Paul was commanding the Austrians and I was to take the French.  The French right was deployed on either side of the stream north of the village of Massing with their flank anchored on the village of Poigen.  Their left was deployed around Peising with two elite battalions garrisoning that village.  The centre was lightly held by three regiments of Light Cavalry.  The Austrians were massed south of Seedorf and around Abbach.

The game victory conditions rewarded the Austrians for exiting troops via either of the roads on the south edge of the table, occupying Peising and Poigen villages and destroying French units.  As the French I had to hold the two villages the Austrians wanted, prevent their southern exit and destroy units.  Which, to be honest, looked like a big ask.

2. Battlefield from the east showing initial deployments

Apparently the Duke of Wellington once wrote that "The history of a battle, is not unlike the history of a ball. Some individuals may recollect all the little events of which the great result is the battle won or lost, but no individual can recollect the order in which, or the exact moment at which, they occurred, which makes all the difference as to their value or importance.".  I know exactly how he felt as I try to write up this game!  The telling is entirely from the French viewpoint, some of my recollections don't entirely gel with the sequence and time stamps on the photo's and some bits I'm struggling to put into the right point in the game entirely, and that's without anyone shooting at me (or asking me for a waltz).  Still I will do my best to give an outline.

The initial deployments are as shown in photo 2 above, the French are on the left, the Austrians (actually Prussians) to the right.  Units with blue glass markers are 'large' units.  Each turn commences with dicing to determine the order in which divisions move, this is a straight dice roll with no modifiers.  in the case of ties formations with attack orders move first.  The game started with the Austrians surging forward all along the line.  Things are not looking good for Napoleon's boys! In response I placed most of my infantry into line keeping a couple of battalions in column as a more mobile reserve and awaited the coming storm.  Infantry in column move further than those in line but can't shoot but gain an advantage in melee. 

3.  The cavalry and their supporting artillery attack

The first blow was a combined cavalry and artillery attack against my right wing (Photo 3).  I managed to form a hasty square with one battalion but the left most one failed to do this and was swept away.   After which the Austrian cavalry decided to ignore the infantry in square and retired to rest their horses. After one turn of melee become 'blown' and only recover after a turn out of combat.  Being attacked while your horses are blown is not a good thing!  Blown horses are noted by a red glass bead in the pictures.

4.  The Austrian infantry pick up the assault

Hard on the heels of the cavalry charge came the Austrian infantry.  They quickly moved into Poigen village and started a musketry dual prior to a bayonet charge.  This staggered some French formations but did little else.  The French musketry in response was distinctly lack lustre (I threw a lot of ones, I mean a LOT!).

5. Turn three and the first re-enforcements arrive

Meanwhile on the left the Austrians held a huge numerical advantage and pushed cavalry and infantry south down the road out of Abbach.  I moved one of the cavalry regiments in the centre to the south of Peiping with a view to launching a spoiling attack against the rapidly advancing Austrian columns.  I also moved one of the elite battalions out of the village to hold off the Austrians moving south towards the central sector of the battlefield.  Although they slowed the advance doing so allowed the Austrians to slip a battalion into the southern half of the village.  The French also gained much needed re-enforcements in the shape of two light cavalry regiments entering in the South West corner.

6.  The French centre is now wide open

However, that left the centre looking distinctly under garrisoned!  One battalion of infantry is having to hold off three Austrian ones and having sent one cavalry regiment to support my left wing I had precisely two remaining cavalry regiments in support.  Following a round of combat with the Austrian Dragoons opposite me that quickly dwindled to one regiment, as shown in Photo 6.  My remaining cavalry are blown and staggered.  Staggered is the equivalent of disrupted or disorganised so far as I can make out, certainly a staggered unit is at a large disadvantage.

7. The Austrian infantry pressing forwards on my right

Over on the Right the Austrian Infantry continued to close on my defensive line (Photo 7). I'm unclear how many turns of musketry occurred or if they attempted to close to melee but overall things were looking pretty shaky on this wing.  In a desperate attempt to reverse the tide of events I decided to go for it and attacked all along the line.  Austrian volley fire failed to prevent my infantry getting into melee and a series of poor Austrian rolls and good French rolls saw Austrians fleeing to the rear in large numbers.

8. The Austrian push around and into Peising village

Things were even more desperate on the left side of the battlefield.  Although so far the Austrian's had not been able to make their numbers tell, but it was only a matter of time before they did.  My elite battalion which had left the village was not just holding it's own against the Austrian assaults but was actually beating them.  I was in serious doubt as to how long that could be maintained though as Austrians were poised to leave the village to their rear.  The light cavalry re-enforcements plus the regiment diverted from the centre launched death or glory charges to hold the Austrian's back and had some success but at a cost.  I was beginning to look for the next set of re-enforcements arriving to rescue things.  In an attempt to hang on until then  I abandoned the village and moved the second Battalion of infantry out to support their colleagues facing the enemy.

At this point we broke for lunch; I'd like to claim that this was taken in the saddle surveying the field of battle, but in fact it was taken sitting very comfortably in Paul's conservatory discussing the pros and cons of domestic solar panels! Very nice it was too. 

9. The aftermath of the French close assault on the right flank

The French counter attack around Poigen was far more successful than I had hoped (see photo 9).  In fact the Austrian's were even worse off than the photo suggests.  Shako 2 has a cascade morale failure rule.  When units reach set levels of troop loss their chance of passing morale tests declines dramatically and entire divisions can simply melt away.  So it was for the Austrians.  Over the course of two turns both Divisions on the French right failed tests and were removed from the table.

10.  Fighting is still continuing around Peising

Back at Peising the fighting was continuing the second Battalion had deployed from the village to shield the rear of Battalion which was already engaged but at the cost of abandoning the village which the Austrian's quickly fully occupied.  The Austrian attacks to the east of the village were starting to falter as they were unable to make headway against the better quality French.

11.  Two regiments of my light cavalry holding Austrian columns at bay

Ignore what looks like Austrian re-enforcements at the top of photo 11, those are some of those troops who are no longer 'combat effective'.  There are still eight battalions of Austrian infantry and a regiment of medium cavalry in play though most of which are in good shape.  Facing them are around half that number of French.  This would be a good time for additional French troops to arrive, which they do in the shape of six battalions of infantry, 2 skirmisher bases and a battery of artillery all entering south of Peising (Turn 7 of 12).  These are not the greatest of quality but hey, quantity has a quality all of it's own as someone once said.

The newly entering troops slogged forward through the woods, to enter the open ground effectively blocking any chance of the Austrian's exiting the table at this end of the board.  

12.  The situation around Poigen at the start of turn 8

Things had now turned around quite dramatically  Over on the right I was able to occupy Poigen and despite still being on defensive orders at least start moving units towards the centre of the battlefield.  Orders were sent from the C in C to change orders to attack  which would free them to move to support the left wing in the next turn or two.  The situation over on the left was now looking to be more stable anyway and had a decent counter attack developing all on it's own.  A quick tot up of victory points showed that the Austrians were a long way behind and had no chance of pulling things back.  On the plus side they controlled both sectors of Peising but against that their losses were substantially higher than the French and the exit points were both under French control.  Accordingly at the start of what I'm almost certain was turn 9 we called the game as a French win.

This was my first Napoleonic game against real live opposition in around thirty years and I have to say I enjoyed it and not just because I was on the winning side!  The rules played well, although as always I could see a couple of areas where a house rule might make things more interesting.  The game see sawed and for most of it I was convinced I was going to loose, and it was sufficient to have me trawling that electonical inter-web thingy to see if I could find a copy of Shako 2 and the scenario books for the Peninsula War.  Well I got given some figures for the peninsula a couple of years back so I may as well use them I suppose.  All in all a great day, with nice people, what more could you ask for.  Thanks to Paul Dawson for putting the game on, advice on the rules and providing lunch plus to his friend Paul for being good company and not laughing too much when my dice seemed to only have ones on them.

The next get together will be back to my place for an ECW encounter using my homebrew rules, which should be interesting.

Saturday, 11 December 2021

15mm Napoleonic photos

 No not photos from 1815, these are some pictures of the new toys I was bequeathed.


The figures came in two display cases intended for wall mounting.

The smaller display case - cavalry and artillery
  

I need to replace the glass which was in the door of the larger display case as it was broken.  I will try to find some Perspex rather than go with more glass.
This is the larger case - infantry and cavalry

The eagle eyed may have spotted that the figures are not standing on the shelves as they should be.  I needed to sort them out into units as they were jumbled up so I used the cases flat on their backs as sorting boxes.

Now for some close ups of individual units to show the paintwork off.


French line infantry


There are also some Grenadiers of the Guard Infantry, Carabiniers in bearskins  and Light Infantry plus separate skirmishing LI.

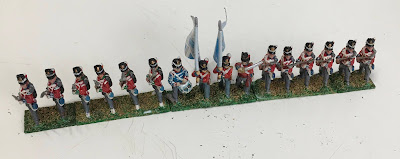
British Line Infantry - Just spotted that I have mixed two poses together

The British also have Highlanders and Fusiliers in bearskins (I know they didn't campaign in those but I'm not changing them) and allied Portuguese infantry, but no Light Infantry or Cascadores.  Some of the flags will need replacing as they have faded while waiting for me to be able to collect them but no other touching up is required

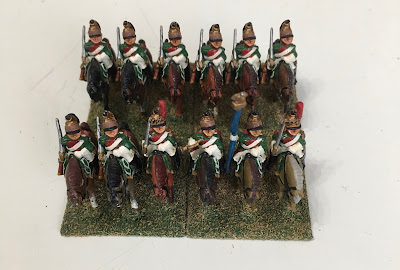
I'm less clear about the identity of the Hussar units but a bit of research should sort that out!

Might not even be hussars, although they do have Pelmans


More unidentified Hussar types

The next horsemen I do know.

French Dragoons - There are two units of these

The next up are French Gendarmes of the Guard (I think)

Gendarmes 

Last but not least French artillery.  The cannon is loose so it can be attached to the limber as required.


Just a part of the artillery!  

If you look back on the display case shots you will see that these are only a sample of the figures.  They are all painted and based to the same standard.  All I need to do is decide on a set of rules.  I have had more recommendations for Paddy Griffith's Napoleonic Wargaming for fun than any other set so they will be my first set to try out.  If I like them they will also be the last.  Not God's own scale but they do have a charm all of their own, even if there is an element of a few chaps taking a flag for a walk at this scale!


Thursday, 9 December 2021

Napoleonic's in 15mm - surely not!

Yes I know I'm generally a 6mm or smaller guy and I have very limited experience with horse and musket gaming, but.   A friend from the re-enacting world passed away a pre-covid and left me a bequest.  Because of the covid restrictions and my own health situation I only picked them up from his executor last weekend.  Almost 600 Anglo-Portuguese and French  infantry, and 150 plus cavalry with artillery and a couple of supply wagons.  All painted to a decent standard and with a pair of display cases to boot.  So I should really do something with them I suppose.

Having the figures led me down that rabbit hole which is Napoleonic uniforms as I tried to identify what I had.  The Anglo-Portuguese are reasonably straight forward but the French, oh dear.  I have figures with Plumes, others with Pom Poms and Carabinier companies for Light Infantry battalions in Bearskins as well as shakoes.  Let's just say it's been a steep learning curve working out which figures belong with which formations.  I think I have my head around it now.  Cavalry is just as bad plus I have rogue unit of Spanish Dragoons that don't seem to fit anywhere in the rest of the Orbat!  I'm sure I will get the hang of it the question is whether a future of slow and steady decline into button counting now awaits me. 

Friday, 18 October 2019

The battle of Billington Moor 798AD - The scenario

Following on from my post 'Do I do any actual wargaming' I mentioned re fighting Billington Moor to the MNGers and they seem interested.  Phil has 15mm DBA troops including Anglo-Saxons and Pre-Feudal Scots so we may be able to do something in 15mm rather than in 6mm.  Which means I now need to look into the numbers and make up of the forces with a view to having a couple of commands a side.  So big battle DBA (BBDBA) is looking favourite for this one.  The rules are DBA 3.0

Rather than getting too hung up on numbers I have decided to focus on the number of elements required and then amend the battlefield layout to suit.  Using BBDBA would normally give 36 elements drawn from the DBA lists with min-max numbers multiplied by three.  Each side is then divided into three commands of no less than 6 elements.  While DBA doesn't stipulate a maximum size for any of the command a bit of basic math tells me that it cant be larger than 24 elements and that this is probably going to be an issue for PIP allocations if a 24 element command is chosen. For this refight I am creating modified army lists to reflect the slightly different compositions of the two sides but sticking with the overall number of elements.

These lists are:

Middle Anglo-Saxon (Alderman Wada's Rebels)

  • 2 x Generals (4Bd) one representing Wada as CinC
  • 1 x General (Sp)
  • 2 x Hird (4Bd)
  • 1 x Fyrd (Sp) in effect a third poorer quality Hird unit
  • 24 x Fyrd (Sp) or (7Hd) For each 2 x Sp selected 1 x 7Hd must be selected
  • 3 x Archers or Scouts Ps or Fyrd (Sp)
  • 3 x Archers or Scouts (Ps)
  • 3 camps which can be massed together at one point (or the village may be considered the joint camp)
Middle Anglo-Saxons (King Eardwulf's Royal Army)
  • 3 x Generals (4Bd) the King, Alderman Eardbehrt (Herbert). Herbert's son
  • 6 x Hird (4Bd)
  • 21 x Fyrd (Sp)
  • 3 x Fyrd (7Hd)
  • 3 x Scouts (Ps)
  • 3 x camps which must be placed one per command (the king's camp counts as a double loss if captured)
As an aside I am currently having serious problems on my PC with posting photos between windows and blogger.  It seems to be an issue with memory overflow but I can't seem to get to the bottom of it.  The second I click the insert button on the blog the PC crashes and I find myself looking at the dreaded blue screen of death!  All pictures posted over the last half a dozen posts have been shipped out to my smartphone posted to the blog from there before I  return to the PC to ensure they are exactly  where I want them.  It isn't really an issue when its a photo as those are generally on my smartphone anyway.  Where it does become an issue is where I have created a map in a graphics program as that won't easily transfer to the phone.  Thus it was with the map for Billington Moor!

Scenic Ribblesdale.  The top of the map is North.  The village is 'Old Langho'  Billington is roughly south of there.
It would be probably accurate to add some scrubby woods in a thin band along the banks of the head waters of the streams as a scenic item but I wouldn't give any terrain effect to them.  The banks of the Ribble and Calder were probably not wooded.  At least not in this location.

The map is divided up into one foot squares.  The idea is that the defender is able to choose which 3' by 3' area to fight over by choosing the nine adjacent squares which will make up the battlefield.  No matter which area is chosen Wada's troops are the defenders and will deploy on the east side and Eardwulf will be the attacker and deploy on the west.  The Rivers Ribble and Calder are tested for passability separately to each other.  The standard DBA check is amended so that it is only paltry on a throw of 1, a 2, 3 or 4 makes it slow going and 5 or 6 makes it a slow crossing with effects as per DBA 3.0.  all other streams are 50:50 chance to be either paltry or slow going (DBA scores of 1-4 with no chance of the worst result of a 5-6 arising) The Roman road counts as a track (its not been properly re-surfaced since the late 4th Century after all).  The solid green is a steep hill and the green dotted areas are boggy ground.

If any one plays this out under DBA or any other rules I'd be interested in your feedback.


Thursday, 6 June 2019

More Ancients in action - This time with Armati II

I have never played Armati or any of it's variants in this case Armati II.  I have now played two games.  Trajanic Romans v German Tribesmen and the classic match up of Greeks v Persians.  After the game of ADLG a couple of weeks ago (see xxx) we discussed the pros and cons of ADLG and Trebian said he could see where some of the game mechanics had come from.  This turned out to partially be from Armati.  One difference he pointed out was that units were much less maneuverable than in ADLG which to him it felt more like an ancient period battle.  After all command and control wasn't a huge feature in most ancients battles especially in the barbarian armies!

Armati does indeed restrict maneuver or to be accurate there are limits to what can be achieved while maintaining a unit's order.  Like ADLG it has 'hit points' for each type of unit and when these are gone so is that unit.  Unlike ADLG light troops don't count towards an armies break point and lights are quick killed by contact with certain heavy troop types, representing light troops being dispersed beyond recall rather than wiped out.  Movement is not directly linked to base widths although like ADLG and other games it does use the standard WRG base sizes.  There are restrictions on how many maneuver groups an army can have and different armies have different initiative modifiers.  In the game the Romans get to add 7 to a D6 roll us Germans only get to add 4.  The difference between the Greeks and Persians was less marked being 5 and 6 respectively.

On to the Games
The Roman game was played in 15mm using Peter Pig figures, which are really rather nice, its a shame they only produce a limited range of armies for the ancient world.  Trebian and Phil umpired and provided tactical advice and the remaining four us commanded the troops.  As I had been on the winning side last time out I elected to try out the German side as they are very much the under dogs when facing the cream of Rome's army.

Another interesting point in Armati is that after terrain is deployed a screen is used to allow table top deployment without either player seeing what the other is doing.  That actually works really well and it means deployments are never guaranteed to be optimal.

The terrain provided two areas of woodland on the front edge of the German deployment area and a small hill on the Roman right.  When the screen went into place we decided to deploy the heavy german foot with the ends of the line anchored within the woods, a cavalry heavy right flank and a lightly defended left as we expected a lot of Roman light troops in that area.  When the screen was removed we saw the Romans had deployed an infantry box in their  centre with horse in reserve behind that and light infantry out on their right.

The Romans won the initiative roll (they never lost this roll all game) and the game was afoot.  Long story short the germans moved forward to occupy the woods (Roman legionaries are at a hefty disadvantage in them) and pushed forward on the flanks.  The Romans elected to advance as well.  Once we had our Infantry lines set they stood to wait the oncoming storm.  We pushed our flank units of light infantry and cavalry forwards.  The Romans just kept on coming.  On the left we swept aside most of the Roman Light Infantry and sent our own Light Infantry up the low hill hill to pin down the single unit of Roman cavalry.  It worked for one round of shooting!  On the other wing the Roman Horse was pushed right back and they were forced to break a cohort of legionaries off the main assault line to protect the now open flank.  These were supported by auxilia.

The two centres clashed and the legionaries started to chew up the warbands.  However the flanks of their line were not doing so well and because Germans are cheaper than Romans there were more of us than them and we elected to turn our flanks inward to envelop the Roman Infantry.  This cost us initiative points as everytime you split a command your initiative bonus is reduced by one.

Long story short....the Romans broke our centre but we rolled up their flanks and won.  By one breakpoint!  The consensus was that if the Romans had coordinated their flanks and centre more efficiently the Germans would have been badly beaten.

In the second game it was obvious from the start that the Persians had a huge advantage in cavalry numbers while the Greeks had better infantry although in even numbers to the Persians.  The Persians flowed round the Greek left in jig time and swept away the horse and peltasts who were defending their then hit the hoplites in the flank once they were locked into combat with the Persian foot.  The line simple dissolved with rear and flank attacks providing quick kills on the otherwise powerful Hoplite line.  The Greeks lost 7 - 1!

Armati does give a good game and in these games at least it was clear that the game was lost by poor deployment and decisions as much as from the enemy making good decisions.  Deployment really matters as the ability to reset the line of combat troops (especially the close combat formations) is really restricted.  It is vital to try to guess at the potential deployment you will be facing when the screen is removed and deploy to counter those threats.  Oh and it helps to have an ex-world champion player on your team!

Thursday, 24 January 2019

In the bleak midwinter

On Tuesday afternoon the weather finally turned to snow in Rugby.  About 2 - 3 inches fell in under an hour.  I was about to head off to an evening's wargaming at Trebian's (The author of the excellent blog 'Wargaming for grown ups' (which you can find via this link http://wargaming4grownups.blogspot.com/) so I was slightly worried that if it got much worse I would need to cancel.  As it happened once I was a couple of miles out of Rugby and on to the A14 the amount of snow fall was much less.  For anyreaders who don't follow Trebian's blog it is worth the time to read.  He writes his own rule sets and I was looking forward to his take on the Russian Civil War (1918-21).  A full write up of the game is on his blog titled 'More Russian About'.

We used his rules 'Return to the River Don' which gave a great game with all the chaos and uncertainty I expected from a RCW encounter.  The rules are straightforward and focus on command and control problems.  Each turn players dice for initiative and then try to activate commands alternatively between the two sides.  Poorer quality units are harder to activate then good ones but none of them are guaranteed to do what you want. If a unit fails an activation test the Red player must coerce them into action (commissars shooting people to motivate them sort of thing)  that gets the unit moving but they now carry a penalty for future activation and have less actions available once they are activated.  The whites don't have to coerce units but can do so if they wish and they have officers available to do it.  If a unit fails activation all the units in the parent formation stall and play passes to the other side to attempt to activate a formation.

Once a unit has been activated the player verbally states the actions he wants to take.  These may be changing formation, moving, firing, charging to melee, reserving fire and so on.  Each unit has a number of actions once activated but having specified what these are and the order they will occur in dice are thrown and depending on the result you may not get to carry out all the actions you declared.

It quickly becomes clear that you need to lead off with the best quality troops in a formation to prevent the entire parent formation stalling and that the order of taking actions is crucial as it is always the later declared actions that are lost if the dice are against you.

All in all enough fun was had for me to consider buying some Peter Pig 15mm WW1 Russians!