Showing posts with label 2mm wargaming. Show all posts

Friday, 17 July 2026

Back to Manassas once more

For a replay of First Manassas 1861 to introduce a new gaming friend to Altar of Freedom.  The scenario is an interesting one as it uses a 6' x 4' table but with a low unit density.  The battlefield is dissected by Bull Run creek which can only be crossed at a handful of bridges and fords which focusses the initial action towards those points. 

The Federals under McDowell (played by Stephen the new guy) have the objective of breaking the Confederate Army.  To do that requires them to break five Confederate brigades. While the Confederates have to do the same to the Federals (also needing five Brigades destroyed)  or to be contending the settlement of Centreville.  Which means being within musket range of any part of the town.  This is because Centreville is on the road to Washington.  The Confederates (played by me) are under the overall command of Beauregard but also have Joe Johnson as second commander.  

Both sides Generals have a mix of good and bad traits just to make things interesting.  McDowell has an additional HQ (useful for rallying broken brigades, or at least trying to) but on the negative side is inept which means no two divisions can have the same priority point bids so attacks cannot be coordinated.  The Confederates have restrictions through Beauregard who has to withhold half his priority points until the turn end phase and has a random minus one or plus two priority point adjustment each turn.  Did I mention that five times out of six he will get the minus option.  Johnson at least is more positive he can reroll one shooting roll, for any of his brigades, each turn.

Last time out I played as the Federals and tried to follow McDowell's historical plan.  It didn't work! This time I was the Confederates and decided to push over Bull Run to threaten Centreville while holding the Stone Bridge and Fords until I saw what the Federal plan was.  I decided to ignore the Sudley Springs crossings based upon the time it would take for McDowell to get troops over them and around my flank.  The Confederates have to deploy first anywhere south of Bull Run.  The Federals deploy second but are restricted to a four square foot area around Centreville which then extends along the north table edge to a depth of one foot and ends two feet short of the corner where Sudley Springs is located.

Turn one initial deployments with Confederate lines of advance marked in Red

The Federals deployed defensively covering the Potential lines of attack over Bull Run and showed no intention of swinging wide around the Confederate left.  This allowed Stephen to off set McDowell's command issues by leaving one division in a static position in front of Centreville.  For most of the Game he also managed to gain control of the turn clock which allowed him to slow it down sufficiently to ensure that three divisions were always activated.  I Started by pushing Johnsons troops over Bull Run and moved a small portion of Beauregard's division to cover the crossings.  The Confederates don't have the same problem with activation as they are organised in what are for all intents and purposes two Grand Divisions.  What is a problem is the number of available priority points as there are not enough to gain the first activation and to control the turn clock and because of his traits Beauregard's division was usually slow to activate.

The situation at the end of the first turn (11.00am)

The Federal's hold around Centreville and prepare their line in the woods (top of the picture).  Their centre advances into the woods west of the ridge Centreville stands on which is a slow process as woods are rough terrain with a big move reduction (Shown by blue arrows) . On their left Stephen reenforces his line opposite the Stone Bridge.  Johnson has a toehold over Bull Run but hasn't deployed in a firing line and I totally forgot to move Stuart's Cavalry brigade at the far end of the table (DOH!).  The massing of troops opposite the bridge worried me enough to detach two infantry brigades and send them to support the defence there.  At least those Damn Yankees aren't heading for the Sudley Springs crossings!

The end of Turn 2 (12.00 Noon) Fighting has broken out in the woods

Turn two sees my infantry pushing into the woods on the North side of Bull Run and skirmishing with the Federals.  You can see fatigue markers starting to accumulate (the white and green discs).  I remembered to advance Stuart's cavalry brigade this turn !  The Federals have closed up on the Stone Bridge but the extra two brigades of infantry are helping hold the position.  Stephen is getting to grips with fighting an army level action now and has understood that fighting on the defensive is a better option for his green troops.  His experience with Napoleonics is also coming into play as he understands the importance of supporting his infantry with aggressive use of artillery.

As the day wears on the fighting in the central and eastern sectors really starts to heat up and the first brigades start to flee to the rear in rout.  By early afternoon neither side had made any progress at the Stone Bridge, over at the east end of the field, with artillery and musketry driving back any attempt to gain a foot hold over Bull Run.  However, in the centre the Federal defence had been driven back through the woods in the centre and more and more Confederate units were crossing over to add to the pressure.  South of Centreville Federal counter attacks were holding the Confederates off and there was an entire division in and around Centreville which hadn't been committed to the fighting.  This was mainly due to the way Stephen had marshalled his priority points to offset McDowell's negative command traits.  By keeping a reserve he could give more priority to the other three divisions, which was a clever move.

Things were heating up (both on the table and in my conservatory)  as the game entered its closing moves.  Faced with the possibility of having his army split by the Confederate push against his centre, Stephen elected to consolidate by pulling back from the Stone Bridge so he could reinforce the centre of the battle line.  Given that neither side was anywhere near breaking the Confederates needed to close on Centreville to achieve their secondary victory condition.  I was making slow progress to the south of Centreville but was having more success in building for a 'left hook' into the flank and rear of the Centreville defence.  Stephen basically closed the door on that idea by bringing troops west from the Stone Bridge area.

The end stage of the battle

Red arrows show the confederate advance over the Stone Bridge and the wavy red line the extent of their advance.  Blue arrows show the Federal retirement from the bridge and the advance of the reserve Division south of Centreville.  The Federals were slowly giving ground to the North East to protect the roads toward Washington and to refuse their right flank while the Confederates are slowly pushing forward onto that flank.  The delay is due to the need to get over the bridge and deploy into line again coupled with Beauregard's command problems.  This is pretty much where we were when the game ended.  Both sides had lost two brigades, but the Federals were carrying slightly more fatigue markers, although these were being rallied off as troops pulled out of the front lines and reorganised.  I'd call it a draw as neither side had managed to break the required five brigades and the Confederates didn't look like they were going to contest control of Centreville anytime soon.

It was a good game with a new opponent who picked up the rules and tactics really quickly.  Altar of Freedom gave their usual entertaining game with command and control issues to wrestle with throughout.  I only managed to gain control of the turn clock once in the entire game but it didn't really hamper me too much.  I hope Stephen enjoyed it as much as I did.

Wednesday, 19 February 2025

Irregular Miniatures 2mm and 6mm ranges update

Some good news to share.  Things have moved on at Irregular, Ron has retired at the grand old age of 98 after a mere 44 years of building up the business, Lawrence and Tara are moving on and Ian and Anne have decided to concentrate on the 10 mm to 54mm ranges.  The 2mm and 6mm ranges have been taken in hand by Nas Bat an ex-Irregular employee who will take on casting and handling orders for those ranges.  He currently has the 2mm moulds and some of the 6mm ranges.

More information at IRREG-2mm 

Friday, 4 October 2024

17th Century Armies - Part 3 The Swedes (Part two)

A couple of things to add to the last post.  Firstly the Swedes had abandoned the arquebus before the start of the Thirty Year's War so all infantry units are musket armed.  Secondly in each brigade the squadron with the most pikemen is assumed to have formed the point of the arrowhead or diamond.  Personally I'm finding it difficult to accept that some brigades had no pikemen at all but in the absence of evidence I will go with that interpretation until a better one comes along. 

So, after looking at the Infantry I can turn to what seems (in theory at least) the easier part of the army! 

Cavalry

Native Swedish cavalry had two major disadvantages in the years prior to the Thirty Year's War.  Firstly their horses were neither large enough nor strong enough to carry a heavily armoured trooper as effectively as their enemies.  Secondly they struggled to manufacture sufficient wheellock pistols and armour to create troops capable of acting as armoured cuirassiers.  This is not to say that he did not have small numbers of Swedish cuirassiers available but these were mainly bodyguard units.  Gustavus' solution to this shortage was to use his other cavalry more aggressively, in a similar way to the French Huguenot Miller cavalry.  He took away the carbines from his Harquebusier style troops and left them with swords and pistols, and placed those troopers with armour in the front ranks.  To offset the lack of mounted close fire support for the charging cavalry he deployed bodies of musketeers between each squadron of horse in the front lines.  This would have been effective against an enemy who wanted to use Harquebusiers to soften up the Swedish cavalry prior to a Cuirassier charge but was risky against an enemy who closed to melee quickly unless the Swedish cavalry could hold them off!  Apparently at Breitenfeld Tilly was taken by surprise by the aggressive Swedish tactics as he had never considered Harquebusier style horse as 'Battle Cavalry'.  

Gustavus Adolfus at Breitenfeld 1632 with cavalry in background by Johann Jakob Walther

By the 1630's to support the more lightly armoured Swedish cavalry, heavier cuirassier and better equipped harquebusier style cavalry were provided by German mercenaries or allies.

I would treat the native Swedish/Finnish horse as shock or mixed shock with an option to class some as poorly equipped horse to reflect the lower proportion of troops with back and breast plates.  I would also treat the Finnish 'Hakkapeliitta' Horse as elite to reflect their reputation.  They are classed as trained and experienced or veteran from Sweden's entry into the Thirty Years War reducing to trained and experienced after Lutzen.

Native Swedish/Finnish horse probably deployed in three ranks to fight but probably manoeuvred in six ranks.  Cuirassiers should be deployed in deeper formations of at least six ranks if they are firepower or mixed firepower tactic troops or three ranks if mixed shock.  They are classed as armoured.  Swedish allied cavalry might be considered as unwilling if representing Saxons at Breitenfeld, and should be considered as trained but raw for that battle other wise treat as trained and experienced or veteran if long serving German mercenaries.

Formation sizes are harder to be precise about but seem to have been in the range of 200 - 400 men per battlefield Squadron.  The table below gives some formation data drawn from  Daniel S's blog post: The Swedish Army in the Battle of Breitenfeld 1631 | Kriegsbuch.  The whole site is a mine of information as are his posts on The Miniatures Page (TMP).

Swedish cavalry at 1st Breitenfeld

The table above covers all Swedish, and mercenary cavalry but excludes the Saxon allied horse.  The column titled "Harq'bus'" covers all non 3/4 armoured cuirassier type cavalry, these are both the traditional Harquebusiers and the more lightly armed Swedes and Finns.  The data for Cuirassiers covers all formations that are known to have been or may have been 3/4 armoured.  Based upon this roughly 35% of the cavalry were Cuirassiers and these tended to be in larger formations than their less well equipped brethren.  There were also between 400-500 Dragoons present which are not included in the table.

As a comparison at Lutzen the cavalry (may) have been split as follows:

Swedish cavalry at Lutzen 1632

I'm saying 'may' as my available sources don't show a split between harquebusier and cuirassier style cavalry.  Because of that I have made the following assumptions.  Those squadrons thought to have been cuirassier equipped at Breitenfeld are still equipped that way at Lutzen the following year.  That none of the new units are cuirassiers, except Ohme who formed the central cavalry reserve.  It would seem sensible to have that reserve made up of the heaviest available cavalry so Cuirassiers seemed to fit the bill.  Please note that I have excluded the Saxon and Hessian horse from the above table, as I'm trying to concentrate on the Swedes and mercenaries in their service here.  For completeness be aware that the Saxon and Hessian allies provided three additional squadrons of cavalry at Lutzen.

We can draw some (pretty speculative) conclusions from these two battles.  Cuirassier squadrons formed between 50 - 35% of the total and were deployed as very slightly larger units on average.  There was a fairly large variation in size on paper although in reality the smallest units were statistical outliers (i.e. only one at that small size in each army) probably acting as lifeguards or escorts.  The number of cuirassier equipped squadrons declined as the Swedish involvement went on and the percentage of German mercenaries increasing.  Native Swedish horse probably became better armoured over time as they acquired back and breast plates and helmets from battlefield loot. 

Cavalry may have company sized bodies of 50 or 100 shot attached and after 1631 a single ultra light gun may be deployed with each body of commanded shot as detailed in the rules on sub-units.  These bodies deployed in the spaces between front line cavalry squadrons.

Dragoons

I have struggled to find much information on dragoons in the Swedish army.  The order of battle for 1st Breitenfeld shows 400-500 dragoons were present.  None of my available sources gives any information for them being present at other battles but I find it hard to believe that they vanished after Breitenfeld.  I suggest that unless an OOB clearly states no dragoons were present that you should have a single squadron of no more than 500 dragoons present.  At Breitenfeld they were used to provide fire support to the cavalry on the left of the Swedish army so it is possible that at least some of the shot detachments supporting the cavalry wings in later actions were dismounted dragoons.

Artillery

Like the Dutch the Swedes supported their infantry with artillery at the brigade level.  However, forget the myth of leather guns, which if they ever saw use at all were probably not used for very long and not in Germany.  Instead use 3pdr ultra-light guns as infantry support (if you want to think of them as made of leather that's fine by me).  Each Brigade would have at least one supporting gun per squadron of foot and ideally would have two or even three.  These guns were not automatically deployed with their parent brigade, as at First Breitenfeld  some seem to have been deployed from the second line brigades to boost the support for those brigades in the front line.  At second Breitenfeld (1642) the 3pdrs were allocated in a large part to the cavalry wings at a ratio of one gun per division of commanded shot leaving only 11 to support the infantry centre of 8 brigades.   


Swedish 3pdr; the paint scheme may be a later addition


The heavier field artillery seem to have been mainly 24pdrs and 18pdrs.  The Swedish had a liking for massing the heavy artillery in batteries to the front of the Infantry centre,  these batteries could be extremely large.  For example at the crossing of the River Lech in 1632 the 72 available guns were all massed into three batteries of 24 guns each (including the 3pdrs)!  In the battles where I could easily find data the heavier guns never exceeded 34% of the total guns deployed.  The table below gives numbers of guns and their percentage of the total artillery deployed and the average number of 3pdrs for each brigade present.  As noted that doesn't mean these deployed with their parent brigade/regiment.

Some examples of the split in artillery allocations by shot weight

The data for Lutzen shown above is an estimate as the Swedish records simply state 70 guns were present of which 20 were heavy guns but doesn't detail their size.  A minimum of three 24pdrs were present as a salvo from three of these opened the Swedish assault.

In every TYW battle I can find details of the Swedes deployed more artillery than their opponents, be those Imperials, Catholic League or Spanish. Well over half the total number of guns available in the army were infantry support ultra light pieces as shown above. 

Army Deployment

Infantry commonly deployed in two lines of brigades to provide support and (as at Breitenfeld) create a reserve that could be deployed to cover a turned flank or replace a frontline brigade. I would use the three squadron Brigade between 1627 and 1631 and the four squadron brigade between 1631 and 1632 (Lutzen seems to have been the last use of four squadron brigades) then revert to three squadron brigades until some point prior to Nordlingen.  From Nordlingen and later the size of the individual infantry squadrons and their deployment pattern shifted to a simpler model as described in the previous post on the Swedes.

A cavalry reserve would be deployed to support the infantry centre although the bulk of the horse were deployed to the two wings of the army.  This could be as small as one squadron, as at Lutzen or two or three squadrons supporting each line of infantry brigades as at Breitenfeld. 

InfantryCavalryArtilleryDragoons
1st Breitenfeld163114,7427,45054400
Lutzen163213,0326,24060?
Nordlingen163416,0009,70068?
2nd Breitenfeld164210,00010,00070?

Split of troop types at major actions across the period

The chart shows the estimated numbers of the main troop types deployed at four major battles, it doesn't give a perfect analysis but gives some indication of the relationships between the various arms.  With the exception of 2nd Breitenfeld cavalry comprised between 33% - 38% of the total headcount.  This was split fairly evenly between the two wings with no more than 15-20% deployed as reserves for the infantry centre.  Because of the way infantry were deployed as brigades the number of manoeuvre units gave more flexibility to the cavalry who deployed and fought as individual squadrons until after Lutzen.  Typically the infantry were deployed in 7-8 brigades but cavalry could number between 25  to 30 squadrons.

A Swedish army is actually a joint Swedish and German force during the Thirty Year's War, although their mercenary troops were intended to fight in the Swedish manner and not in the formations used by the German or Imperial armies. They need some care in use as the Swedish cavalry can be brittle due to the shortage of armour. As a result they need to balance aggression with the need to allow the detachments of shot to have an impact before they charge. Infantry need to cover the cavalry flanks (and vice versa) when advancing. Although they had a reputation for aggression it was tempered with a need to ensure all elements of the army supported each other so that close combat was against an opponent who has been weakened before melee.

Sorry about the length of this post.  It just kept growing!  Everything above is a fast overview and this is an army that really deserves a deep dive into it's history and tactical use.   

Thursday, 19 September 2024

Seventeenth Century Armies - counting the troops

I'm busy with the second part of the Swedish Army post at the moment.  I had to take a few days out for recovery from having a kidney stone lasered but I'm back at the keyboard again now.  The enforced rest gave me time to think about one of the things I'm finding quite difficult.  Which is getting hard information on Swedish unit sizes, well unit sizes for any nationality really.  That left me thinking about how units were assembled for use in combat and their actual sizes.

I have already stated that the Regiment (or it's local equivalent) was an administrative body, pure and simple.  The combat formations were a different beast as they were formed from the regimental manpower pool but would have been merged or split as required to make up battlefield manoeuvre formations.  Companies or troops would have been kept together as these were bodies used to fighting as a group so I expect there to be some variation in unit sizes but not to a huge extent.  This is where the difficulties arise.  

The vast majority of the manpower figures I have seen are from pay returns or casualty returns.  These were drawn up by the administrative formation; the regiment not the combat formation so are not automatically an accurate reflection of the numbers in the combat units.  On top of which as mentioned before the practice of drawing pay for dead deserted or entirely fictional soldiers means the returns are not as accurate as we might hope.  (Yes I know you're dead Smith, now just stand there and be counted by the nice pay master there's a good lad).  I do wonder if that was worse or better in European armies which employed a large number of mercenaries as the contractor wants to increase his profit, but the engager wants to know they are getting value for money.

Either way we do know the theoretical size favoured under the various, and different, tactical doctrines from looking at the writing of the military authors of the day.  We can test that by the simple means of dividing total head counts by the number of tactical formations to see how close these come to the theoretical head counts.  And that dear reader is as good as it gets, unless you have a TARDIS about your person!

Thursday, 11 July 2024

Infantry frontages for FPPS

A question was raised about whether the four infantry brigades of Essex's army at Edgehill would be better depicted in Fast Play Pike and Shot (FPPS) as double width (or two separate bases).  To consider this we need to do some simple maths and to make some assumptions.  The assumptions are that we only want to depict units deployed in fighting formations.  This means that Essex's men are in chequer board deployment with each brigade forming in two lines of battalia.  It also assumes a frontage of 1 yard per pikeman and 1.5 yards per musketeer. 

Actually, it's not quite that simple though as there are additional spaces in the ranks of musketeers to allow ranks to advance or retire during firing drills.  Musketeers were drawn up as several small 'divisions' of between four and six files (also termed a 'corporalship' as each had it's own corporal to keep things in order).  Rather than the entire rank filing back through the body it was common for the front rank of each of the sub-divisions to use the spaces left between corporalships for advancing or retiring between shots where firing by ranks.  There were also spaces between the two wings of shot and the central block of pikemen.  So those spaces need to be taken into account.

Essex's infantry brigades at Edgehill were all between 2,650 and 2,900 men strong. With average sizes for the constituent battalia running around 640 - 650 men formed up in eight ranks.   To make things easier lets consider a theoretical battalia of 648 men (excluding officers and drummers stood outside the ranks) which gives 81 files (648 divided by 8).  With a ratio of 2 musketeers to each pikeman that gives us three blocks each of 27 files, two of shot and one of pike.  Each block totals 216 rank and file.   Four such battalia would give us a brigade of 2,592 soldiers plus officers etc.  

Our theoretical Battalia

Starting with the pike block in the centre the 27 files need one yard of frontage per pike file so that block's frontage is 27 yards, easy so far.  The shot are a bit more tricky as there are gaps left in the frontage to allow easier exchange of ranks from front to back of the body (or visa versa) when firing by ranks.  In Dutch formations (and probably in all European tactical systems) musketeers were divided into sub divisions of between four and six files, each of which was under the watchful eye of a corporal.  These had different names in different armies but here I'm going to call them a corporalship.

It's tricky to divide 27 files to make the corporalships come out even as it would need a divisor of three or nine.  so we will have to fudge things a bit.  Dividing by 6 would work but only if there were four corporal ships on one wing and 5 on the other, but that helpfully gives us a spare corporalship of 48 men close enough to the number of shot sent as to support a single cavalry squadron.  This brings up a side question do battalia strengths represent a unit before or after shot are detached to support the cavalry wings.  I'm leaning towards the before option if numbers are based upon pay returns, however we will come back to this later.

So lets assume our theoretical battalia has lost a corporal ship of shot to support the cavalry.  It now has four corporalships of shot on each wing and a total head count of 384 musketeers and 216 pikemen plus officers etc.  Each wing of shot has 24 files in four subdivisions.  As a musketeer deployed in fighting formation requires 1.5 yards of frontage that gives us 36 yards for the men plus the space allowed for the gaps between corporalships at ,say, 2 yards each or an additional 16 yards.  I make the entire frontage to be two times 36 yards (shot), plus 27 yards (pike) plus 16 yards for the spacings or a total of 115 yards. 

Horribly out of scale battalia laid out to show the gaps in the formation

The small blocks are the corporalships of shot the larger one is the massed block of pikemen. The gaps are between the sub-divisions of shot and also the shot wings and the pike centre.

Last but not least on the formation aspect, the brigade frontage.  Four battalia as described above gives a frontage of 460 yards without allowing any gaps in the frontage between the battalia, which would make it difficult to exchange or merge the lines if pressed.  I'd estimate that a frontage of around 500 yards is the minimum to deploy one of Essex's brigades.

Four battalia brigade in chequerboard deployment

The only fly in the ointment when it comes to the above calculations is that we really know very little about the way a regiment was broken down prior to deploying on the battlefield so although the above looks nice and precise in reality it is anything but.  Who was included in pay returns, what percentage of dead and missing soldiers were still being claimed, how big were corporalships in a specific regiment at a specific battle, how big were the gaps between them (if they were present at all) etc, etc, etc.  As a wargamer I crave precision so I can have nice neat units of toy soldiers.  As an amateur historian I have to accept I don't actually have the data to allow that precision and that really I'm just dressing up an estimate with spurious calculations and that while some of the neat solutions I spot may be accurate they could also just be my preconceptions colouring the few facts we do have.

All that said I'm coming around to the idea that Essex's brigades need to be broken down into smaller formations to fit the 100 - 200 yard grid concept in FPPS.  Which would match the way cavalry has already been dealt with.  I'd have to calculate a frontage for each 'brigade' for each battle to determine what the break down should be but that's not that big of an ask.   What do you think?

Monday, 8 July 2024

Second Edgehill Playtest

I know that two games played in under a week is unusual for me but I really wanted to get a handle on how the fast play P&S shots play out. So on Sunday I laid out the troops and went at it again. This time I took the historical refight brakes off and played the rules as written. That meant using the one unit at a time deployment with sides alternating placement and each new unit (after the first) having to be placed next to one that had already been placed. That led to a race for the flanks effect with both sides laying down their infantry brigades first and then extending the lines to try to avoid having an overlapped flank. Now that might just be my preferences coming out and a real life opponent might have made different choices but it showed another aspect of the game that didn't crop up using a deployment based on history. Unlike the last game I used markers to show those units with attached light artillery or commanded shot support.

1.  The initial deployment you can see the effect of the race to the flanks effect

Move one - jockeying for advantage

The Royalists opened proceedings by making a measured advance down the slope.  Byron's Horse starts to move to the right to extend the Royalist line further as they risk being flanked.   Their artillery battery popped away as they did so but didn't hit anything.  In fact neither sides artillery battery was of any use all game!  Also unlike last game Parliament was more aggressive and came forward from their high ground (high ground who am I kidding, it is a slight rise and no more).  Their three infantry brigades took on a shooting stance, advanced and waited.  On the flanks the dragoons occupied the enclosures on the right flank and the commanded shot did the same on the left.

2. Parliament grabs the enclosures while the Royalists move forwards

Move two - close to contact

At the end of turn one Parliament has brought some of it's troops into range for a cavalry charge to make contact.  On the Royalist right Rupert's Maurice's and Prince of Wales' horse take advantage and charge home, well not quite home Rupert's and Maurice's are fighting to breech the hedges around the enclosures held by Holles' and Ballard's detached shot.  Prince of Wales' though get a clear run at the opposing horse (Sandy's) but as all three moves are of two squares they loose the support of their commanded shot.  

In the centre most their infantry holds it's ground to avoid moving into musket range of the larger Parliamentarian brigades, the exception being Wentworth's Brigade who are shielded by the rise of ground to their front and are not facing infantry. on the left Grandison's horse charge The Lord General's Horse and inflict hits but come off worse from the reply (remember both sides both attack and defend in a close combat so two attack rounds occur in each turn, which can get messy).

Parliament's moves allows their Infantry to advance in shooting mode and they inflict hits on Byron's and Fielding's brigades.  On their right Holles' and Ballard's come to hand strokes with Rupert's and Maurices Horse rather than be caught in shooting stance next turn.  Although they inflict hits the return  drops both units to wavering.  Sandy's are engaging Prince of Wales' horse frontally and can't avoid a flank attack from Waller's.  They are broken and flee with Waller's loosing two steps in the pursuit roll.  Confidence is ebbing away rapidly where combat has occurred!

3.  The Royalist right flank where both sides are looking vulnerable

In photo 3 you can see that Waller's are wide open to a flank attack from Byron's while the commanded shot in the enclosures and Maurice's are all breaking (one more hit will 'kill' them).  Close combat is brutal in these rules. 

4.  The stand off in the centre two Royalist Foot brigades are wavering

Move Three - End game

Things are about to start moving quickly!

The Royalist infantry adopts close combat mode and surges forward to contact with Parliament's centre.  Essex's Infantry are at a disadvantage having lost the advantage of the ground and being caught in shooting stance.  Byron's horse hit Waller's in the flank.  Waller's break and Byron's manage to avoid pursuit weakening them too badly.  the fight in the centre is a blood bath with Grandison's horse destroyed by The Lord General's Horse's return attack.  In Parliament's turn Ballard's and Meldrum's destroy Fielding's and Byron's Brigade but are destroyed in turn.  On their right Usher's dragoon's are destroyed by Wardlow's but Urry's Horse come off worse in close combat and are also destroyed.  In a deperate (literal) last throw of the dice Holle's shot close assault Maurice's horse and despite being roughly handled manage to break the cavalry and destroy them.  This tips the Royalist over their break point at the end of the turn and Parliament wins 6 - 4 although they are in no condition to follow up on their victory.

5.  The end of the affair.  Just look at all those orange and red markers!

Conclusions

My first thought is "Wow! That was fast".  Only three turns, but they were busy turns with action all along the battlelines.  If you wanted to make games last longer you could add an extra confidence rank between Steady and Wavering perhaps called Shaken.

One thing this play through highlighted was the effect of holding defensible ground.  The minus one to all attacking dice rolls for troops shooting into or fighting close combat into rough ground halves the to hit percentage from 33% (roll a 5 or a 6) to 16.6% (rolls of 6 only).  Being caught in the wrong stance has the same impact and if both apply it's impossible to hit the enemy. Flank or rear attacks are equally deadly as a unit only rolls half it's normal defence dice!

Are the rules finished?

Is there scope for further tinkering?  Of course there is, the question though is would it be worth it?  I intended to create a simple beer and pretzels style game, adding more chrome would defeat that object even though it's my natural inclination.

However, feel free to play with the rules and add more bells and whistles if you want.  Here are a couple of things I considered.  Allow deployment to be any of the eight squares surrounding a previously deployed unit, so that's adding corner to corner contact as a choice.  This allows refused flanks to be easily created.  Another option is to remove the free 90 degree turn and replace it with a diagonal move for 1 movement point as a way to manoeuvre as an aid to lining up with enemy units.  If I did that I would also restrict cavalry's charge bonus to cases where the 2 square move is in a straight line directly ahead from the starting square.  An evil little voice at the back of my head keeps murmuring 'This would work better on a hex grid' and I'm not sure it's wrong.  Align the hexes with two frontal sides, two rear sides and a single flank side to right and left and keep most of the rest of the rules the same? 

Last but not least, the key question.  Do I like these rules?  If I'm honest they are not entirely my cup of tea as they don't have all the nuances of the period.  However, I wrote them for a specific kind of game and gamer and I think they hit that target.  I can get a big battle onto a small table and finish it in an evening without rushing things, both players are busy at all times and there are decisions to be made and risks to be run though out.  So while I wouldn't say they are the best rules ever, I wouldn't say they are the worst and I don't hate them.  Writing them gave me some interesting insights into why some rules for this period fudge things and don't feel right to me.  It's because sometimes it isn't worth the additional over head that trying for accuracy over game play creates and sometimes we don't have all the data on 17th century combat to do it anyway.

Saturday, 6 July 2024

Edgehill playtest of fast play pike and shot

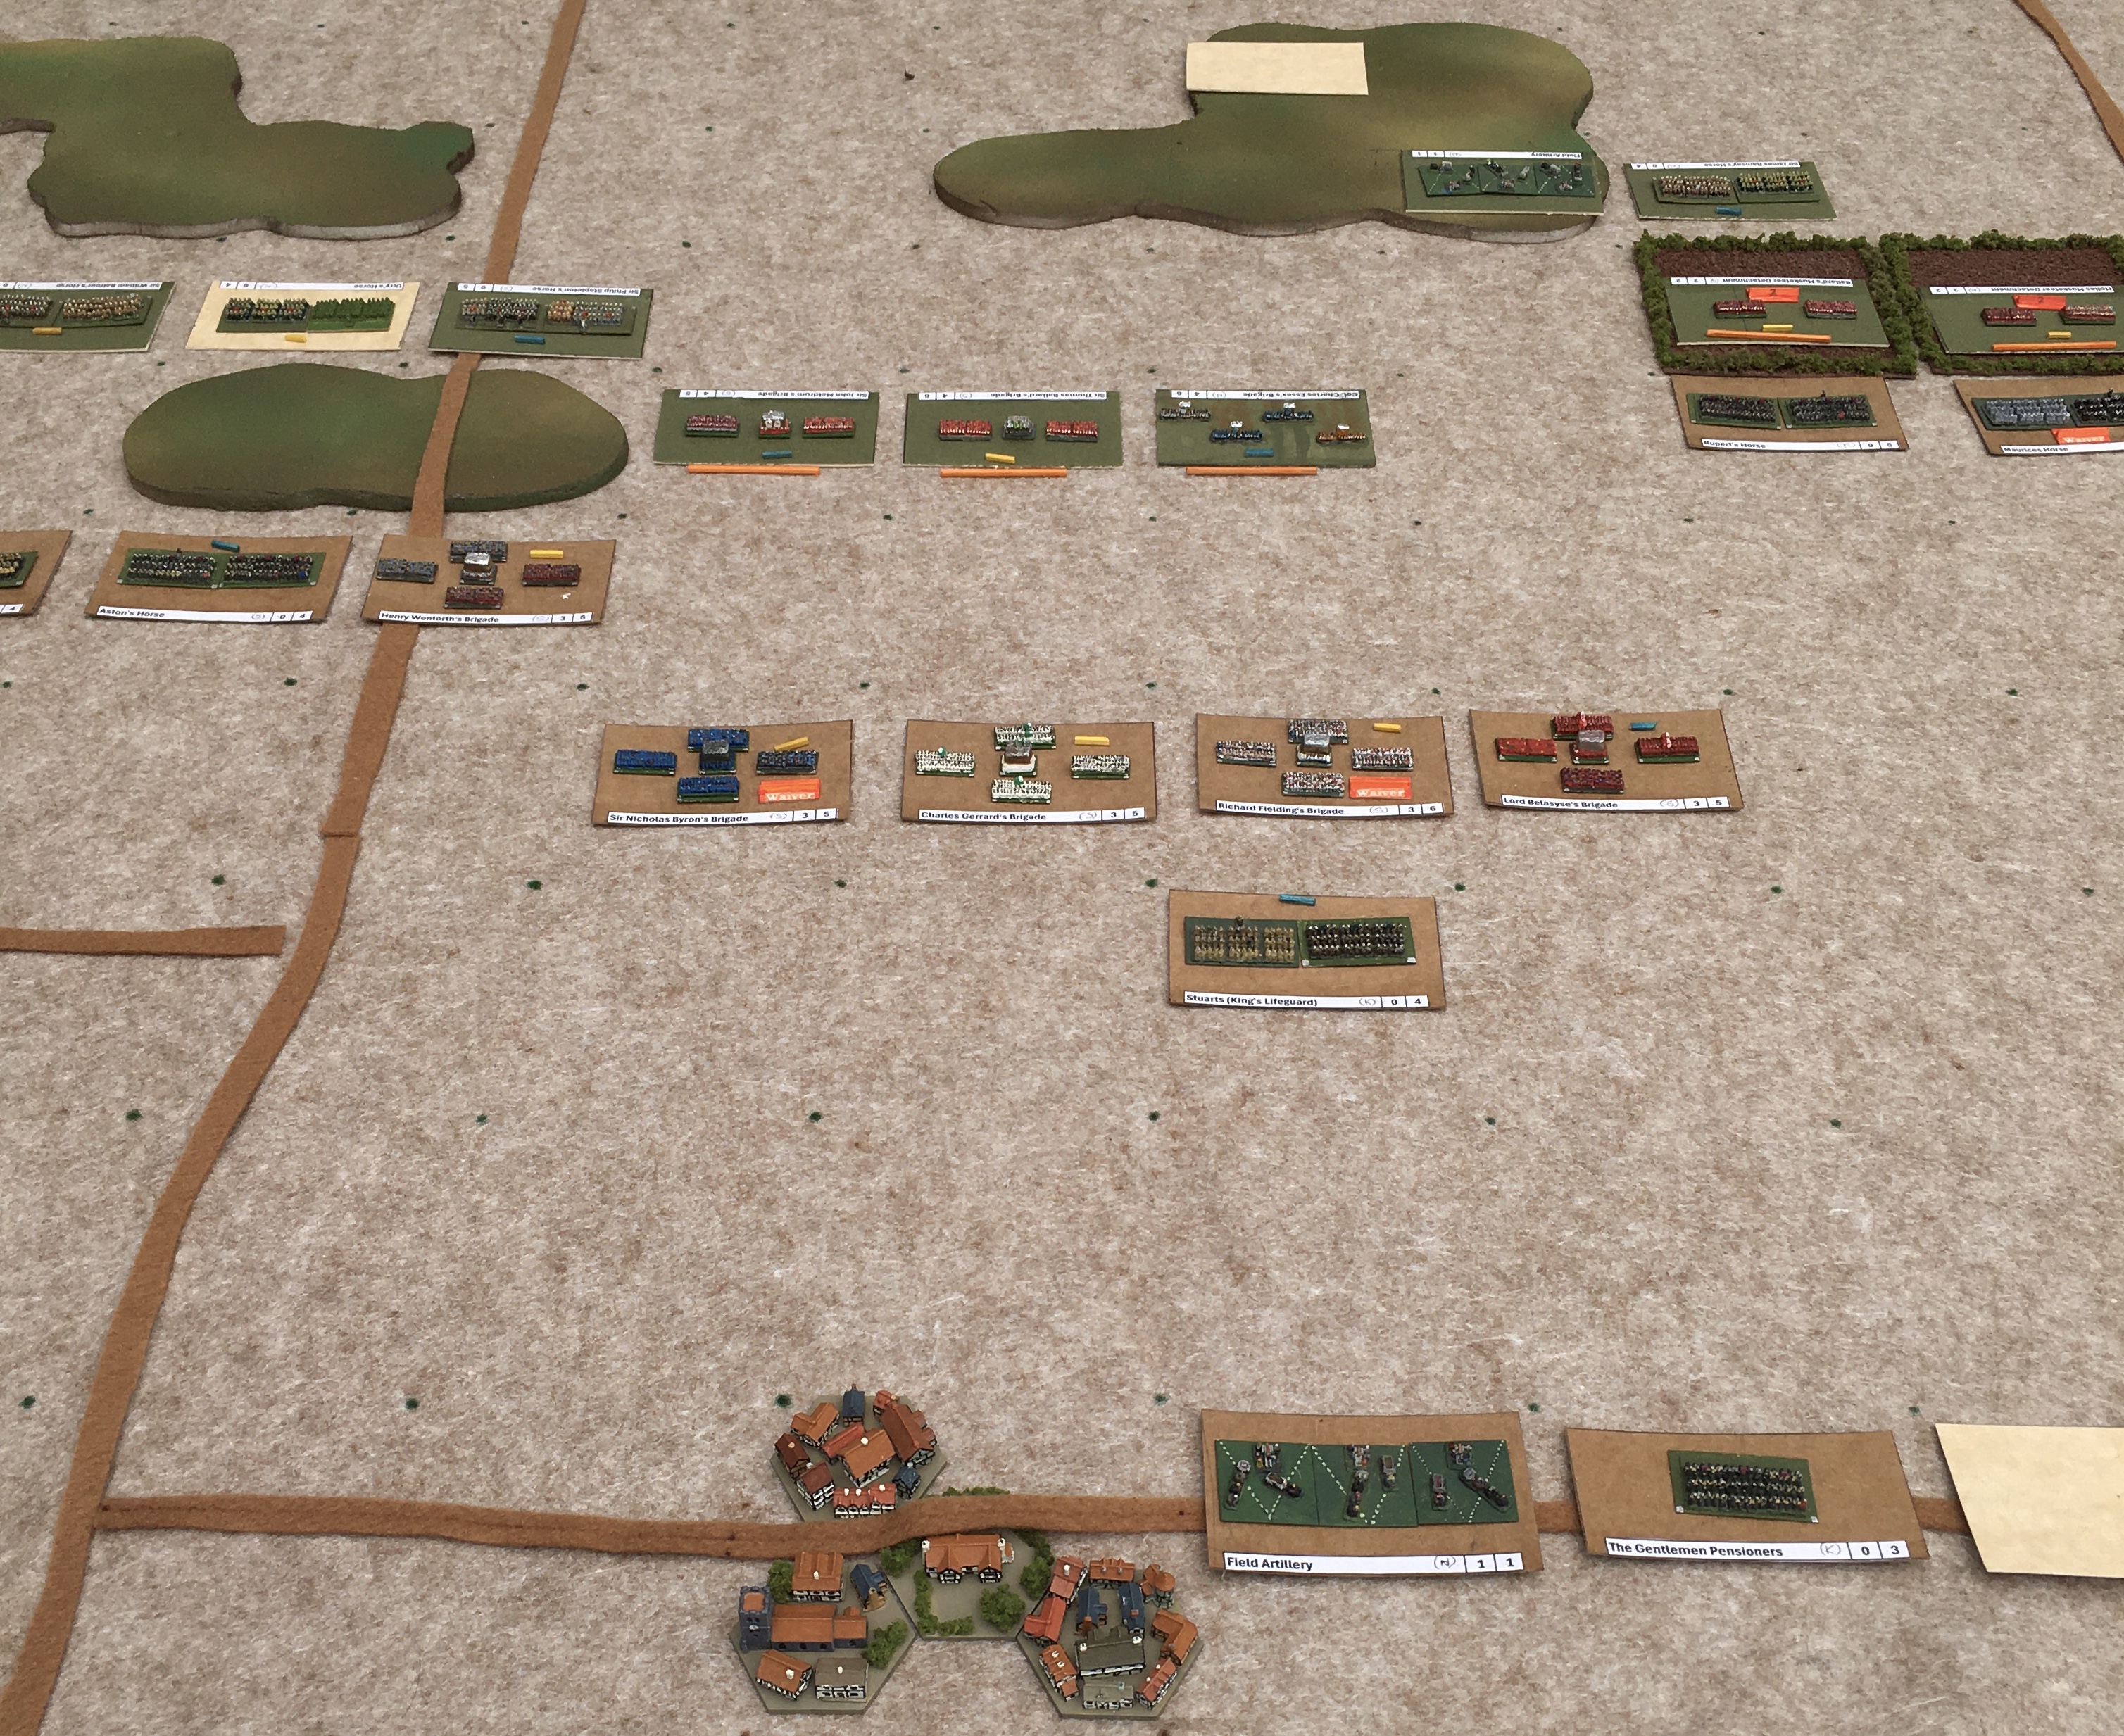
So after much faffing about I finally got the troops and rules onto the table top.  The battlefield was an abstracted version of Edgehill and the troops were as the army list I posted a few days ago, plus the additional rules for commanded shot with the cavalry and light guns supporting the infantry brigades.  I'm ashamed to say that I had to keep checking the rules, you know the ones I only wrote a couple of weeks ago, to ensure I didn't miss anything.  The troops are not based as they will eventually be I used my existing 2mm pike & shot stuff just to avoid pushing empty cardboard outlines of the bases around!  When I am happy with everything I will create some less generic brigade and squadron bases for use with the rules.  The attached ultra-light artillery and commanded shot were not modelled.  I assumed every unit had these in place.  As a game plan I initially followed the broad outline of the actual tactics applied in October 1642 as this gives the best test against reality. 

 
1. The battlefield before deploying the troops

So how did it go I hear you ask, you did ask didn't you?  Well allowing for breaks to walk the dog and eat, the entire battle played out in about 90 minutes or so, covering five full turns.  So that's 'fast play'; ticked off the objectives.   There a couple of minor things to tweak and one slightly bigger issue to consider but more about those as the after action report unfolds.

The table and the initial deployment

The battlefield on the tabletop is an approximation of the Edgehill battlefield but restricted by the need to have terrain fit on a square grid.  I didn't model the lower slopes of Edgehill instead treating the first three rows of the grid on the Royalist side as a slope and rough terrain.  I also didn't use the deployment system in the rules instead I tried to replicate the actual deployments as far as possible.  That meant that not every unit was in grid to grid contact with another once deployed.  This left gaps in the Parliamentarian infantry line which probably were not present in reality which flags up an issue with basing or perhaps unit sizes per base.  I'm going to have to think about that point and decide if I can live with the mismatch or if I need to change things.

2. Opening deployments Royalists on the right

Turn one - The Royalists advance

The Royalist army all adopted marching stance to close on the rebels as quickly as possible.  The exceptions being the Gentlemen Pensioners who I decided should not move except to protect the person of their king.  This provided some separation between the two lines of the army as the second line had to move through a grid line of rough terrain while the front line moved straight into clear ground.  I immediately decided that infantry march moves were too long and should be reduced to two movement points from three.  This allowed the cavalry to get slightly ahead of the centre infantry command.  Using the full march movement bonus for the horse turned out to be a mistake as it brought them into charge reach of the Parliament horse wings and reduced their combat effectiveness.

3. The Royalists push forward, Parliament occupy defensible ground

Unlike the actual battle, the Parliamentarian horse acted aggressively in response to this as it created a chance to strike at a significant advantage.  Firstly they threw Wardlow's and Browne's dragoons forward into the enclosures on the right flank and Holles' detached shot into the enclosures on the left flank.  Secondly where the chance arose their horse used the charge bonus to attack.  The combat mechanisms for close combat worked well including the plus one bonus to attack dice where a cavalry unit moves two squares into contact.  The ability to fight back for the defenders also worked well and the use of defence dice to negate hits would keep both players busy even though this is an 'I go - You go' style game.  Very quickly unit confidence levels started to be reduced.

Turn two - The Royalist Infantry continues forward.

The leading three Royalist infantry brigades switch to shooting stance while their second line stay in March stance to close up.  Their cavalry caught in march stance shift to close combat and take the fight to the enemy.  Their dragoons on the left dismount and shift to shooting stance and engage their opposite numbers who are ensconced in the enclosures and hedges ahead of them.  Over on their right their dragoons dismount ready to engage the enemy.  The fast moving Royalist horse and foot have lost their commanded shot and artillery support because of that rapid advance and this would tell over the next few turns.

Essex keeps his infantry in place and exchanges fire with the leading Royalist infantry brigades.  The fire fight is ineffective on both sides, although hits are scored the defensive dice are successful at negating them.  The parliamentarian cavalry reserve moves forward to fill one of the gaps between infantry brigades.  On the left the commanded shot get into position and start to shoot at the approaching cavalry, behind them the cavalry close up to be ready if the shot come off second best in the approaching combat.

Turn three - Fighting becomes general

Having found the use of musketry to be slow going in reducing the enemy's confidence the Royalist's opt to go to close combat and move up to contact.  Very quickly both sides start to show the impact of close combat, due to the double combat effect of both sides fighting in close combats.  some hits are defended against (think of it as men being pushed into gaps in the front ranks and officers leading by example) but not all.  The effect of Parliament holding the rough ground of the enclosures, boggy ground and slight hills does show though and the Royalists are taking more losses than Essex's men.  That said the first unit losses occur at this point with Holles' detached shot breaking and fleeing the field.  The pursuit test has some of Maurice's Horse pursuing but not all.  Parliament launches Their cavalry reserve against Fielding's Brigade and the armoured cuirassiers hit them hard causing two step losses in confidence.  Further to the right the Lord General's Horse attempt to move around the flank of the Royalist line.

Turn four - Losses start to mount

The Royalists are determined to take the enclosures on their right and push forwards into the enclosure vacated by Holles' shot.  They continue the close combats along the rest of the line but fail to make a breakthrough.  Digby's Horse seeing The Lord General's Horse flanking attempt, use march mode to block the route around their flank but stay far enough back to prevent Balfour being able to catch them on the march.  In the centre Fielding's Brigade breaks and runs in the face of a Stapleton's cuirassier attacking their front and a flanking attack from Balfour's cavalry.  The dragoon v dragoon action around the enclosures is a stalemate both sides causing damage and then also negating the impact on confidence (think of this as officer's leading by example and sergeant's dressing lines and filling gaps in the front ranks from the rear ranks).

Essex continues to hold his defensive line but Charles Essex's Brigade is suffering confidence hits and Meldrum's are being hit hard too.  At this point it is looking like the King will be victorious as Parliament has lost three units to the Royalist's one.

Turn five - exhaustion sets in

After a concerted effort to break Essex's line the Royalist centre collapses with the remaining two of the lead infantry brigades breaking and running.   Partly this is due to Stapleton's cuirassiers counter attack but most of the heavy fighting fell on the infantry who despite taking confidence hits managed to both negate hits and then rally off a confidence step loss at a crucial point while the Royalists never managed a successful rally all game.  On the Royalist left the dragoon fight continued as a stalemate but Digby's Horse break their opponent and manage to avoid a full scale pursuit thinning their ranks too badly.  Over on the other flank Parliament is doing badly as there are now no cavalry facing Byron's or the King's Life Guard who looked posed to roll up the Parliamentarian lines.  However, it is too little and too late as at the end of the turn both sides have reached their break point and the game ends as a draw.

4. The end positions

Conclusions

The biggest issue is whether I need to reconsider infantry unit sizes to match them to the ground scale size of the grid.  Currently the large Parliamentarian infantry brigades should extend beyond a single square. Cavalry brigades had the opposite problem and I have already changed the size of the formation represented by each base from a brigade to a smaller squadron sized unit. That said the under sized unit frontage for Essex's infantry didn't seem to hamper them so I need to calculate some unit frontages before I make a decision on this.

I found the pursuit rule wasn't as effective as I expected in taking cavalry out of the action.  As a result I'm going to remove the 'defence' roll for those troops with a reputation for bogging off in pursuit seeking glory and or loot (Prince Rupert's Horse I'm looking at you here)!  It will stay as is for more disciplined troops.  I'm also going to allow all units a single free 90 degree turn each move to allow more flexibility as they manoeuvre into contact.

I need some removable markers to show cavalry units with shot support and foot with ultra-light artillery support, the action stance they are currently using and whether units have defensive fire available.  This is mostly because when playing solo I loose track of those things!

Overall though I'm happy with the rules and with the exception of the points noted above I'm calling them done.

Tuesday, 2 July 2024

Matchstick madness - back in the saddle?

Well I say matchstick but actually this time its plastic canvas aka Granny Grating to my American readers.  Never one to give up easily I spotted a post on You Tube about making 6mm figures using this stuff which wasn't entirely convincing but it gave me pause.  It's sold as a framework for cross-stitching at most hobby suppliers and comes in a few different grid sizes.  I think the mesh number is how many 'holes' per inch so a 14 grid has 14 holes per inch.  I had two sheets in the hobby pile used on my 28mm wild west building project a 7 mesh and a 14 mesh, so I dug them out and had a bit of a play.

The 7 mesh was much to big for what I had in mind but the 14 mesh is about perfect.  Following the idea on the 6mm post I had seen I went smaller and created an initial test strip of three horses in a file.  These are almost identical in size the my favoured irregular Miniatures' castings.  So much so that I wondered if they had been used as a dolly for the sculpting of their 2mm cavalry.

This is the stuff I'm using

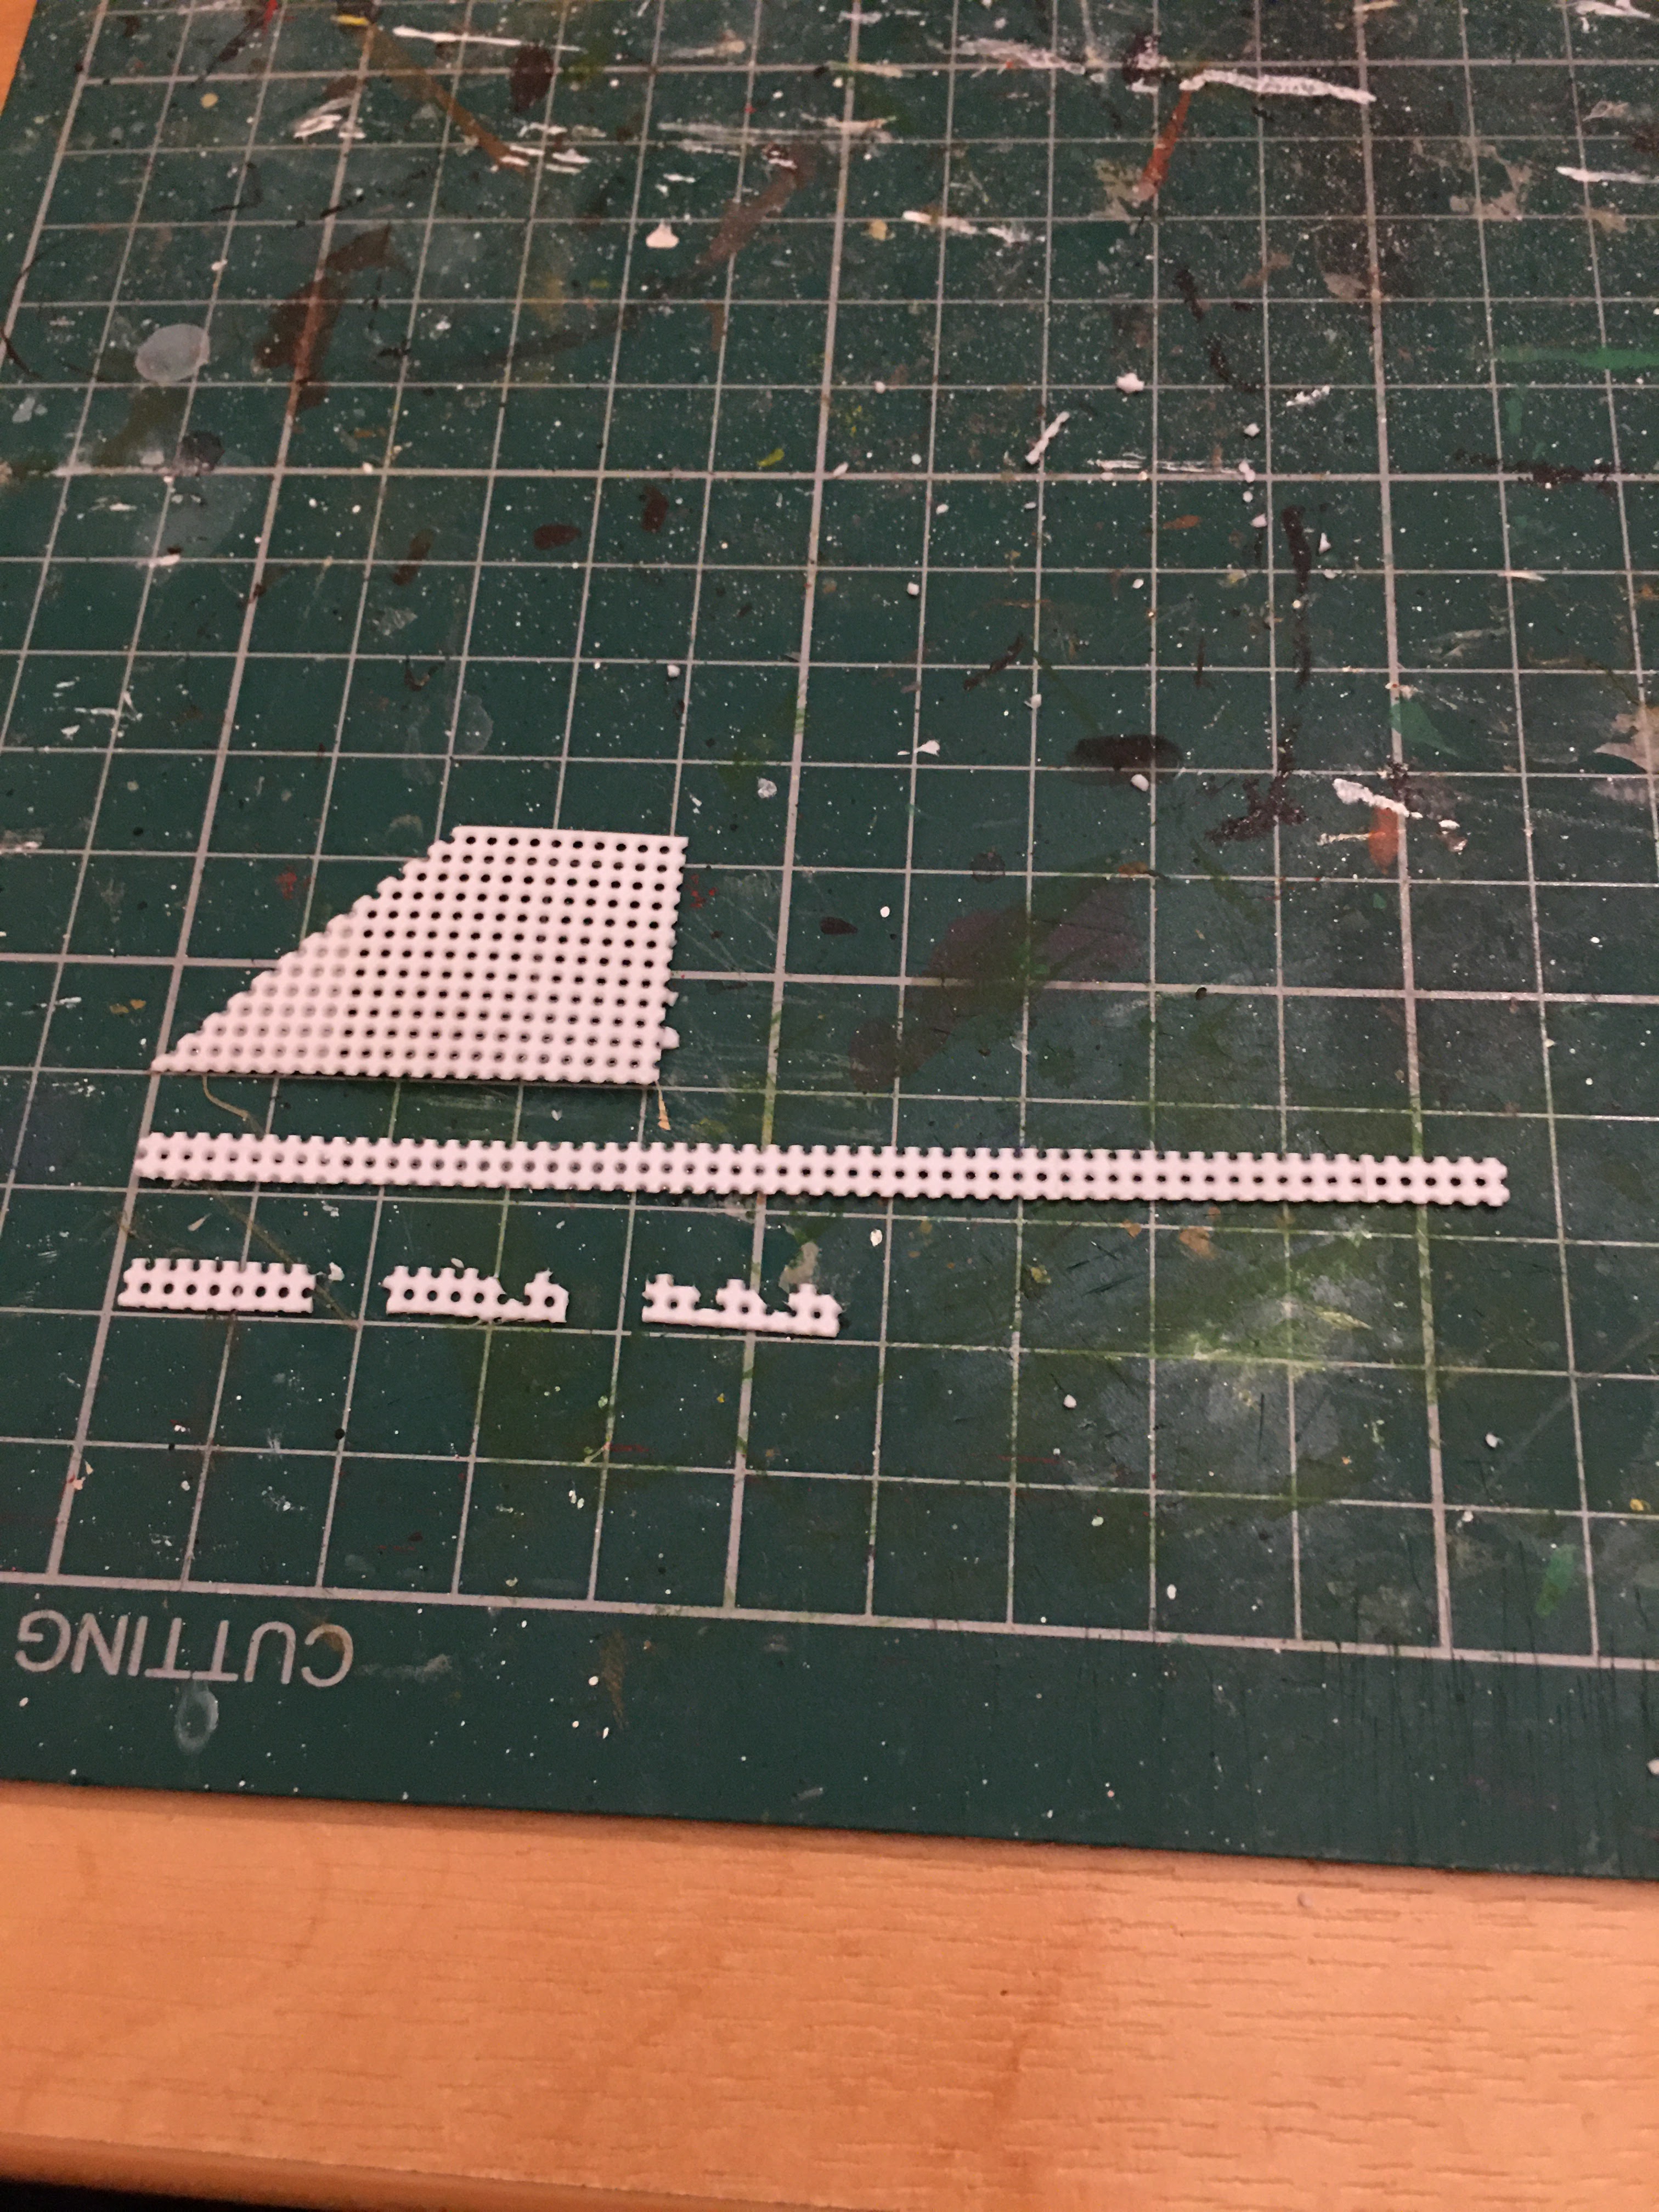
The process is slow and unbelievably fiddly.  I sharp scalpel blade is essential along with a good pair of scissors for the longer cuts.  The stages of the process are shown in the image below.

The stages are in sequence top to bottom and left to right

I had a small offcut (top of the image) which I used in the trial run.  For the second run I cut a longer strip.  The important point is that you keep a solid line at the base of the strip, and then cut above the top of the next full grid so that stubs are left sticking up which will be the 'riders'.  Next cut the long strip into shorter sections in my case of eight stubs and keeping part of the horizontal line of plastic sticking out front and back (this will be the horses head and rump.  Now comes the tricky bit, trimming this strip into shapes that vaguely resemble horses and riders seen from the side.  Starting at the end of the strip (on the right in the image) trim out every third vertical and the stub over the rear vertical on each 'horse'.  This leaves you with a single grid square with three stubs one at either end of the top horizontal and one above the front 'leg'.  cut the back corner of each horses body at 45 degrees to create a tail.  Okay so the rider is too far forward sat over the front leg, but it looks like a line of horses.

Not a great image but you can see the size comparison

The bad news is that the individual strips are too thin and I had to glue two together to get a decent cross section view.  The good news is that in groups they look OK.  The worst news is that I would need to make a Metric Sh!t Ton of the little blighters.  I may try to get a slightly larger grid say 10 squares to the inch which may not require two strips to be glued side by side.  So it's off to the local hobby emporium to see what may be obtained before I try full scale production.  Or it may still be easier to buy from Irregular, but if I don't try I won't know!

2mm scratch building eh?  You don't have to bonkers to try this, but you may well be when you finish!


Sunday, 16 June 2024

Fast Play Pike and Shot - Armies at Edgehill

The first pair of armies are not the greatest fighting forces ever, but they do have some interesting points.  Two different tactical doctrines were used by the opponents Swedish vs Dutch.  Prince Rupert forcing his Uncles army to fight using tactics they didn't really have the training in while Essex stuck with the tried and tested Dutch system.

De Gomme's plan of the Royalist deployment. Parliament's forces are off the top of the plan
(source Royal Collection Trust website)

The Royalist deployment is interesting as it used the four squadron brigade structure (if De Gomme's plan is accurate and there is no reason to think it isn't) which had been tried and abandoned by the Swedes a decade earlier.  This placed one squadron in each brigade to the rear as a reserve of sorts and required some complex drill to bring it forward into action.  As a result up to a quarter of each brigade's manpower may not have been available in the initial attack unless the brigades had time to 'shake their lines out' which in my view wasn't likely.  I take that view due to the Swedes abandoning the four squadron brigade in favour of one with three brigades, which would have been easier to deploy for action and the fact that De Gomme's plan shows just enough space between the front three Brigades to allow the rear two to advance into the line of battle.

 By comparison while he is often considered cautious and conservative in outlook, Essex played to the strengths of his untried army and the experience of his officers.  His brigades deployed in chequerboard formations with gaps in the front line to allow the second line to advance.

The Royalist cavalry were deployed three ranks deep and supported by dragoons for added firepower.  Both wings had a small reserve brigade behind the front line.  This was not a chequerboard formed by individual troops of cavalry but by the larger squadron or regimental formations.

By comparison Parliament's horse where in deeper eight rank formations intended to allow the use of rolling firepower.  Individual squadrons were deployed chequerboard here as well although Ramsey may have abandoned that deployment on his wing and brought the second line up to join the first to minimise the advantage of the longer frontage enjoyed by the Royalist horse.  Like the Royalists they were supported by shot both dragoons and detachments of shot.

It seems that Parliament's forces were better equipped with a higher proportion of musket to pike than the Royalists in the infantry brigades.  I have worked on the basis of Parliament being 2:1 ratio and Royalists being 1:1.  The exception to that is Ballard's Brigade where both Holles' and Ballard's Regiments have detached significant numbers of shot to support the cavalry on their flank these I have reduced the headcount of the main brigade by the number of musketeers deployed as commanded shot and reduced them to a 2:3 ratio.  I have placed a battery of artillery with each army but have not allocated any light guns either to brigades or as stand alone guns, so that is a decision for you to take if you play the game.

The order of battle is drawn from the excellent book Edghill: The Battle Re-Interpreted by Scott, Turton and von Arni.  My version has more information on unit strengths. pike to shot ratios and number of ranks in each formation but I have had to remove this to make the list fit into the blogger format!

Edgehill 23 October 1642
Unit Statistics
Parliament ArmyConfidenceShootingClose Cbt
Dutch formations
Right WingSir William Balfour
Sir William Balfour'sNervous04
Lord General'sNervous04
Fielding'sNervous04
Col John Browne's DragoonsSteady22
Col James Wardlow's dragoonsSteady22
CentreThe Earl of Essex
Sir John Meldrum's BrigadeSteady45
Col. Charles Essex's BrigadeNervous46
Sir Thomas Ballard's BrigadeSteady46
Reserve
Sir Philip Stapleton's BrigadecuirassiersSteady05
Left WingSir James Ramsay
Sir James Ramsay'sNervous04
Waller'sNervous04
Goodwin'sNervous04
Sandy's & Bedford'sNervous04
Urry'sNervous04
Holles Musketeer DetachmentNervous22
Ballard's Musketeer DetachmentSteady22
Independent
Field Artillery6 gunsNervous11
Royalist Army
Swedish formations
Right WingPrince Rupert
Rupert'sKeen05
MauricesSteady04
Prince of WalesSteady05
Stuarts (King's Lifeguard)Keen04
Byron's Brigade (2nd line)Steady05
Usher's Dragoons (Dismounted)3 troopsSteady11
Usher's Dragoons (Mounted)Steady01
CentreSir Jacob Astleyloose 1/4 to reserve
Charles Gerrard's BrigadeSteady35
Richard Fielding's BrigadeSteady36
Henry Wentorth's BrigadeSteady35
Lord Belasyse's BrigadeSteady35
Sir Nicholas Byron's BrigadeSteady35
Left WingLord Wilmot
Wilmot'sSteady04
Grandison'sSteady04
Carnavon'sSteady04
Digby's Brigade (2nd line)Steady04
Aston's HorseSteady04
Aston's Dragoons (Dismounted)12 TroopsSteady22
Aston's Dragoons (Mounted)Steady02
Independent
Field Artillery6 gunsNervous11
The Gentlemen PensionersCuirassiersKeen03

The battlefield

I used the maps in the Edgehill book to create a simplified version of the battlefield.  I’m ignoring the slope of Edgehill itself by starting the action after the Royalists have descended to it’s base.  I have included some hills on Essex’s side of the field and some field boundaries where these had an impact on the fighting.  All of those features are rough ground.


Welcome to the Battle of Edgehill October 23 1642.