Showing posts with label Buildings. Show all posts

Sunday, 22 May 2022

The painting table - May 2022

My painting table is unusually crowded at the moment.  Mainly this is due to the 2mm ACW production line.  On the table are bases that just need the bases a dry brushing in green so they will be out of the way PDQ.  Towards the top right are a couple of 2mm artillery bases but I can't rebase these until more MDF bases arrive in the relevant size

There are also some Brigade Models small scale scenery buildings from their Medieval and ACW ranges and some 6mm Hun Light cavalry, from both Irregular and Baccus. The later have been waiting on my attention for quite a while now!  There are also a few bits n bobs awaiting repurposing for my 6mm ancient armies and a small number of O8 3mm armoured vehicles for the 1980's cold war gone hot games.

The current state of play

I'm going to try to make inroads into these before I post a June painting table update, well it would be embarrassing to keep posting the same picture wouldn't it!  Lot's to do and so little time to do it so if I don't make progress feel free to nag at me!

Monday, 9 May 2022

New Housing from JBM homes

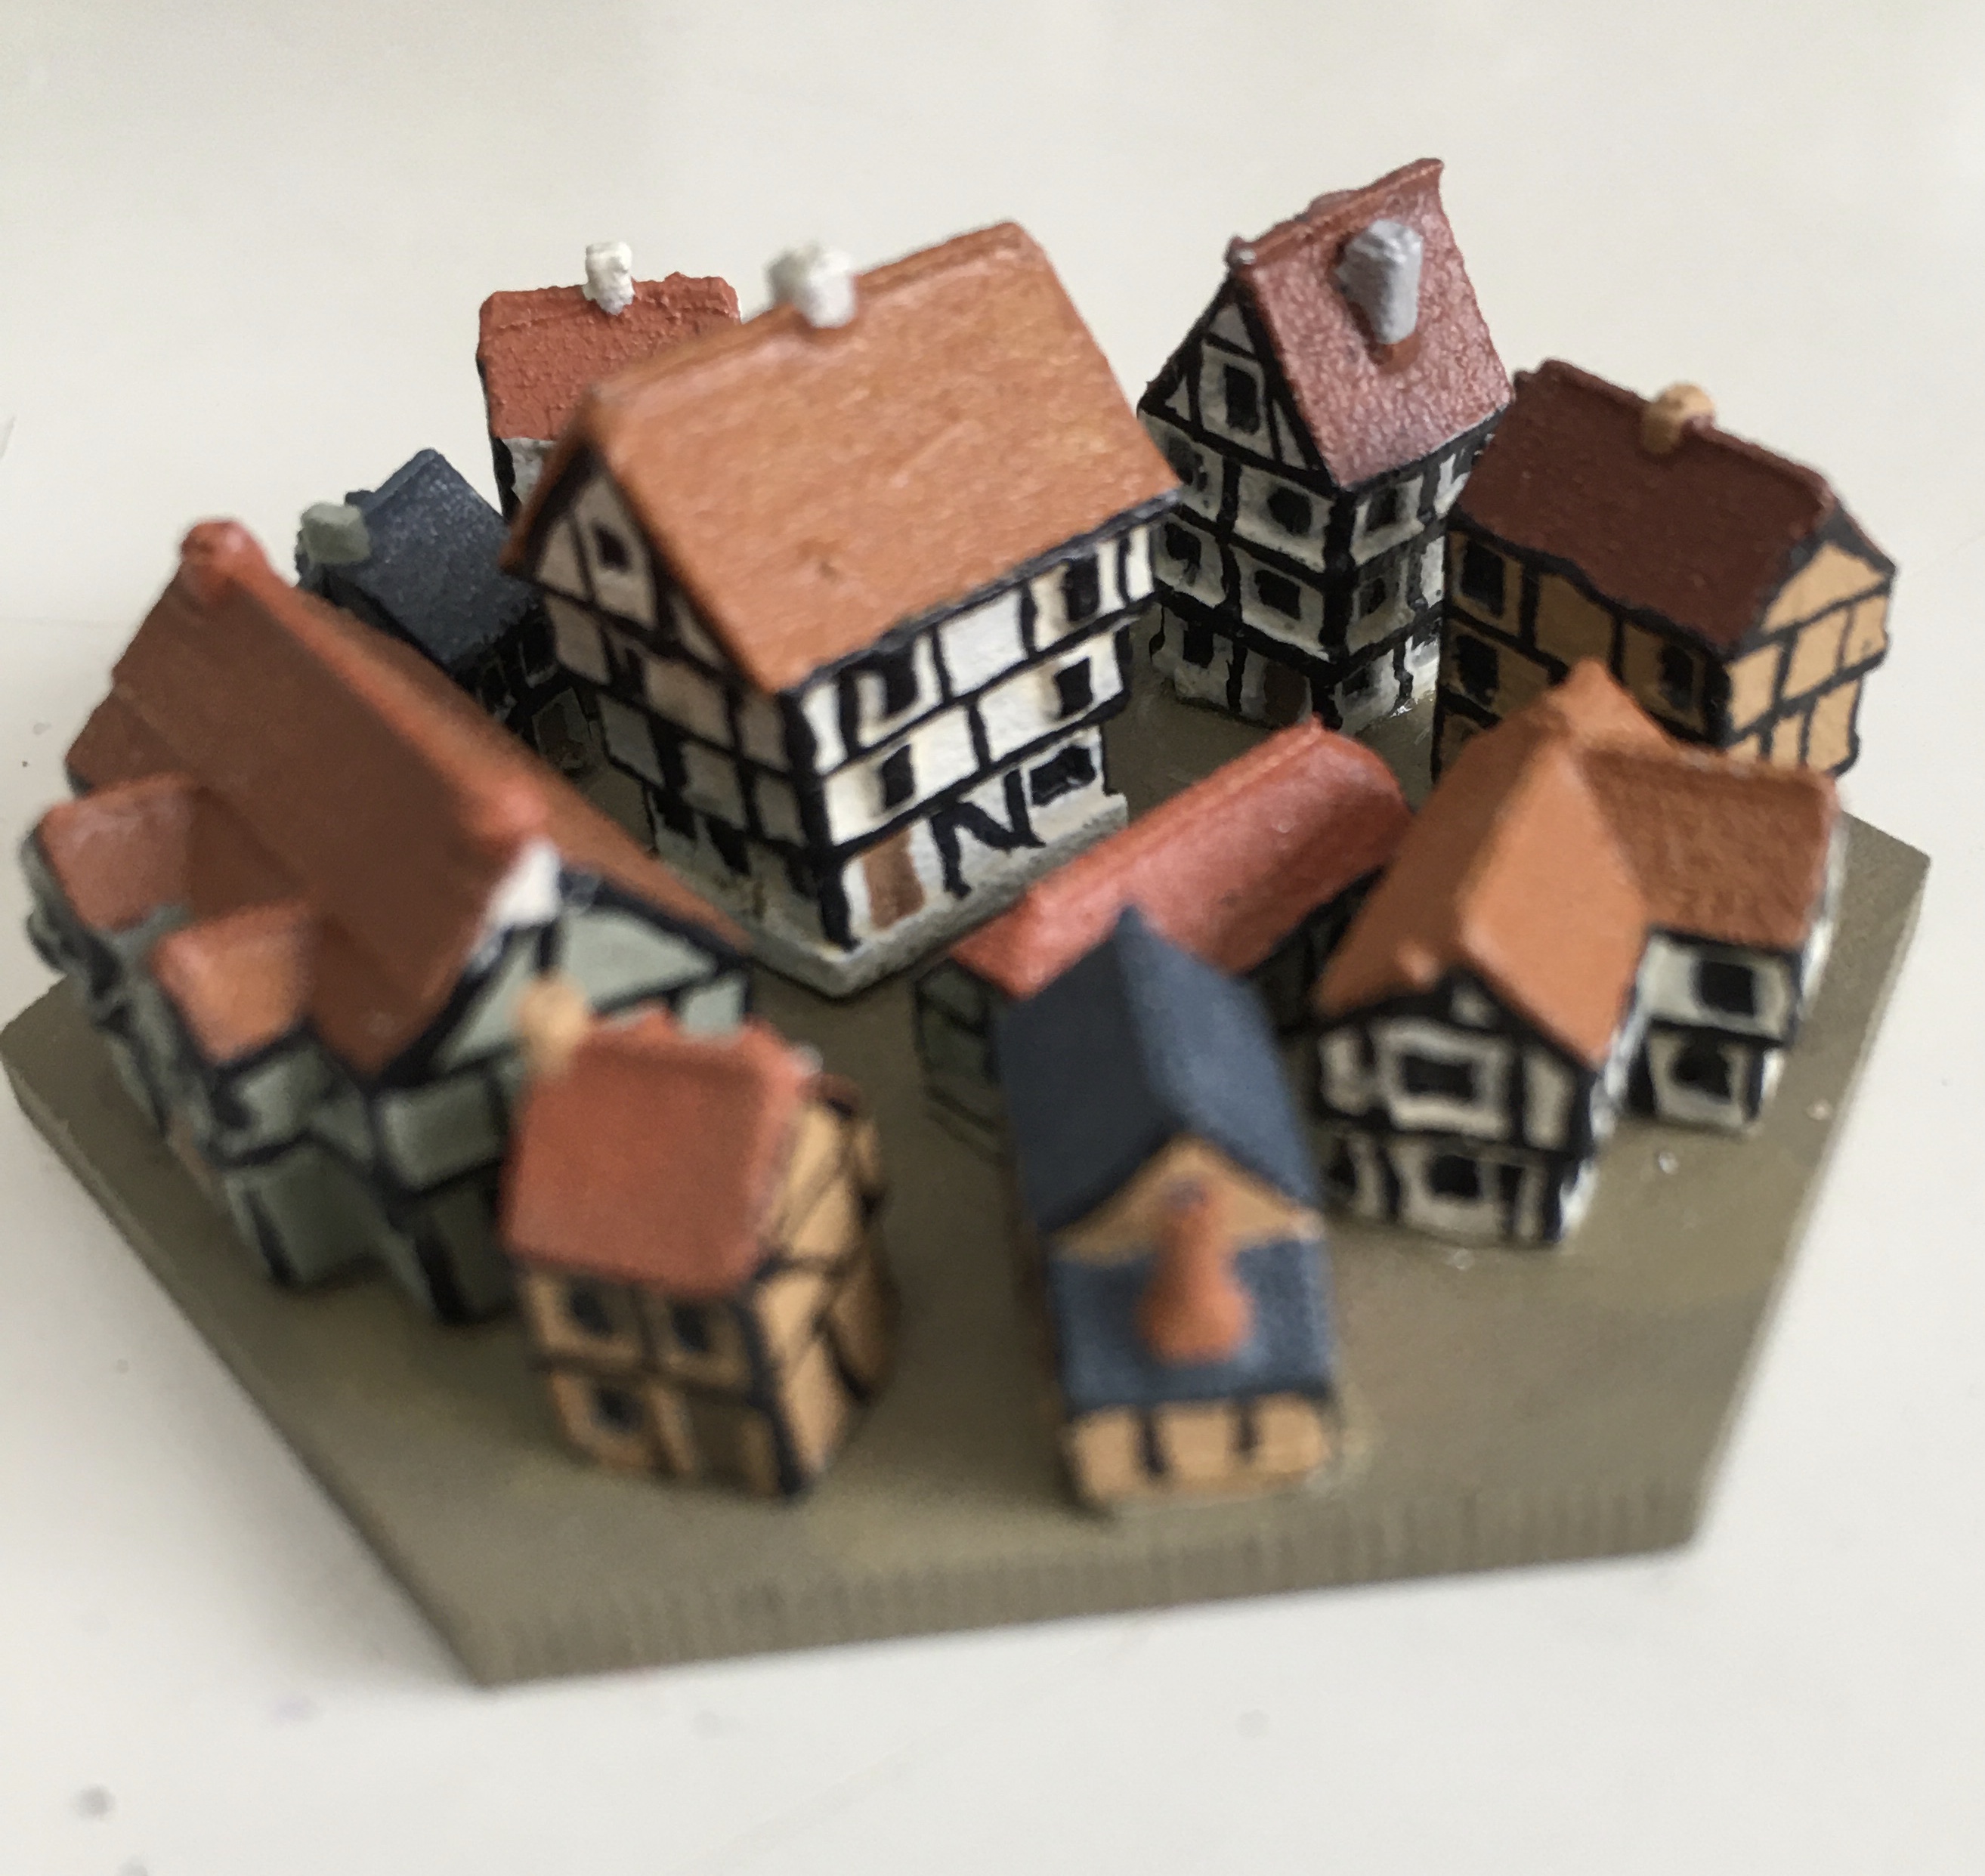
A lovely gift dropped through the letter box this morning.  A nice selection of homes fit for heroes courtesy of the Jolly Broom Man.  All from Brigade Model's 3mm scenic range as far as I can see, painted and very nicely based by JBM himself.  Lots of nice detail and added features.  The clocks on the churches both say four o'clock.  Which seems right as it is always teatime in a traditional English village when we look back on them.


The full collection.  I rather like the multi building bases.

The first village base

I'm thinking this must be the Central Banking District
Probably the main retail area

For some reason this reminds me of Chigley

A Post mill


The big church, that will be the High Anglicans then. 

Lastly the 'big house' where Squire Broom 'isself lives

I have to say that these put my own efforts to shame and I'm going to have to up my game now or the tenants in the houses I created will be raising complaints about the poor standards of maintenance in their village!  JBM thought I might need to rebase them but I'm not so sure I want to do that.

Thank you so much JBM these are exceptional and will be getting lots of use on my game table.

Wednesday, 14 July 2021

Supreme Littleness Design's 3mm scale buildings

The hunt for small scale buildings to use with my 3mm O8 Cold War armies and my Altar of Freedom home made troops has continued. Brigade Models stuff is lovely but slightly too small as is the Irregular Miniatures range. Both are more 2mm so are around a third too small for what I have in mind. I continued to search Google and recently came across Supreme Littleness Designs' offerings. The 3mm range is aimed at European Napoleonic gamers but a fair amount of it is generic enough to work in an ACW setting or a modern European one.

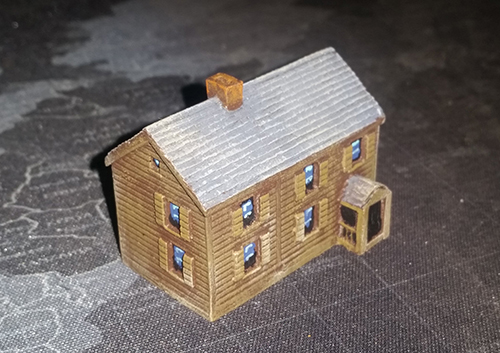
The range is inexpensive for the number of buildings in each set at around £1.50 - £2.50 with there being 2 - 4 buildings per set.  They are made in laser cut MDF which comes as a kit to be assembled (As an aside; am I weird in quite liking the smell of freshly lasered MDF?).  Now the idea of a kit for a 3mm building may seem to be a stretch but trust me it works and has some advantages.  For a start the method used to create the buildings creates great texture for the roofs, which as we look down from a playing vantage point is the main thing we see.  Secondly it allows some customisation of buildings.  Chimneys can be moved around and lean to sheds added or not as the whim takes the modeller.  This is possible due to the design of the models.  Think of the design as a sliced loaf of bread approach.  Each building consists of  vertical slices, mostly shaped like squat arrows.  The arrow point forms the peak of the roof, and the laser cutting creates lines along the edges of the vee of the arrow head that create lines of tiles when the slices are put together.

This how they arrive.  

The two gable ends have some detail laser etched in, windows. brickwork and similar things.  Each building has a number of these vertical slices and two side walls that go along the length of the 'sliced loaf' creating the long walls of the building.  Again these have etched details and they also hide the layers of the core of the building and tie the whole thing together.  It's really rather ingenious.
Examples of two of the completed kits. 

The downsides are that troops cannot be physically placed inside buildings, but that isn't really a thing at this scale anyway and that the fit of the parts does have some natural variation in thickness of the MDF sheet the parts are cut from.  This means that the slices of the building core and the sides may not be a 100% match.  This is easily rectified by either using paper of thin card shims between the slices to lengthen the core or filling the corners with a bit of modelling putty or Milliput.  Don't let this slight issue put you off the buildings are very, very nice indeed.  My only real criticism is that the building instructions are not always as helpful as I might have liked, but I have been able to work out what I was doing by dry fitting the parts and looking at the images of the completed buildings on the website.  The order is accompanied by an email with PDF instructions but these are often just an image and a description of the finished building.

The manufacturer also does buildings in other scales and covers some areas I haven't seen else where in the larger scales like the city walls and buildings of Troy!  Their website is here >>Supreme Littleness Designs Home

Tuesday, 11 August 2020

2mm buildings for Altar of Freedom


After a bit of Googling I have come to the conclusion that I need to scratch build some of the buildings I will need as no one seems to have all the buildings I want and some of the ones which are available may be incorrect.  Beware, what follows is the result of entire minutes of detailed web surfing so may not be accurate! 

That warning aside lets look at the first building I'm interested in Henry Hill House from the First Battle of Manassas/Bull Run.  A number of models of this house are available in different scales and mediums.  Below is the Leven Miniatures 6mm version in resin.

6mm Henry House
From the Leven catalogue - Henry House as most models show it

As with all Leven models it really is a lovely casting but sadly it is too big for 2 or 3mm use and it may not be as the house looked in 1861.  That is no reflection on Mick at Leven,  as every other model of this house is the same.  In fact I used the Leven version as an image as it is such a nice item.  Until an hour ago I would have unflinchingly accepted those models as accurate (damn you Google search).

All of the models I have seen are based on the building which sits on the site now.  The original was very badly damaged during the battle and demolished sometime before 1870.  According to the US Library of Congress >>Link<< the existing building was built on the site of the original property in 1870.  The Library of Congress site says that it was "Built of wood frame construction on a fieldstone foundation, the Henry House originally consisted of two rooms downstairs and two rooms upstairs, with an external chimney centered on the north gable. By 1883 an addition had been constructed at the north end of the house, adding another room to each floor, and including a cellar." 

The chimney is the key as the modern property has the additional two rooms beyond the location of the chimney.  Photo's of the present building clearly show that there is a join at that point with the pre 1883 extension to the left in the photo below.  So it looks as if the original house was smaller than the current one and so smaller than the available models. 

You can see the join in this shot.

Another factor is that several Civil War websites also have the drawing below listed as a drawing of the damage to the Henry House after the battle.  If that is accurate it does have the chimney on the outside of the gable but there are no windows to the upper floors as the roof comes down to sit level with what would be the ground floor rooms' ceiling.  (Source is the Civil War Wiki).  The upstairs rooms would have had to be in a loft or attic space.  Its side doesn't look like the Robinson House which has a prominent extension to the roof forming an attached rear room and porch and the only period photo I have found doesn't have windows in the end elevation of the building.

File:Henry-house-drawing.jpg
Is this really the Henry House after the Battle?

There is also this photograph which is also  described as the Henry House after the battle  But I'm not convinced by this either as it has two chimneys.  Clearly at least one of them must be wrongly identified and possibly both are wrong.

I'm almost certain that Henry House only had the one chimney not two, so where is this?

It can't be the Stone House as, .......well,  its clapboard not stone.  That leaves Sudley Sulphur Springs House which I don't know anything about so can't compare to this image. Of course it could be a different house on a different battlefield altogether.  Its a bit of a puzzle really.  So where does that leave me?  Personally I would go with the design of the current house but shortened and with an external chimney effectively removing the 1880's extension and be very happy with that.

In other small scale news I ordered the Brigade models pack of ACW buildings in 3mm yesterday so I will wait to see how those look and scale to the figures I made before deciding what to do.  All of which simply proves that sometimes I'm far too much of an accuracy nerd for my own good.

Monday, 10 August 2020

Back in front of the keyboard - what have I been up to?

 What have I been up to of late?  Well Mrs E and I took a short holiday, nothing fancy and mostly taken in our garden and then we have had some building work under way which has slowed down my blog output.  Oh and I was binge watching 'The Big Bang Theory' on Netflix as well.  The other thing (and probably of more interest to you) is the progress on the 2mm Altar of Freedom units.

I sent off an order to Irregular Miniatures, just after my last post, for some 2mm castings to cover the HQ elements, Artillery and and command bases and have painted these up and based them since last I posted.  The army command post casting  is really rather nice having tents, picketed horses and a couple of figures gathered around a table.  It comes with a flag attached to one of the tents but I clipped that off.  The rows of small tents are also very useful and the large tents add a bit of variety.  Throw in some covered wagons and all the components for the command stands are sorted!

As you can see from the pictures I have added some overscale flags to the HQ and command bases so they are easier to identify on the table.  I'm ignoring the fact that these are wildly out of scale as they will help show where the centres of operation are.

HQ and Command stands for First Bull Run/ Manassas 

I also bit the bullet and purchased the STL files available from Forward March Studios these only cost $15.00 and provide a huge number of files for troops from late renaissance through to the late 19th century along with some terrain items.  Once I have decided what I need I will arrange to get some  printed. I also lost some time playing with Tinkercad a 3D modelling software package.  This is free on line and although it's not a professional level package I think it will let me edit the STL files from Forward March should I want to.

The thing which is slowing me down is the sourcing of 2mm ACW buildings.  The Altar of Freedom site provides some paper models for free covering some of the best known  buildings from the various Battle sites but although described as 3mm scale I found them a little over sized.  Nearer to 6mm then 3mm in fact.  Still reducing the size on the print settings easily solves that.  What it doesn't solve is the the fact that I find making a 1/900th scale paper building tricky with full scale fingers!  Brigade models do some ACW buildings which include some I can identify as being based upon those on the Bull Run Battlefield as well as from A few others.  They don't do the bigger buildings for say Gettysburg though and I can see why from a commercial perspective.  After all how many Lutheran Seminaries will I, or other ACW gamers, need to buy?  Demand would be limited so its never going to be a priority.  Which is where I was hoping 3D printing might help but 2mm and 3mm is not well catered for at present.

Picture
Nice production values for a free download

I have tried my hand at making some using some old house shaped pieces of hard wood from the bits box which are not too bad but don't look like any of the well known buildings.  They will work as generic buildings for towns and villages but I should really like to have a recognisable Henry House or Stone House available.

Most Altar of Freedom games are played on a 6' x 4' Table, with a very few using a 4' x 4' table.  I have been meaning to create a wargames board for a long time (If I'm honest that's a very, very long time) so I dug out the MDF boards that have been sat in garage since we moved in and stripped off the badly made Bussaco terrain they were covered with, to bring them back to a level surface.  They have warped slightly since I made the Bussaco boards back in 2007 so I need to batten them to take that out and then seal them.  I have four 2' x 4' boards so that's more than enough for what I need.  1" x 2" timber should be enough for the battens and I intend to drill through them and use kitchen unit connectors to fasten them together as required.  A coat of cheap emulsion paint and Bobs yer Mother's Brother and all that.  

Friday, 1 May 2020

Progress in April - the leadpile diminishes

Lockdown has actually slowed down my painting output, odd isn't it.  I suspect it is because while still working, I'm now doing this from home every day and not just three days a week.  That means I have more freetime and things I would have been putting off are getting moved up the priority list which means that figure painting is being moved down!  The good news is that I haven't bought any more figures so the leadpile is still diminishing.

The photos are pretty poor I'm afraid its really sunny here today and my phone camera doesn't seem to cope well with contrast.

As well as the 6mm stuff, I also painted a couple of old castings in 25mm (or possibly 28mm) that have been sitting in the lead pile for a couple of decades or more.  I think they are Grenadier fantasy figures from the 1980's or 90's but I'm not sure.  They don't feature on the leadpile statistics as they aren't part of the 6mm pile.  I'm not sure how I am going to texture the bases yet.  I might try something different from my usual sand and flock approach.  These are big beasts at 30mm from the soles of their feet to their eyeline.  I have an idea in mind to use these to throw a spanner into the works for any French and Indian Wars skirmish games I might host in the future.

Not sure what these are but they will be fine as Sasquatch
During April I managed to complete 11 elements based for DBx or ADLG totalling 60 cavalry figures and 56 foot figures all in glorious 6mm-arama.  This is made up of two Late Roman Auxilia Palatina bases, 2 Sassanid LMI Javelinmen bases, 2 Gothic heavy cavalry (Roman Foederati), and 4 Late Roman Heavy Cavalry (Equites).  On top of which my resin pile is slightly smaller too.  I have completed 3 Dark Age buildings and a Roman villa.  The buildings are a mix of Levan and 2D6 and are as always lovely sculpts.

Auxilia Palatina with home made transfers on the shields
I have used Moorish Infantry for the Daylami LMI as they are Ax(Fast) in DBA and Light Medium Infantry in ADLG so a less well regimented look seemed right.  There are only 12 figures per base compared to 16 for DBA Solid Auxilia or the ADLG Medium Infantry Sword which also helps distinguish them.
Daylami Javelinmen for the Ssassanids.  
The Roman Equites are part of the revamp of my Late Imperial Romans they are Baccus late Imperial Roman Heavy cavalry.  To be honest apart from the lack of cloaks they seem almost identical to the Goth heavy Cavalry.  If need more I may try the earlier period Heavy Cavalry instead just for some variety.

Roman Equites
The Goth heavy cavalry are the first ones I have actually painted as Goths.  All the previous ones to cross the painting table have become Strathclyde Welsh noble cavalry.  I have some Goth medium cavalry in the queue and likewise those will be the first of those to be actual Goths too.  I really like the Gothic range from Baccus, nice sculpts and capable of being proxies for a huge range of other armies as they are generic Dark Age migration period barbarians.  My only historical quibble is that none of the foot have the strange, stepped shoulder, coffin shields, although that would stop them being such useful proxies.


Gothic Heavy Cavalry.  Lets claim it was at dawn and they riding out of the sunrise...or something!
The buildings are a Leven Roman Villa which has been sitting around for a year or more a small viking hut also from leven and two thatched 2D6 dark age buildings.  These work well with the leven anglo-saxon and viking range but seem a bit big compared to the leven Roman villa, still tey are never going to be side by side on the table so it's all fine, and both are simply lovely sculpts.

More Urban sprawl.  I remember when this was all rural drop terrain
The leadpile is still ahead by 265 6mm figures compared by the start of the year, but I have actually painted more cavalry than I bought so I'm ahead there by 19 figures.  Still not going to run out of figures anytime soon though, although I may need to give Irregular Miniatures some of my money for some castings that Baccus don't do, or at least don't sell in small enough numbers for what I need.It's not going to be much of an order mostly foot command figures, but you know how it is once I start to look at the online catalog almost anything could happen!


Thursday, 19 December 2019

Second sight - 2D6 Anglo-Saxon Buildings

Second sight posts will be where I give my thoughts on new products after I have painted, based or for rules after I have played a game with them.  In this case its a chance to provide some pictures of the painted Anglo-Saxon buildings from 2D6 which I gave an initial review of a few days ago.

The evidence for the appearance of Anglo-Saxon housing isn't great as most buildings were of timber construction so little remains of their architecture other than archaeological evidence.  That gives us a good idea of the footprint of the buildings and evidence of the type of construction and the materials used but little or no idea of the look of the finished buildings.  For makers of model buildings that means that they have to look at the best reconstructions of these buildings.  In this case 2D6 based their models on the structures at West Stow Anglo-Saxon village near Bury St Edmunds.   From what I can see on the village's website they are a pretty good reproduction too.  Wattle and Daub is known to have been used and there is good evidence for timber planked structures and that latter style is what 2D6 have modelled.  There is less evidence (that is to say none that I am aware of) as to how they treated the exposed woodwork to preserve it from the elements.  It might have been lime washed or even painted if the building was the hall of a Thegn or an Alderman but for the less wealthy it was probably just as simple to replace planks as they rotted.  I have read that the Anglo-Saxons preferred to use logs split in half as planks rather than flat split logs and the models reflect that.

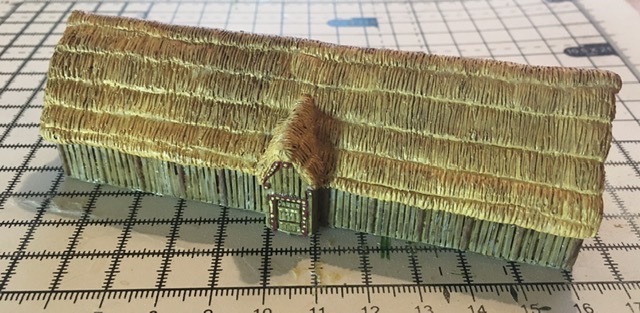
The Great Hall - Timber walls and a thatch roof

Painting is easy as there is good definition to work with.  The thatch is particularly well modeled which means a simple straw yellow block paint with a wash of Agrax earthshade is sufficient.  The newer the thatch the more yellow the block painting needs to be and the lighter the coat of Earthshade.  The downside to the design is that timber and thatch doesn't create a lot of colour contract for the finished paint schemes, which probably reflects the nature of the original structures really well.  Looking at examples of older thatched buildings in real life shows that the thatch quickly weathers to a dark grey-brown colour. As cut timber weathers to a grey almost silver shade I tried a couple of techniques to break things up a bit.  For the timber I started with a Vallejo Green Brown (70.879) washed with Earthshade and then dry brushed a really heavily thinned Vallejo Sky Grey (70,989) which creates a bit of contract.  I also tried block painting in the Sky Grey and then washing with Earthshade which was OK and had the benefit of being fast but wasn't as nice a finish as the grey dry brush.

The pit dwelling in the centre plus two huts the light thatch gives the best contrast
The photos are a bit lighter than reality as the lighting was a bit harsh.  I should really make a light box!

Cottage with wood shingle roof - the timber walls look lighter here than in reality

I'm reasonably happy with the results and will be buying more of the 2D6 buildings as they are released.  There are palisade sections due for release next which will allow me to create fenced enclosures around a Hall complex.  These were usually ovals so some curved sections would be nice. I should really like to see some wattle and daub versions of the existing cottages and Great Hall too to give a bit of variety.

Lastly if you want to order some for yourself the webshop for 2D6 can be found at https://www.2d6wargaming.com/


Thursday, 5 December 2019

First sight - 2D6 Anglo Saxon buildings

Robert Fellows of 2D6 Wargames has very recently released a new range of 6mm Anglo-Saxon resin buildings.  So of course I ordered a set.  Using his online shopping cart was extremely easy (far too easy according to Mrs E) and as with most internet shopping sites I could pay with a bank or credit card via paypal without having a paypal account.  The order came through within a couple of days and I received email updates to show how the shipping process was going throughout.  Packaging was good and I'd be surprised if normal handling in the postal system would be able to damage anything.  Excellent customer service throughout.

The castings themselves are in a fairly dense resin similar to that used by Leven Miniatures for their buildings, so they should be robust enough to withstand tabletop wear and tear.  The resin in my order was a pure white and my first thought was that they probably wouldn't need an undercoat, especially as there little or no trace of any mold release agent.  There were no bubbles in the castings and only one tiny bit of tissue thin flash where resin had over topped the mold and that came straight off without damaging the casting.

The detail is crisp and the buildings are well modelled with good proportions.  Over all they are ever so slightly larger than Leven but not as big as Timecast in size. The doors are the right height for 6mm so these are simply models of larger buildings.  The range currently consists of one large and small pit house, two cottages one thatched and one with a wooden shingled roof and a huge great hall model.  The latter is probably twice the length of the Leven offering. I'd say a Royal Hall as much as a great hall.  The differences in size are fine though as it will simply add some variety to my tabletop settlements.


2D6 (unpainted) and Leven Great Halls

from left to right; Timecasr, 2D6 and Leven cottages
Of course me being me I couldn't wait to slap some paint on at least one of the 2D6 models.  I chose the small pithouse, after all its small so wouldn't take too long to do.  I didn't undercoat it although I did wash it in hot soapy water first.  It seems to have worked OK although time will tell if the paint is going to rub off.  I used a very basic technique a straw yellow base on the thatch and a light green-brown for the timber.  I slapped (er I mean lovingly and carefully brushed) a coat of GW Agrax Earthshade over the whole model.  Lastly I applied a heavily thinned pale grey over the highpoints of the woodwork to simulate weathering.  I think that worked quite well and will do it again.  The entire paint job took under 30 minutes including letting coats dry.  The detail in the castings really helped there.  Its going to be no time at all before I have  good sized Anglo-Saxon town ready for the tabletop.


Front elevation of the painted pit house plenty of details to be seen


And the rear is just as well sculpted

The completed pit house, the grid is centimetre squares
I will be painting the rest of the order over the next couple of days and will post more images once I have done so.

To sum up; I'm very impressed, especially as these are 2D6's first foray into 6mm model buildings.  I'd say we have a significant new player in the resin scenics market which can only be a good thing.  I'm looking forward to seeing what comes next from Robert.


Monday, 2 December 2019

A change of pace

After a couple of weeks where I have been painting Viking Age figues I wanted a bit of a change.  I had some Leven 6mm buildings I had bought last year which for various reasons had either not made it to the painting table or hadn't been finished so I turned to these for a bit of light relief.  Or so I thought, I quickly realised that I had forgotten what techniques I had decided on using to paint buildings and my system for 6mm figures doesn't translate to buildings.  The problem is that they have large areas of flat, often textureless, space and making sure to get a good even cover is difficult.  This easier for the buildings cast in the cream resin than it is for those cast in the grey resin but in both cases I am coming to the conclusion that an undercoat is vital.

I have a mixture of Timecast and Leven buildings.  I prefer the Leven stuff myself but the Timecast Anglo Saxon buildings are still top notch castings and I have no hesitation in mixing the two together, I just prefer the proportions of the Leven ones.

Leven Norman Chapel with the large Anglo Saxon Cottage and the Great Hall behind 


Over the last couple of days I have tidied up the Anglo Saxon Great Hall and started on the two Anglo Saxon Cottages.  Those were fairly simple paint jobs as they are wattle and daub with a thatched roof which don't provide that many options for colour schemes, darker thatch for older roofs white wash v natural cow dung and straw coloured walls and you are about there!  However, lurking at the back of the queue was a Norman Chapel with stone walls and a slate tiled roof.  There are a couple of examples of this style of church locally so I have a decent handle on the colours for the materials but getting them right on the model was another thing entirely!  The variance in tone from block to block of the sandstone is really causing me some heartache as I just can't get it to look right.  It probably doesn't help that I studied Geology in my youth and I know that a rock isn't just a rock.  Sandstone colours vary based on the individual grains of sediment which up the rock, those in turn vary based upon the rocks that were eroded to create the sand that is the basis of the sandstone.  Sandy Limestones look different to Gritstones and so it goes.  I'm two far into the red sandstone end of the spectrum which is fine if i'm recreating Buildings that use Old Red Sandstone or New Red Sandstone but isn't right for south and central England where the stone is a more, well, sandy coloured.  I agonised over that paint scheme until I realised that no matter how hard I try my painting will never rival the detail nature puts into real building stone and probably nobody will care anyway.

I have just order some of 2D6's new Anglo Saxon buildings which should arrive in a few days time so once those arrive I will provide a review of this new manufacturer's products.  The photos on the website look good and reviews of their WW2 stuff have been universally positive so I have high hopes.

Wednesday, 2 January 2019

Whats on the painting table - 2 January 2019

I have done the occasional how to do it article in the past  I thought a more regular update on whats on the work bench might give me an incentive to clear things off it!  Feel free to comment with constructive criticism, suggestions on techniques or to ask how (or why) I do things in the way I do.  If you see a review of a purchase that doesn't crop up in one of these posts it will probably be sat in the lead (or resin) pile waiting it's turn, and not in any way shape or form represent a project that has just stalled.  My projects don't stall they just sit patiently waiting for me to get my ass in gear!

At the moment the next job is terrain items. I have a small village worth  of Leven Miniatures buildings I need to finish off.  These consist mainly of Dark Ages period stuff.  Plus a Roman Villa which I couldn't resist as it was such a lovely design.  For those who haven't yet seen Leven Miniatures in the flesh, they are lovely castings.  The range is entirely 6mm and covers most wargaming periods.  If It's not in the range contact them and ask if it could be added, Mick (the owner) is very helpful and will seriously consider creating items to fill gaps in the range.  His customer service is first rate too.  I ordered some Small Saxon Roundhouses and received the Orc Huts from the fantasy range in error.  I contacted Mick who sent out the correct items by return and told me to keep the Orc Huts rather than send them back.  I'm sure I will find a use for them before long.

Leven 6mm village awaiting my attention
The buildings are cast in a resin which holds the details really well.  Apart from the very occasional small bubble I have never had a bad casting from Leven and they do paint up really nicely. Compared with the Timecast buildings I have the resin is slightly less weighty which may be why there is such good detail as I expect a thinner resin would allow a mould with more detail to be used. I like the fact that the buildings dimensions aren't changed to match game ground scale.  I have a church model which is an extreme example of this it looks tall and thin because of the distortion.  While it may mean that troops weapons ranges stay realistic compared to the footprint of the building it just looks wrong.  Take a look at the image below to see what I mean.

That church is just weird
I prepare the buildings by washing in hot water with a little washing up liquid and then pat dry to get the worst of the water off.  I then put them to one side for 24 hours to give them time to thoroughly dry out (that's the hardest part of the process as I'm itching to get to work on them by that stage).  I start off with an undercoat in white.  I use white because small scale stuff needs to reflect as much light as it can.  To me black undercoating dulls the colour too much.

I read a long time ago that the smaller the scale the brighter the colours need to be.   The logic is that a real person is still the same size no matter how small they seem to appear due to distance.  So the surface area from which light reflects is always the same and that is what determines the colour you see..  A model is trying to look like the actual thing but has less surface area to reflect light from (everything we see is light reflected from the thing we are looking at).  We have to enhance the effect of colour to offset the smaller surface area hence white undercoat and brighter colours.

I start by block painting the main areas and then add the details.  I go over and touch up any paint that has gone over the edges of the casting area I want it to be restricted to and then ink wash in a brown.  Lately I have gone over to Agrax Earthshade by GW.  The reason being it acts as a filter rather than just a shader.  Meaning it gives a very thin cover to everything rather than just pooling in the low points.  That ties the colour schemes together.  As a nod to zenithial lighting I hold the casting upside down while I apply the wash.


My two favourite models so far are the Saxon Great Hall and the Roman Villa.  It may not be a coincidence that these are both larger buildings.

Saxon Great Hall

Roman Villa - part painted


Wednesday, 19 August 2015

Urban Sprawl

I took delivery of some of Brigade Model's small scale scenery range last week.  They arrived within three days of ordering online which is a decent turn around time by anyone standards.  The items I bought were the Small English Churches, the Agricultural buildings set and the Normandy village set.   I choose these as they gave a range of buildings which span several centuries and can be happily used (with one or two exceptions) for 17th through to 20th century western Europe.

The Small English Church set

The castings were very crisp with good detail and a slightly granular surface texture which suggests that the masters might have been 3D printed.  It also helps with painting if you are using a dry brush technique as the surface texture helps grab the dry brushed paint.  There was minimal flash mainly from air channels I think, and not much in the way of visible mould  lines.  They did need a wash to remove the traces of mould release agent though.  Of the items I bought my favourites were the churches.  They all appear to be based on real English churches from the Sussex area.


Agricultural Buildings

Although the range is described as being 3mm it is fine for use alongside 2mm figures.  The doors scale to the right height and the building footprints are not excessive.  The ratio between height and foot print hasn't been adjusted as with some other ranges I have bought in the past for larger figure scales, so that the buildings proportions look correct rather than being over high for the size of the horizontal dimensions.

Normandy Village - 20th Century styles at the rear


The buildings paint up well.  I used the technique I use for 1/300th scale AFVs, as shown on the excellent Ritterkreig 6mm WW2 site.  Undercoat in white, add an ink wash to bring up the detail, block in the main colours, and dry brush for high lights.  I then pick out any detail like doors, windows and ridge lines and varnish.  One trick is to use contrasting tones between roof and walls to give definition.

 
I have posted images of two of the churches to give an idea of how well they paint up, remember these are both less than 4cm long!  The detail is far superior to the Irregular Miniatures buildings for this scale, so they will be my range of choice where they cover the structures I want.  Look out for them to feature in a game before too long.