Showing posts with label Wargame scenarios.. Show all posts

Friday, 12 December 2025

Fighting the Thirty Years War - Battle of Wimpfen 1622

The Through the Square Window rules include a lot of useful additional information including some orders of battle.  One of those is The Battle of  Wimpfen 1622.  The orbat is in Guide 3 covering the forces of Margrave George Frederick of Baden Durlech (No, I hadn't heard of him before either).   What intrigued me was that it involves the use of "Battle Wagons".  I immediately thought of Hussite style war wagons and well, you know, the 'ooh shiney' complex kicked in and I found I really needed some war wagons.  The orbat only includes estimates for Baden Durlech's army so I started digging.  When I started to look a bit deeper into things I found the painting below (via Wikipedia).

The Battle of Wimpfen 1622 By Sebastiaen Vrancx (original in The Hermitage Museum)

This seems to show something more like a protected camp with a defence of wild west looking covered wagons rather than Hussite style armoured and garrisoned mobile forts.  What I did like was that the wagons are not all covered in boring off white canvas.  No, there are some boring brick red and black (or at least very dark grey) covers as well.  On the plus side the painting seems to show cannon muzzles pointing out of the rear of some of them. The orbat in the rules describes these as grape shooters and gives special rules for their use.  The period images I have found term it a 'wagonburg'.  As an aside, the Wikipedia image of the Vrancx painting is worth a good look as it can be magnified and there is a lot of interesting detail in there.  

Wood cut of the battle by the workshop of Eberhard Kieser  The 'Wagonburg' is at points D on the left side

Next up (above) is a woodcut image of the battle.  I'm not clear when this was created although Wikipedia says it was scanned from a 1960 tourist guide!  Keiser himself died in 1631 so it is likely to be near contemporary to the battle.  The nature of the wagons used in the wagonburg isn't incredibly clear in the woodcut but again it looks like covered wagons.  It does give a nice overview of the battlefield though along with some information on the number of units deployed by the two forces.

This version is by Matthäus Merian and shows the Catholic League formations clearly

Merian's engraving above lists the wagonburg in the key but I cannot actually find them in the image.  It is a view from the Catholic/Imperial side and clearly shows Tilly's Baggage train around Wimpfen itself.   My feeling is that the infantry formations depicted are more accurate than those shown in the Kieser woodcut.  Flags are inside the pike blocks and the catholic blocks look to be deployed in double battalia style which Tilly preferred to use.

Double battalions were a style of infantry formation where the usual practice of deploying twice the number of files as there were ranks (and using those pesky square root formulas to determine the formation depth and width) gave the theoretical layout for a single battalia of any given number of men.  A double battalion doubled the number of ranks arrived at using the square root model at the expense of the number of files.  The idea was that it gave more resilience and the pike block had more 'punch' as it had more weight when it came to 'push of pike' (no not a rugby scrum with sticks but the point at which the two blocks were in close combat.  I will discuss what this actually was compared to the modern re-enactors push in a future post). 

The Armies
Baden Durlech's force was a mainly mercenary force and included some cavalry from the army commanded by Ernst von Mansfeld who was campaigning alongside him.  They seem to have been well trained and to have had good morale. However Mansfeld had taken the bulk of his command to join up with Christian of Brunswick to carry out a siege leaving Baden-Durslech on his own. Opposing Baden Durlech was Tilly with Catholic League troops and allied Spanish troops under Don Gonzola Fernandez de Cordoba.  These were experienced well motivated troops and in the case of the Spanish Infantry probably veterans.  This wasn't known by Baden durslech who thought he was only facing Tilly's Catholic League forces.

The order of battle in the rules only gives the Protestant side's forces but I found Nazfiger's order of battle on line, which fills in that lack.   According to him we have the following:

I made some notes and some assumptions on the above that might help.  The number s are the headcounts for each unit as listed by Nazfiger.  For the Spanish the nationality listed is where the unit was originally raised this has an impact on their quality.  

For the Catholic League it looks like Herzog Holstein's and Wangler's foot were brigaded together under von Scharfenburg.  That would bring them up to roughly the same size as the other League units.  I'm assuming that a half Kartaune is similar to a demi-culverine.

Baden-Durlech's 20 x 8-3pdrs are probably the grape shooters in the wagons.  The wagons are not listed but the rules give 10 bases of wagons and the illustrations show a minimum of eight (in the Vrancx) and could be showing 20 -30 plus in the Keiser.

The style of the cavalry is a little more difficult (apart from where it is clearly described).  As a default I'd say treat them as Kuirassiers except from the baden Foot Guards who you might want to consider as Dragoons or Harquebusiers in keeping with the fact that they are infantry who have been mounted on horses.

I'm assuming the Spanish foot are well trained with good morale and the Spanish raised  tercios could be professional with the cavalry being lower rated than the foot.  Accounts say that Baden-Durlech's troops were well trained and had good morale and Tilly's would be at least as good.

The battlefield

The table divided into 305mm (1 foot) squares.  Ground scale is roughly 1mm to 2 paces

The table is shown with the right hand short edge being the North.  Red lines are roads although these are at best gravelled.  Wimpfen was walled and had 'modern' earth work defences.  Obereisheim seems to have had some sort of ramparts from the Keiser print.  Biberach also seems to have had some defensive works although it is hard to be sure from the period prints.  Biberach lies on a tributary of the River Neckar called the Bollinger Bach.  As there are bridges over this and the Neckar I'm assuming they cannot easily be crossed.  The brown line running through Wimpfen denotes an area of raised ground.  probably not more than 50 feet higher than the rest of the table at it's highest point.  Black blocks are villages and towns, Green 'splodges' are woods from the prints they seem to be medium density so I would treat them as passable but disordering for foot and not allow cavalry to fight within them.  Lastly the dark yellow curved line shows the rough position of the Protestant wagonburg.

The Protestant forces deploy to the north of the Bollinger Bach and above (west) of the River Neckar but no further forward than Obereisheim.  The Catholic League deploy in the squares containing Wimpfen and the village below Wimpfen on the Neckar.  The Spanish contingent must form a second reserve line.  Tilly's camp and baggage train was close by Wimpfen while the Protestant baggae was in and around Biberach (except those wagons used in the defensive line).

The events of the actual battle

The Battle commenced around 11.00am and was closely fought.  It seems that sheer luck played a large part in creating a Catholic victory.  This was from a random artillery shot detonating the Protestant magazine after around seven hours fighting.   This panicked the Protestant forces and allowed Tilly's men to force the Wagonburg line of defence.   How to create this as an event on the tabletop is a tricky one. Some kind of random event, but without knowing the chance of it happening it is hard to say how to do it. Perhaps draw a card from a standard playing card pack every time a League/Spanish artillery piece fires and if a specified card or cards are drawn we have a big Boom!  The number of trigger cards I leave up to you but I suggest this mechanism doesn't come into play before the equivalent of 2 game hours of fighting has elapsed.  Once the magazine explodes all Protestant foot should be penalised by reducing their morale state.  I'm not being very specific as you would have to tailor this for your rules of choice.

Easier to deal with was the fact that Tilly kept the Spanish in reserve in case Mansfeld's army returned to link up with Baden Durlech.  I would have a random number count down system to trigger Tilly releasing the reserve.  Probably rolling a dice each turn and counting the  cumulative total until a predetermined number is reached.  I would make the trigger number a multiple of 3.5 (average roll on 1D6) with the multiplier being determined by how many game turns (on average) I want Tilly to wait before releasing the Spanish.  I'd also suggest that they are automatically released if the protestant magazine explodes. 

Refighting the battle
I probably won't get to have a crack at this until after Christmas.   I need to obtain some wagons for Baden Durlech, a few more pike and shot units to represent the Catholic army's large battalions and some more Kuirassiers.  That's more lead  added to the unpainted mountain (sigh!).  If anyone gives this a try before I do please make a comment on how it went.                                                                                                         

Friday, 1 September 2023

Wargame scenario - Last stand in the Cotswolds -21 March 1645

To be fully accurate it was actually counted as 1645 by contemporaries, although by our reckoning it was actually fought on 1 April 1646 (see footnote marked *).  The place is Stow on the Wolds and the battle that is about to be fought sees the last active Royalist Field Army brought to bay.  Traditionally it is seen as the last battle of the First Civil War.

Background

Sir Jacob Astley had been trying to gather troops from isolated garrisons along the Welsh borders to both lift the siege of Oxford and to re-enforce the garrison there.  The men he has gathered have been pulled together by stripping the isolated garrisons of the West Midlands. They are experienced soldiers,  many of them being Reformado officers serving in the ranks after their regiments have been destroyed or so reduced in size as to no longer need them.  As he pushed south Astley found himself being pursued by three Parliamentarian forces.  He is cut off from Oxford by two New Model Army cavalry regiments under Fleetwood and Whalley somewhere between Oxford and Burford so on 20th March he turns to make a stand near Stow.  Facing him are troops from the Parliamentarian garrisons of Gloucester, and Hereford along with cavalry released following the fall of the Royalist garrison at Chester.

The Battlefield

The exact location of the battle is disputed  the traditional site by Donnington village, north of Stow, has yielded little evidence to support the idea that a significant field action was fought there while a site closer to Stow does show evidence of spent musket and pistol balls.  That evidence also suggests a running fight or fighting withdrawal into Stow, which accords with period descriptions of the fight.  Accordingly I have placed the scenario on the outskirts of the modern town (just north of the Tesco Store if you want to visit!).

The Battlefield - played on a 4 x 4 foot table

The centre of the table is a ridge line with Stow on the Wold sitting on the main North South route, the old Roman Fosse Way. Branching off towards the South East is the road to Burford and Oxford.  The Fosse Way exits directly south of Stow and leads to Cirencester.  Running around the table edge from there in an anti-clockwise direction are roads to Gloucester, Evesham, Coventry and Leicester.

The Parliamentarians deploy first, any where behind a line running from the centre of the Eastern edge and the centre of the Northern edge.  The Royalists then deploy anywhere within the four central squares.  This represents the Royalists covering their route towards Oxford and having a line of sight onto the advancing Parliamentarian forces.

The Forces

Sorting out an order of battle for Stow requires an element of guesswork (as do most battles of the period). The best estimates I could find on line are as follow:

Royalist 1,500 foot, 200 dragoons & 900 Horse  CinC - Sir Jacob Astley (Infantry centre), Sir William Vaughan (Left  cavalry wing), Sir Charles Lucas (Right cavalry wing)

Parliament 2,000 Foot, 200 dragoons & 1,500 Horse - CinC Col Thomas Morgan (Infantry centre), Sir William Brereton (Right cavalry wing),  Col John Birch (Left cavalry wing)

This is my conjectural order of battle.  Dragoons placed between the Horse are blocks of 50 men

Royalist Horse and Dragoons I would rate as veteran and trained,  The foot should (using the deployment above) have two veteran and trained battalia and one experienced and trained battalia.  The artillery I would class as experienced and trained.  

Parliament are a more mixed bag.  Brereton's wing of Horse and Dragoons I'd class as veteran and trained although I might be tempted to drop one squadron to experienced and trained.  Birch's wing of Horse I would class as experienced and trained.  The infantry I would consider to be experienced and trained.  Again I'd class the artillery as experienced and trained.

The order of battle above is entirely fictional so do feel free to tinker with it.  At some point I need to get my hands on the Helion book on the battle 'The Last Army' as the above is the result of minutes of detailed research on Google!

I considered giving "In Deo Veritas" a run out for this scenario but in the end went with my own home brew set "Stand with me to fight the field" as I wanted some flexibility in unit sizes.  In Deo Veritas assumes units to be of one of three standard sizes which slightly grates when trying to create a historical OOB.  It should be possible to rework my OOB and battlefield plan to suit your preferred rules.

I'm planning on inflicting this scenario on Paul Dawson on our next get together so there will be an after action report once that has happened.

* Now for the footnote; this makes my headache!

England didn't change from the  Julian to Gregorian calendar until 1752.  The change had two effects the change over year lost 11 days and the date upon which the old year ended and the new year began changed from 25 March to 1 January.  So when looking at dates in original documents the English Gregorian calendar year runs from 25 March to the following 24 March but the period between 1 January and 24 March sits in the 'wrong' year.  The difference between the two calendars was 11 days at the time the adjustment occurred so 21 March 1645 Julian, is 1st April 1646 Gregorian  (it's to do with errors in the application of leap years).   

The date of the battle on a contemporary grave memorial is given as 21 March 1645 hence my saying 1 April 1646 for the corrected date.  That said, most historians change the year but ignore the missing days and state 21 March 1646, as it is less confusing.  Just to make matters even more 'interesting' Scotland and much of Western Europe had already changed to the Gregorian calendar so there was an international date line between England and Scotland!

It always intrigues me that tales of ghosts appearing on anniversaries of events seem to give the ghost the ability to update their appearance to meet the modern calendar date!  Who knew the dead were so savvy.

Saturday, 3 April 2021

Cold War Gone Hot - the first campaign map

 As mentioned in the last post I have created a campaign map which should cover the first 24 hours of a Warsaw Pact attack, give or take a couple of hours.  Apologies for the slightly washed out reproduction I need to play around with the scanner settings to get a bit more colour saturation. 

The campaign map for the initial fighting 

Soviet Forces will enter at the right hand side and try to exit from the left. I will be covering this frontage with BAOR forces.  Recon units will cover the area in the first two rows of rectangles (each one of which is a game table measuring 6' by 4').  Heavier formations will be to the west.  I will probably deploy a brigade sized battlegroup to cover the area consisting of a Chieftain regiment, one or possibly two mechanised infantry battalions plus a couple of Milan platoons, A Striker detachment (mounting Swingfire ATGM) and a Blowpipe AAGM detachment.  Artillery will be offboard.  Soviets will have (initially) three Motorised Rifle Regiments backed up with a T-62 Regiment. Stacked up behind that will be a T-64 Tank Regiment.  Which means that I need to get on with the painting and basing!  15 T-64As are painted and will be based by later today.

Based upon my initial test game it took the Soviets 36 game minutes to achieve their initial objectives on a 6' x 4' table and they would perhaps probably needed another 24 minutes (two turns) to get forces off the table excluding time for the second echelon to come up.  I intend throwing WarPac lines of assault open to input both through this blog and elsewhere on Face Book and through real life (TM pending) contacts.  So it is probably worth mentioning that WarPac forces may enter the map on any of the roads marked with a red arrow and the rules require battalions to be kept together.  Other than that express your opinions on the best WarPac operational plan for day one in the comments.  I will throw the actual table tactics open in due course.


Friday, 3 July 2020

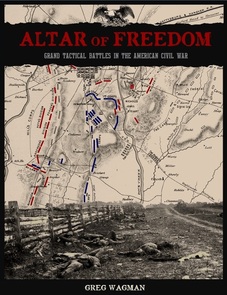
First Sight - Altar of Freedom ACW rules

You know the saying "I need [insert name of thing you don't need here] like I need a hole in the head", well yes it's that, although I could do without any additional holes.  This time it's the American Civil War.  By way of explanation or possibly excuse I should state that after ancient period wargaming the other big period I used to game was the American Civil War in 20mm using Airfix figures.  This stemmed in part from my having been an ACW re-enactor back in the 1970's before I became embroiled in the homegrown variety of civil strife.

It's "The Mild Bunch" circa 1977.
A few days ago while browsing the web I came across a review of a set of rules called 'Altar of Freedom' and they sounded like they were using some interesting mechanisms.  They were available on Wargames Vault for $15 with scenario books for the major battles in the Eastern and Western Theatres for an additional $15 each, available for a simple couple of clicks of a mouse button.  Online purchases, its  what we do in lockdown and it was my birthday on Sunday and they come as a PDF so no incriminating parcels.  Did I mention that the recommended scale is 6mm too.  It's not my fault it was more than mere flesh could bear.  So I bought a set of the rules and the Eastern theatre scenarios.

Picture
Nice cover art work too
Lets say right from the off these are not rules that work well for solo gaming (although I'm going to see what I can do about that).  This is because of the activation and game turn length mechanisms.  The whole point of the rules is to have a live opponent.  What they do cover really well is the grand tactical level command and control issues that the Army Commander focuses on.  Each manoeuvre element is a brigade, there is no micromanagement of Regimental formations to worry about that's happening down the chain of command and is beneath the interest of the Army command.  No this is a game that focuses on the bigger picture with the objective being that full scale ACW battles can be fought on a reasonable sized table (the biggest needed is 6 feet by 4 feet).  They are tailored to refights of actual battles rather than fictional encounters or point based competition encounters which suits me fine.

The rules a short, crisp and have the minimum of modifiers to combat.  The core of the game is the activation bidding system.  Each player has Army and Divisional commanders represented on the table.  These all have command points available plus some traits that may impact how they can allocate those points, along with some which impact on other things such as combat.  At the start of the turn those points are allocated between divisions to determine the sequence of activation.  Highest bids go first.  Points can only be applied to units in that general's chain of command.  Some points can be held back to be used in the admin phase at the end of the turn (where reserves can be moved and units may attempt to rally amongst other things.  The other important use of these points is to gain control of the turn clock.  The turn clock has a value ( determined by the scenario) after each group of divisions on the same bid value have moved and fought both players throw a dice and the player who controls the clock decides which one to use.  The value on the chosen dice is deducted from the turn clock and then the next set of divisions are moved at the end of those divisions turns the players throw the dice again to count down the turn clock.  Once the turn clock passes zero the turn ends.  So by having control of the turn clock a player who needs to do a lot in a turn can choose the lowest dice rolls and delay the end of the turn or if they want to block the oppositions plans they choose the higher dice rolls.  this can be useful if there are a lot of reserves needing to be brought up or broken units to rally.  Although its a bit 'gamey' it does allow the impact of generalship to be modelled.  The traits assigned to generals reflect their performance on the day of the battle so as army commander the player has to deal with the personalities.  This is something I really like.

The units are generic brigades on standard bases which makes creating the units easy.  They have a numerical modifier to reflect larger or smaller formations or a better or worse performance at a particular engagement  allocated for each battle.

The scenarios cover the major battles of the war with a tablelayout, order of battle and specific traits for the relevant commanders for that battle.  These vary from battle to battle to reflect how they behaved on that specific day.

Of course this being me a confirmed 6mm player I decided to try the rules using 2mm figures as the recommended scale for buildings is 2 mm.  Plus I can make markers quickly and easily to get up and running.  In due course I may use 6mm figures, or I may not!

The website for the game is excellent (a real plus in favour of the rules in fact)  there are free introductory scenarios to download, a free Gettysburg campaign rule set (also free) and a select of paper building's to make (again free).  These can be found here https://www.6mmacw.com/ along with the rules and other helpful advice on building terrain.

So I have a start on Brigade bases and terrain.  So its "On to Richmond" next with a try out of First Manassas as soon as the rest of the units are done.

Sunday, 24 November 2019

The battle of Billington Moor - player briefings.

To complete the battle planning I have created briefing packs for the commanders of each side.  These are drawn from the original scenario but add a bit of period chrome.  I have added one extra game rule.  The royal army has to draw up a deployment before the rebels disclose the battlefield layout.  This is to simulate an army in column of march having to deploy into line of battle without time to think to much.  This is a direct steal from my British Civil Wars rules.  From the evidence we have 17th Century armies had a deployment plan in mind and set up the column of march to allow this to be formed quickly and easily by simply wheeling units into line of battle.  It seemed to fit this situation so I borrowed it.

The briefings are below in case anyone wants to use them.

Billington Moor 798 AD - Alderman Wada’s briefing
The rightful King of Northumbria, King Osbald, has been deposed by the usurper Eardwulf.  His rule lies heavy upon the land, especially yours as his advisors have you marked as a supporter of Osbald.  They are not wrong and news is now come from Mercia that King Ceolwulf will support Osbald’s claim if it is clear that there is support for his return.
Osbald has sent messages to his supporters in and around his land in at Osbaldeston and even now they flock to your side.  Your own folk from your lands around Wadingasham are also here.  If you can march on York more men will come to support the rightful King from his holdings around Osbaldwick.
The is a single problem to the completion of your plans.  Eardwulf has somehow learned of your rising and is close at hand with his army his intention is clear; crush your army and kill it’s leaders.  You are faced with a simple choice fight or desert your folk and flee into exile in Mercia.  For a true born Northumbrian the choice is clear.  We fight.
Your Forces
·                     2 x Generals (4Bd) one representing Wada as CinC
·                     1 x General (Sp)
·                     2 x Hird (4Bd)
·                     1 x Fyrd (Sp) in effect a third poorer quality Hird unit
·                     24 x Fyrd (Sp) or (7Hd) For each 2 x Sp selected 1 x 7Hd must be selected
·                     3 x Archers or Scouts Ps or Fyrd (Sp)
·                     3 x Archers or Scouts (Ps)
·                     3 camps which can be massed together at one point (or the village may be considered the joint camp)

You must form three commands none of which may contain less than 6 elements.  Each must include a general.  The rules are DBA 3 using the Big Battle DBA additional rules.

The Battlefield
This is your land you know it well and can choose the battlefield to suit your forces.  You will deploy on the eastern edge of the selected ground.  The usurper Eardwulf will deploy on the west.
You will select any 9 squares from the map which form a 3 x 3 square as the table to fight the battle upon. The Rivers Ribble and Calder are tested for passability separately to each other.  The standard DBA check is amended so that it is only paltry on a throw of 1, a 2, 3 or 4 makes it slow going and 5 or 6 makes it a slow crossing with effects as per DBA 3.0.  all other streams are 50:50 chance to be either paltry or slow going (DBA scores of 1-4 with no chance of the worst result of a 5-6 arising) The Roman road counts as a track.  The solid green is a steep hill and the green dotted areas are boggy ground.

Choose wisely Alderman, the usurper will be attacking and seems likely to have more Fyrdmen and Hearthtroops than you.  Still God favours the righteous does He not?

Billington Moor 798 AD – King Eardwulf’s briefing
You were acclaimed King by the Witan of Northumbria only a few months ago and already those Mercian Dogs to the south are fomenting unrest.  The reasons are simple King Offa is dead and his successor is weak.  Already Kent and the East Saxons have thrown off the Mercian yoke and Ceolwulf has ridden south and east to crush their armies.  To keep Northumbria from descending upon his northern borders he needs to keep you busy.  If you can defeat this rising then nothing stands in your way both at home and perhaps in extending your rule southwards.
The depraved despot you replaced, Osbert, dare not face you and has roused his supporters, men who hope to thrive on the chaos of civil strife to taking up arms.  They are raising troops in the southwest of your kingdom but you have stolen a march upon them and even now are marching to bring death and destruction upon the rebels.
Your scouts have returned and report the enemy marching towards you from the west perhaps a 1,000 strong or more.  There seem to be many old men and boys with few seasoned warriors capable of standing in the shield wall. Your aim is clear; crush their army and kill it’s leaders.   
Your Forces
  • 3 x Generals (4Bd) the King, Alderman Eardbehrt (Herbert). Herbert's son
  • 6 x Hird (4Bd)
  • 21 x Fyrd (Sp)
  • 3 x Fyrd (7Hd)
  • 3 x Scouts (Ps)
  • 3 x camps which must be placed one per command (the king's camp counts as a double loss if captured)
You must form three commands none of which may contain less than 6 elements.  Each must include a general.  The rules are DBA 3 using the Big Battle DBA additional rules.

The Battlefield
You are advancing from the west.  Before you see the battlefield you must select your troops and draw up a deployment plan (this is to simulate a pre set line of march deploying into line of battle).  You will be the attacker but Wada will select the battlefield by selecting any 9 squares from the map which will form a 3 x 3 square as the table to fight the battle upon.
 The Rivers Ribble and Calder are tested for passability separately to each other.  The standard DBA check is amended so that it is only paltry on a throw of 1, a 2, 3 or 4 makes it slow going and 5 or 6 makes it a slow crossing with effects as per DBA 3.0.  All other streams have a 50:50 chance to be either paltry or slow going (DBA scores of 1-4 with no chance of the worst result of a 5-6 arising) The Roman road counts as a track.  The solid green is a steep hill and the green dotted areas are boggy ground.
Choose you deployment with care for who knows what terrain you will have to fight upon this day and may God in His wisdom grant you the victory.


Friday, 25 October 2019

The Battle of Billington Moor - re jigging the scales

I spent last night working out a couple of representative armies for the game using the lists I created.  This came in at 36 elements a side (obvs!) and about 570 figures a side.  Working towards a headcount of about 1,000 a side means I'm working with a figure to man ratio of 1 figure to 2 men so the armies come in around 1,150 combatants each.  This is where I had to do the rejigging of the game.  The two armies could cover a table top frontage of 1.44 metres each, if no reserves are used and blades don't deploy in depth to get rear support.  Using my original three foot square game table was going to be a touch crowded at that so I needed to rethink things.

I mount 16 figures on each 40mm frontage for spears and blades in two ranks. Assuming three foot a man for spears and blades as a starting point that means that a 40mm element at 2:1 figure to man ratio covers 16 yards.

8 figures x 2 = 16 men
16 men x 1 yd each = 16 Yards....simples!

Maximum army frontage in game scales is 36 elements x 16 yards =  576 yards.  I'm missing a few steps out here regarding frontages for Horde and Psiloi but just go with me as I have assumptions about troop densities built in here.

So 1.44 metres game table equals 576 yards in reality (and yes I know I'm mixing imperial and metric measurements here but stick with me) so 1 metre on the table equals 400 yds of real ground.  The maximum army frontages are 576 yards so the table needs to be at least 1.5 metres square or 600 yards square to scale.  Now that may sound tight but allowing for blades deploying in depth, camp guards and reserves ( Ok probably no reserves these are wargamers we are dealing with after all) the frontages will be less perhaps around a metre or so. The map is going to have to be rescaled in relation to the tabletop to make this work.

Fortunately that wasn't too hard.  Splitting the original squares into nine smaller squares was sufficient.  Each square is roughly 400 yards game scale and 50cms on the table.  Giving us a table of 1.5 square metres or 600 square yards and the figures will fit.  Yes there is a bit (a lot) of fudging with the map but it now all comes together in a reasonable approximation of the correct frontages on the ground without needing a huge table.  The defender can still choose their ground using any 9 map squares which form a larger 3 x 3 square.  I already have the ground picked for my play test.

Saturday, 26 January 2019

Meeting at Bourne Vale - a BCW scenario

 My last BCW scenario was one of the most viewed pages to date so I thought that a second one may prove popular.  This is another early war action set in early 1643.  It's a tight battlefield about 1,000 - 1,500 yards square, so little chance of subtlety here, this is a case of line 'em up and let 'em roll.

The battlefield, lets call the bottom of the sketch 'South'

The battlefield - Bourne's Vale 1643
The battlefield consists of a shallow valley between two low ridges dropping towards boggy ground to the bottom of the table.  The contours would be about 10 foot changes in level if on a map so shallow hills giving some advantages for being uphill but not much else.  The boggy ground should be considered disordering and difficult for horse and foot and impassable for artillery.  The village (Higher Bourne) is a small hamlet of timber framed, wattle and daub, thatched cottages so not much protection from artillery fire.  Lower Bourne has presumably sunk into the bog years ago!

The forces
The Royalists deploy on the left of the map, south of the road and no more than 200 yards from the table edge.  The Parliamentarians deploy on the right also south of the road and no more than  200 yards from the table edge.

Royalist
The Royalists outnumber their opponents having the following troops:

1 x troop of 400 Dragoons - Trained and experienced.
1 x Squadron of 400 Horse - Trained and experienced.
1 x Squadron of 600 Horse - Trained and raw.
1 x Battalia of 600 clubmen - Untrained and raw.
1,000 pikemen Trained and raw
2,000 musketeers Trained and raw
2 light guns Robinettes or similar

The Royalist player may decide how to organise his pike and shot into units see the special rules below.

All Royalist foot are deployed in dutch style 12 ranks deep.  Horse are using Swedish tactics and deploy 3 deep.

They are commanded by Sir Henry Rawlinson a trusted commander with an ability of 4, (meaning he can command 4 units/subordinates directly). He is supported by:

Colonel Arkwright (able to command Foot) trusted and with an ability of 3
Colonel Peaseman (able to command Foot) trusted and ability of 2
Major Southam (able to command Horse and Dragoons) trusted and ability of 2
Captain Walker (able to command Horse) accepted and witha an ability of 2

The guns are commanded by the Gun captains and fall under Rawlinson's direct control

Royalist special rules - you may decide how to allocate the pike and musket into units but must have at least 5 battalia none of which may be below 400 men.  You may draw out a forelorn hope of shot or dismounted dragoons which may deploy an additional 100 yards onto the table if a named commander is with them.  Clubmen count as 1:5 shot to melee weapons and only have arquebus not musket (to represent older or poorly maintained firearms).  In melee they do not count as pike armed but as improvised weapons.

Parliament
Parliament has the following forces:

2 x Squadrons of 300 Horse - Trained and experienced
a further 900 horse - Trained and raw
2 x battalia of 600 foot 2:1 shot to pike - trained and experienced
1 x battalia of 700 foot 5:2 shot to pike - part trained and experienced
1 x Battalia of 600 foot 2:1 shot to pike part trained and raw.
1 x light gun Robinette or similar

All parliamentarian units are using Dutch tactics. They may decide how to organise the 900 horse into units.  See the special rules below.

They are commanded by Colonel James an accepted commander and ability 3.  He is supported by:

Colonel Humble (able to command Horse and foot)accepted and ability 3
Major Ferris (able to command Horse) trusted and ability 3
Captain Carter (able to command Horse and Foot) trusted and ability 2

An accepted commander can add a positive factor to a reaction test while a trusted commander has more of an effect (in my rules +2 as against +1)

Parliament special rules - of the 900 horse yo may divide these as you wish to provide two or three bodies but none of them may be over 500 or less than 150 in strength.

Command special rule
The named officers are able to have more units allocated to their commands then the ability factor.  however, in any given turn they cannot issue more changes of orders to units under their command than their ability value.

Background information
This is a meeting engagement Colonel James expected to meet poorly trained local levies who were assembling at a Royalist muster and is surprised to find a balanced all arms force coming towards him.  He is unable to evade them and there is no better site to stand and fight than this.  In turn Sir Henry having intelligence of Colonel James' movements considered this to be his best chance of defeating the enemy before additional Parliament troops are sent to the area he set out towards the enemy with the intention of bringing them to battle.  He was hoping for a larger advantage in numbers and quality than he actually has.  Both sides objective is to destroy the others ability to fight by breaking the forces facing them.  Its pretty much a traditional slugfest but with some doubt about the ability of either side to land a killing blow!

Thursday, 17 January 2019

Photo Reconnaissance

Another scenario for WW1 dogfights.

German Briefing
Good morning Gentlemen.  The High Command suspect the Tommies are planning a push in our sector.  You know what this means, the command wants photographs of the artillery park south east of Ypres off to the south of the road to Comines to see what the activity is there.  You have been there before so I don't have to tell you to watch for their aircraft patrolling out of Furnes to the North or Bailleul to the west of the target.  To get the best chance of a decent picture you will need to get your photograph from under 6,000 feet.  The bad news is that the staff want two shots of the target so you will need to make two passes!  I know that increases the risk but it's better than having to go back a second time when the British will know we are interested in the state of the ammunition supplies.  Good luck.

British Briefing
Settle down chaps, yes Carstairs that means you too.  Now we have some news that Fritz is showing an interest in the area South East of Ypres, if he is interested it makes sense that we should stop him getting what he wants.  So we have been tasked with patrolling the lines in that area to make life difficult for his photographic excursions.  If he is true to form then we can expect a two seater and escort to try a quick sortie over the area about an hour after first light when the light is good for his purposes.  As he needs to come to us I suggest you patrol just this side of our lines, no point risking Jerry Archie getting you now is there.  If he does come over you main objective is to down the two seater before he can get back over his side of the lines.  Right off you go, take off is at 0500, see you in the mess for a spot of lunch later,what?

The scenario
The mission is set in July 1916.

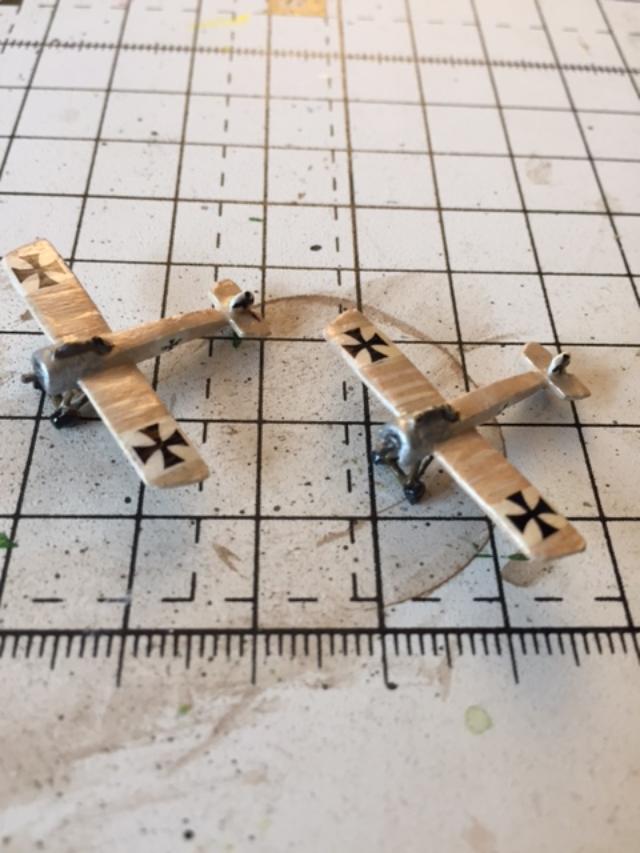
The Germans have a Roland CII and two Albatros DIIs as escorts.  The Roland is an old Irregular Miniatures model I have had for probably twenty years or more!  The two Albatri are more recent Heroic & Ros offerings.

The Germans, It looks a tad exposed flying the Roland


They enter the playing area at point 'A' at heights of the German player's choosing..  One fighter must close escort the Roland but the other is free to roam.  The Roland must over fly point 'B' before exiting at point 'C'.  To get the photographs the Roland must over fly point 'B' at 6,000' or less at a speed of  60mph or less and in  straight and level flight during each attempt to take a photo.


The view the British are hoping for?


The British consist of two Sopwith 1 1/2 Strutters who enter from point 'D'.  Their entry height must be below 13,000 feet but can be as chosen by the player.  They enter as a pair at the same height and within 180 yards of each other they may separate once they sight an enemy aircraft.

The table is the usual banqueting table and is laid out as below

Special rules
The German observer is the photographer, so cannot man his MG and take photographs at the same time.  To obtain a photograph he must be on the camera for 30 consecutive seconds before passing over the target (including the turn passing over the target).  After the first shot, he must spend a further 30 seconds (non consecutive) changing the plate ready for the second shot and for the second shot a final 30 consecutive seconds lining up the second shot again including the time passing over the target.  He can abandon the attempt at shooting to man his gun if needed but would have to start again to be able to take photographs.

Once a photo run has been carried out roll 1D6.  On a 1 the photographic plate is damaged or the observer is convinced the shot was spoiled and it has to be retaken.  That pass doesn't count!  On a 2-6 its OK.

Archie (Anti aircraft fire); if an aircraft passes over the enemy trench lines or (if a German aircraft)  the target  at under 1,000 feet or less they will come under small arms fire from MGs.  Each turn they spend more than half of their move over or within 1,000 feet of enemy trenches or the target throw 1D6 on a 6 the aircraft is hit, throw for damage as if hit by a single belt fed MG.

This is a tough ask for the Germans.  The Roland is a tough old bird but the need to take two photographs will make life difficult for them.  The table isn't that big (at least not with the rules I'm using) so the British will be able to intercept fairly quickly.  The Germans have to make the tactical choices here the British are focused on one objective and their choices will be reactive in response to the German's decisions.  I see three main options for the Germans firstly try to get in and out fast and then back over the friendly side of the lines ASAP.   Second stay on their own side of the lines and try hit and run attempts to get the photo's, third let the Albatri attempt to shoot down the British and then get the photo's at leisure.  If anyone comes up with a different plan do let me know in the comments.

Monday, 7 January 2019

Chocks Away

No I'm not talking about the last of the Christmas confectionery, it's WW1 dogfight time.

As a play test of the rules I'm going to try an early war balloon busting scenario.  The runners and riders being a German Observation Balloon defended by two Fokker Eindecker EIIIs and ground AA machine guns v a Sopwith 1 1/2 Strutter and an Airco DH2:

Gentlemen, here is your target Boche Sausage
The Scenario
I will be using a standard folding banquest table measuring 180cm x 75cm (roughly 5' 10" x 2' 5").  The aircraft will enter from the narrow ends of the table.

The Balloon is at 4,000 feet with two MG positions along side, in the centre of the table The British may enter at any height they wish up to 10.000 feet.  They may enter together and at the same height or from two different points on their side of the table and at any height or heights.  Once any British aircraft appear on table the two Eindeckers may enter on their next turn.  They arrive as a pair at the same height and flying together once on table they may separate.  Dice for entry height using 2D6 x 1,000 feet to set the entry height.

For the defence two Fokker EIIIs
Special rules
The Balloon can be lowered at a rate of 500' per minute this occurs in the German turn.  The German player will start to lower the baloon as soon as British Aircraft enter the table.  The balloon has a defence factor the same as an Eindecker.  Once that is exceeded it is in flames.

The Germans have two ground based machine gun batteries these fire as aircraft mounted twin belt fed machine guns.  They can reach up to 1,000 feet altitude and have a range (as a ground distance) of  600 feet.

The attackers a Sopwith Strutter and a DH2
The game is set in April 1916 when the Eindecker was no longer the cause of the Fokker Scourge having been outclassed by newer allied aircraft such as the DH2 and Nieuport 11.  For the British the Sopwith 1 1/2 Strutter has just come into service with the RNAS (the RFC didn't receive the type until July 1916).  The DH2 has been in service since February 1916. So the two British aircraft would in reality have been RNAS and RFC types and unlikely to have flown together.

Last but not lease a close up shot of the lozenge camouflage on a Halberstadt CL class.  I'm really very pleased with how the transfers (decals if in the US) I made came out.   
Not involved but worth a look 
AAR in the next post.  So chocks away chaps, do try not to come down sausage side and remember it's a mans life in the Twenty Minuter's.  Woof Woof (tm Lord Flasheart)!

Thursday, 13 December 2018

The Great Civil War in Lancashire - researching for a campaign

I started doing some research about 10 days ago, which is why I haven't blogged so far in December.  I have pretty much settled on a map using point to point movement.  Each location will have an initial recruitment value and a replacements value.  This became feasible when I came across population estimates derived from Heath Tax records from 1662.

The hearth tax was an 17th century tax on wealth based upon the idea that the more fireplaces or stoves a household had the wealthier it must be.  It was first implemented after the Restoration.  Fortunately the National Archives holds the records for Lancashire from 1662.  They are at file ref E179/250/11 if anyone wants to take a look at them.  Sadly they have not yet been converted to a digital document so at some stage I need to visit the archives at Kew to obtain additional details. 

I came across these from B G Blackwood's 'The Lancashire Gentry in the Great Rebellion 1642 - 1660' (Chetham Society 1978) which I found parts of on line.  Blackwood used the Hearth Tax records to estimate the population of each of the Lancashire Hundreds and the larger towns within them, by assuming 4.5 people per household.  How he settled on a multiplier of 4.5 I have no idea, but as it derives from his university thesis I'm happy to accept that there was some logic behind it.  He further assumes that 20 years after the start of hostilities the population in Lancashire would have recovered from the deaths of the wars.  I'm happy to accept that theory as well if only due to the fact that no other equivalent records exist.  What he didn't do was publish his results for the smaller townships such as Garstang or Clitheroe which is why I'm planning a trip to the National Archives at Kew next time I'm in London.

Anyway that, coupled with the militia returns for 1639 (summarised  in Stephen Bull's book which I mentioned in the last post I published) gives me a start on the figures for estimating potential manpower.  The raw data is that the population of Lancashire was in the very close order of 150,000 with just under 17,000 living in communities of 1,000 people or more.  That breaks down as follows:

Hundred Population
Salford 48,451.0
Blackburn 21,330.0
West Derby 31,207.0
Leyland 10,656.0
Amounderness 17,667.0
Lonsdale 21,357.0
  150,668.0
 
The major town's populations run between Manchester at 3,690 down to Lancaster at 949 souls.

So that's manpower and recruitment estimates in hand and if I look at the rest of the Hearth Tax data I should be able to set a threshold for the minimum size of township to represent on the map.  My default for that is likely to be 250 souls.  Adding any vital defensive sites and magazines mentioned in Broxup or Bull should fill out the rest of the map locations.  A bit of editing to ensure that the locations represented are spaced by travel time and the map is about there bar the art work which will probably be based on John Speed's map from 1610.

Image result for Map of Lancashire in 1610

More next time on the supply, training and events generation system.

Monday, 26 November 2018

Return to Bridgeton

I promised that I would let you have details of a game using the scenario from the last post I published, so here it is.  I gave it a few days and at least one reader has re fought it using For King & Parliament rules.  His brief report can be found on the Facebook 17th Century Wargaming group pages.  I fought it using my own rules in 2mm scale using a 1mm to the yard/pace/metre as a ground scale.
The initial deployment with Royalists in the foreground
In my rules players draw up a deployment map before the terrain is set up but can (in some circumstances) change the position of the entire army moving it to the left or right, or individual units during the pre-battle phase.  In the photo above the small boxes behind the units are dice frames used to record hits taken that are being carried forward towards the next morale step loss.  Once a unit has taken one hit per element it's morale drops one point.  any hits that are left over are kept and marked by a dice in the frame.  Ther isn't any way to remove casualties using 2mm blocks so this is my way around the problem.

In this case I opted for a traditional deployment for both sides with horse to either flank.    Parliament's Dragoons used their ability to deploy forwards of the main battle line to occupy the enclosures on the outskirts of Bridgeton (Shades of Oakey's at Naseby).

Parliament's Right Wing and Centre.  Double depth formations using Dutch tactices.
The Royalists won the initiative by virtue of having a superiority of Horse and decided to be the first phasing player.  As you can see from the shot below they pushed forwards with their horse on both flanks with the foot making a slower advance in the centre.  This had the unfortunate effect of masking their guns from the start.  They only managed an occasional shot through the gaps and did nothing of note all day.

About 30 mins game time has elapsed. The coloured markers denote the morale state.  Green are steady yellow are nervous.
As the Royalists advance Parliament's guns open fire and the Dragoons pepper the advancing horse with musketry.  Parliament elected to stand and give their guns chance to soften up the advancing Royalists for the first few moves.  The leading Royalist Horse on the right through a combination of musketry from the Hedges, artillery fire and, once close enough, musketry from the Infantry fail a charge to contact reaction test in a dramatic fashion and break routing back through their support line who are carried away with them as is the commander of that wing..

Two units of The King's cavalry discover pressing engagements elsewhere
At first things appear to be going equally well for Parliament on the opposite flank.  The lead Royalist cavalry unit is engaged in a melee with a second Parliamentarian unit about to join the fray.  The Royalists support is strung out crossing a hill and is not yet fully able to support.  However, the Royalists get a first round bonus for pistols in melee and that along with their elite status allows them to hang on.
The cavalry clashes on Parliament's right
While the action is get up close and personal on the flanks the Royalist Foot is trudging forwards across the centre of the field.  They were ordered to make a rapid advance which prevents them from entering into a musketry duel until they get to effective range.  This allows the Parliamentarian Foot to start the fire fight with receiving any return fire.  Although shooting starts at long range some hits are being registered and the Royalist morale starts to move downwards.

In my rules the units have a morale points value based upon their training and experience (with a plus if elite or a minus if unwilling participants)  that point score falls into one of several morale bands ranging from Keen through Steady, Nervous, Waivering,  Broken and Routing.  Each band is several points wide.  The marker only shows the morale category and not the point score so a player can see the general status of an opposing unit but isn't sure how close to dropping to the next level down a unit is.  Points are lost as a result of reaction tests or combat.  

The Royalist foot has crossed the road and is under artillery fire.
 After about an hour's game time has passed the photo below shows the Situation.  Parliaments Horse is pushing forwards on their left forcing the closest Royalist foot battalia into a pike stand. Royalist foot are closing on their opposite numbers on the far side of the field and a swirling cavalry melee is continuing over on Parliament's right.  I think its fair to say that the action is general at this point.

After about an hour's fighting everything hangs in the balance.
 The Royalist Foot doggedly pushed forward into a storm of shot.  The two units first into close musket shot are both raw and find the experience too much and both break and run.  You can see that they now both show red broken morale markers so rallying them is near impossible.  One has run into it's supports and fortunately was able to pass around it but it left the support unit disrupted.  Nearest the camera both sides have had break off reaction tests results at the end of the last melee phase.  The royalists have the upper hand here as both Parliamentarian units are on the brink of dropping to waivering.  The white triangle markers show that the frontline foot units of Parliament have reserved action points to allow fire to be used in the defensive fire phase of the Royalist turn.  Over by the fields the last reserve of the Royalist horse has stopped the advance of the enemy cavalry from turning the flank.

The game turn is broken down into four action phases two in the first player's round and two in the second players round.  This allows a player to exploit any push backs or breakthroughs in the second phase.  Units have three action points to use in each phase which in effect means that moving, formation changes and shooting can happen in any order.  There is also an option to reserve up to 3 action points to use in the defensive fire phase in the opponents turn. 


After this turn I was rushing to finish the game (Mr's E wanted the dining table for dinner) and didn't take any further photographs (sorry).   The Royalist horse on their left moved forwards again and in response the Parliamentarian horse made a counter charge.  It didn't go well for them and they broke in the face of the Royalists but not without breaking their lead unit in turn and reducing the steady unit to waivering status.  Still the Royalists were looking to be able to turn the flank of Parliament the day might yet be theirs.  In the centre the Second line of Royalist foot suffered the same fate as the first although they did get to hand blows with their opponents.  The crucial moment was when the Parliamentarian Commander was able to order his reserve line of foot to to move to close the open flank.  The unit nearest the danger was trained and experienced and was able to form a pike stand to the rear of the light gun at the end of Parliament's line.  By this time the elapsed game time was just short of two hours and neither side had any troops who were not waivering or worse and no further aggressive action was possible.

The day ended with Royalist foot holding to the North of the line of the road  as required but with two units of Parliament's horse across the road and neither river crossing secured the supplies couldn't pass down the road and so Parliament had the best of the fight.  It showed me that as an attacker there is a need to sit back for a little while and attempt to actually use your artillery!   That sitting back on the defensive is a better option for raw troops and that Royalist foot seem to be able to soak up more punishment then I expected.

Monday, 19 November 2018

ECW Scenario - The battle of Bridgeton

A fictional early English Civil war scenario for you to get your teeth into.  Set in the early part of 1643 somewhere  in the West Midlands close to the Welsh borders.


Situation
The Royalists are preparing for the 1643 campaign season by bringing new recruits from Wales and the Welsh borders into Central England to join the King's main field army.  After reaching the West Midlands they find the route blocked by a well fortified garrison at a significant river crossing.  Marching downstream to secure crossings away from that garrison they hope to cross at the small village of Bridgeton where an old Roman road crossed the river at fords and a medieval bridge.  As they cross a ridge line to the West of the village their Cavalry scouts report a force of the local Parliamentarians approaching from the East.  The Parliamentarian force is tasked with denying the crossing to the Royalists and preventing them from moving further East.

The Battlefield


The table is set for 2mm figures at a ground scale of 1mm to 1yard/metre.  The table measures 1.5 x .75 metres.  This can be flexed to suit your playing area.  North is the top of the map as you are looking at it.


The Forces
Definitions are from my home brew rules but they should serve to give an indication of the abilities of the units.  Units using Dutch tactics form up deeper than those using Swedish.  Horse under Dutch tactics will default to standing to receive a cavalry charge with pistol/carbine fire unless they pass a reaction test to change orders.  Swedish tactic horse will default to charging home and using pistols/carbines in the first round of melee.  Infantry using Dutch tactics will default to firing by ranks while those using Swedish will default to volley/salvee fire unless they pass a reaction test to change standing orders.

Parliament's forces (Dutch Tactics) are:
4 x small artillery guns - Experienced & Trained
2 x 200 Horse - Experienced & Trained
2 x 200 Horse - Raw & Trained
1 x 600 Dragoons - Experienced & Trained
2 x 600 Foot - 400 shot 200 pike - Raw & Trained
3 x 600 Foot - 400 shot 200 pike - Experienced & Trained
1 x Commander in chief
3 x Sub generals

Royalist forces (Swedish Tactics) are:
4 x small artillery guns - Experienced & Trained
1 x 200 Horse - Elite, Experienced & Trained
1 x 150 Horse - Elite, Raw & Trained
2 x 150 Horse - Elite, Experienced & Trained
2 x 150 Horse - Raw & Trained
2 x 500 Foot - 400 shot 100 pike - Raw & Trained
2 x 600 Foot - 400 Shot 200 pike - Raw & Trained
2 x 400 Foot - 300 shot 100 pike - Experienced & Trained
1 x Commander in Chief
4 x Sub generals


Deployment and objectives
Parliament deploys north of the road and the Royalists to the south.  Neither side can be more than half way to the centre line of the table. Parliament's objective is to have troops blocking the road to prevent Royalist supplies being able to move through the area and cross the river at Bridgeton.  The Royalists need to hold at least one of the bridges and to be able to control a clear route between the centre of the east side of the table(where the road enters all the way to the bridge they hold.  Controlling a clear route means that no Parliamentarian unit is within two moves distance of the road or the controlled bridge at the end of the game.  The game ends at nightfall or when one side or the other is no longer able to continue to take aggressive action (you will have to decide what that means from your chosen rules).

I have played this a couple of times solo and it's usually a close run thing under my rules.  The use of Dutch tactics hampers the Parliamentarians.  The Royalists despite a numerical disadvantage have more and slightly better Horse.  They have less and rather worse foot but Swedish tactics allow for more firepower to be laid down.  (in my rules salvee is more effective than the same number of shot firing by ranks).  I will let you know how my games went in a later post so I don't influence your thinking if you decide to give it a go.  Oh and bonus points if you spot the original location of the battle.