Showing posts with label Tuesday night games. Show all posts

Thursday, 24 October 2019

The Battle Of Billington Moor (part the second)

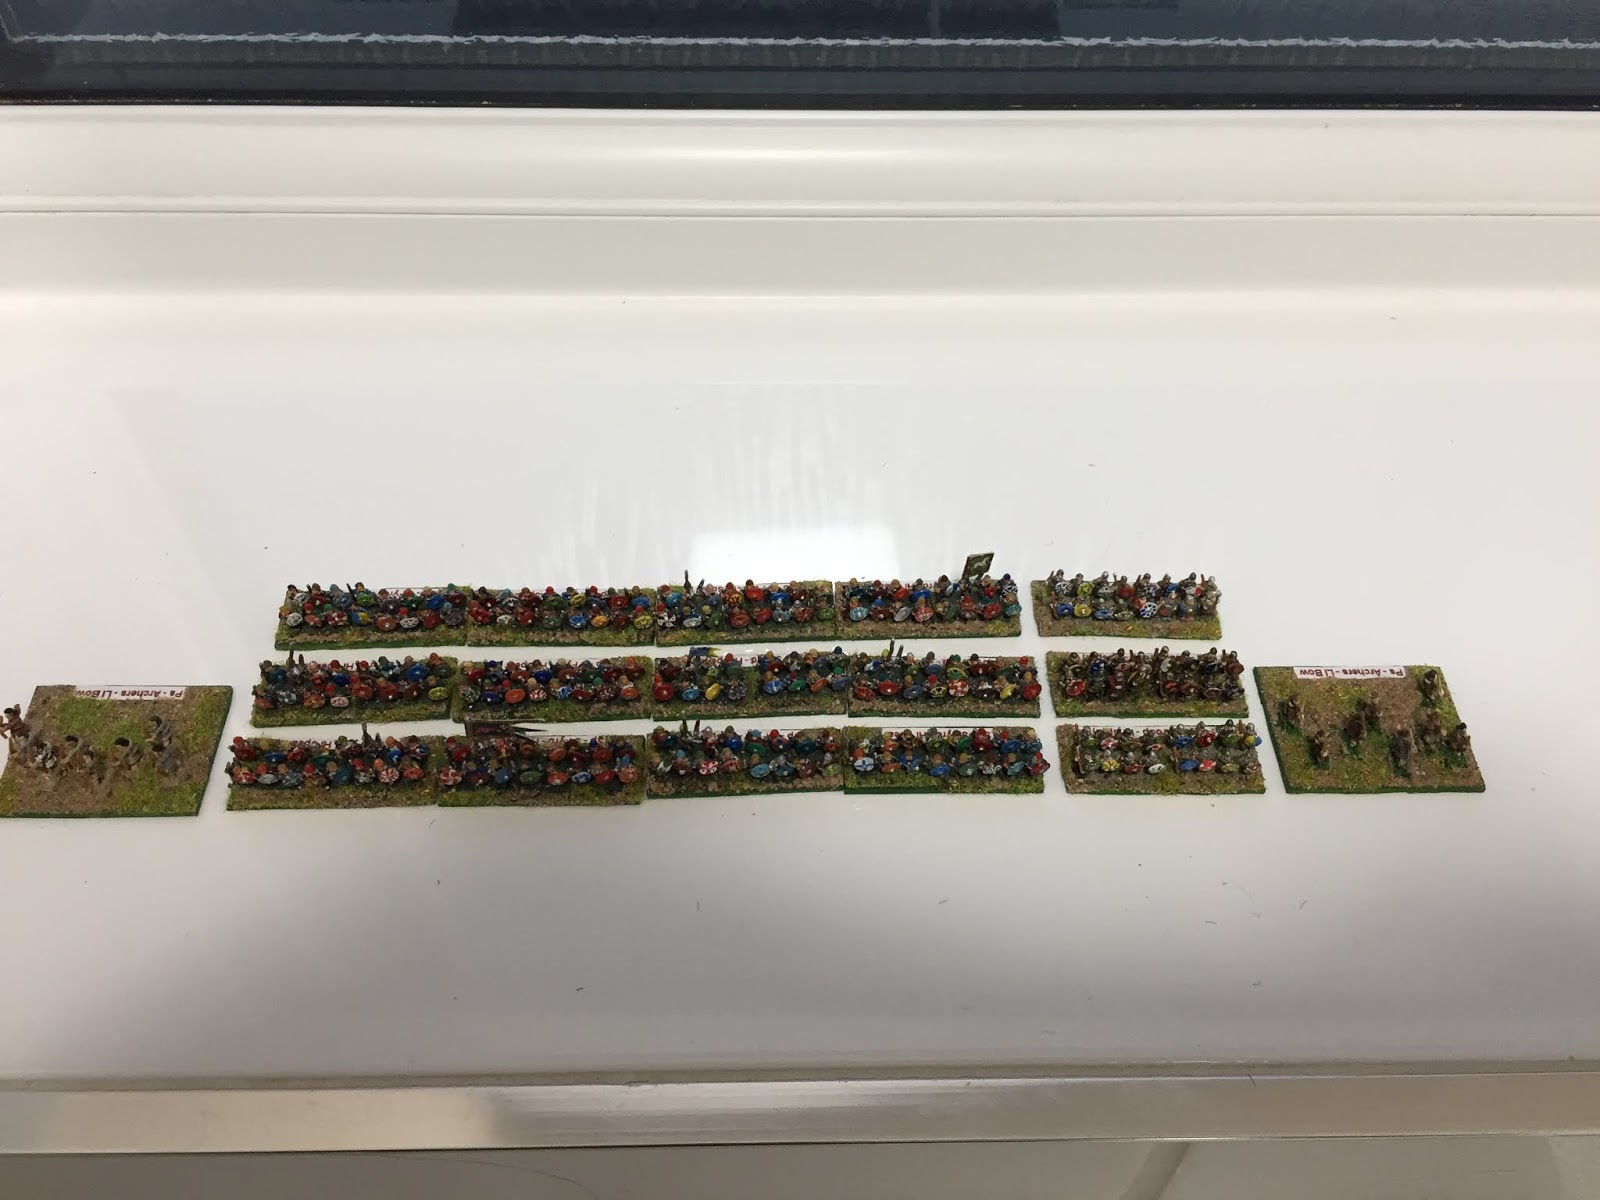
Having decided that this would be a something to put on for the Monday Night Gamers I came up with both a map and forces for use in the game (see my last post).  Although Phil has said he has most of the troops and Graham can provide some proxies I thought I would check if my 6mm collection can cover the force requirements.

Looking at the army lists the game needs to have available:

13 x 4Bd
42 x Sp
11 x 7Hd
9 x Ps
Anglo Saxons on video and The Strathclyde Welsh - I will be using their Spearmen and Psiloi

(Edit - I haven't tried embedding a video before it seems to be working OK.  What do you think worth doing or do you prefer stills?)

Looking at my figures I have (with some proxies being used)

3 x 4Bd (Anglo-Saxon on ADLG HI bases)
12 x Sp (Anglo-Saxon on ADLG HI bases)
2 x Ps

18 x Sp (Strathclyde Welsh on ADLG MI bases)
2 x Ps

6 x 4Bd (Viking on ADLG HI bases)
10 x 3Bd (Viking on ADLG MI bases)
4 Ps

so allowing Viking 3bd to proxy as Sp that gives me total available elements of

9 x 4Bd
40 Sp
8 Ps

Almost but not quite sufficient, time to get the Dacians out!

They can provide the additional Sp elements or I could finish up the Sp on my painting table which would give me another 6 Sp on HI bases.  So no Dacians needed as Sp but I can use their Ps to fill out that roster.  I'm going to need some more 4 Bd as well one pack of Bacus' Armoured Vikings will cover that.

The observant amongst you will have spotted that I haven't mentioned the 11 elements of 7Hd required.  That's because I only have Hd as Sassanid  Persians and even I draw the line at using them as proxies for Anglo-Saxons. Clearly I need to get buying and painting (what a bind!...not).  Baccus Gothic Infantry should do very nicely for the less well equipped Fyrd three packs would cover it.  Its a good job there is a wargames show this weekend at Leeds, its almost as if I had planned it.

Friday, 18 October 2019

The battle of Billington Moor 798AD - The scenario

Following on from my post 'Do I do any actual wargaming' I mentioned re fighting Billington Moor to the MNGers and they seem interested.  Phil has 15mm DBA troops including Anglo-Saxons and Pre-Feudal Scots so we may be able to do something in 15mm rather than in 6mm.  Which means I now need to look into the numbers and make up of the forces with a view to having a couple of commands a side.  So big battle DBA (BBDBA) is looking favourite for this one.  The rules are DBA 3.0

Rather than getting too hung up on numbers I have decided to focus on the number of elements required and then amend the battlefield layout to suit.  Using BBDBA would normally give 36 elements drawn from the DBA lists with min-max numbers multiplied by three.  Each side is then divided into three commands of no less than 6 elements.  While DBA doesn't stipulate a maximum size for any of the command a bit of basic math tells me that it cant be larger than 24 elements and that this is probably going to be an issue for PIP allocations if a 24 element command is chosen. For this refight I am creating modified army lists to reflect the slightly different compositions of the two sides but sticking with the overall number of elements.

These lists are:

Middle Anglo-Saxon (Alderman Wada's Rebels)

  • 2 x Generals (4Bd) one representing Wada as CinC
  • 1 x General (Sp)
  • 2 x Hird (4Bd)
  • 1 x Fyrd (Sp) in effect a third poorer quality Hird unit
  • 24 x Fyrd (Sp) or (7Hd) For each 2 x Sp selected 1 x 7Hd must be selected
  • 3 x Archers or Scouts Ps or Fyrd (Sp)
  • 3 x Archers or Scouts (Ps)
  • 3 camps which can be massed together at one point (or the village may be considered the joint camp)
Middle Anglo-Saxons (King Eardwulf's Royal Army)
  • 3 x Generals (4Bd) the King, Alderman Eardbehrt (Herbert). Herbert's son
  • 6 x Hird (4Bd)
  • 21 x Fyrd (Sp)
  • 3 x Fyrd (7Hd)
  • 3 x Scouts (Ps)
  • 3 x camps which must be placed one per command (the king's camp counts as a double loss if captured)
As an aside I am currently having serious problems on my PC with posting photos between windows and blogger.  It seems to be an issue with memory overflow but I can't seem to get to the bottom of it.  The second I click the insert button on the blog the PC crashes and I find myself looking at the dreaded blue screen of death!  All pictures posted over the last half a dozen posts have been shipped out to my smartphone posted to the blog from there before I  return to the PC to ensure they are exactly  where I want them.  It isn't really an issue when its a photo as those are generally on my smartphone anyway.  Where it does become an issue is where I have created a map in a graphics program as that won't easily transfer to the phone.  Thus it was with the map for Billington Moor!

Scenic Ribblesdale.  The top of the map is North.  The village is 'Old Langho'  Billington is roughly south of there.
It would be probably accurate to add some scrubby woods in a thin band along the banks of the head waters of the streams as a scenic item but I wouldn't give any terrain effect to them.  The banks of the Ribble and Calder were probably not wooded.  At least not in this location.

The map is divided up into one foot squares.  The idea is that the defender is able to choose which 3' by 3' area to fight over by choosing the nine adjacent squares which will make up the battlefield.  No matter which area is chosen Wada's troops are the defenders and will deploy on the east side and Eardwulf will be the attacker and deploy on the west.  The Rivers Ribble and Calder are tested for passability separately to each other.  The standard DBA check is amended so that it is only paltry on a throw of 1, a 2, 3 or 4 makes it slow going and 5 or 6 makes it a slow crossing with effects as per DBA 3.0.  all other streams are 50:50 chance to be either paltry or slow going (DBA scores of 1-4 with no chance of the worst result of a 5-6 arising) The Roman road counts as a track (its not been properly re-surfaced since the late 4th Century after all).  The solid green is a steep hill and the green dotted areas are boggy ground.

If any one plays this out under DBA or any other rules I'd be interested in your feedback.


Thursday, 6 June 2019

More Ancients in action - This time with Armati II

I have never played Armati or any of it's variants in this case Armati II.  I have now played two games.  Trajanic Romans v German Tribesmen and the classic match up of Greeks v Persians.  After the game of ADLG a couple of weeks ago (see xxx) we discussed the pros and cons of ADLG and Trebian said he could see where some of the game mechanics had come from.  This turned out to partially be from Armati.  One difference he pointed out was that units were much less maneuverable than in ADLG which to him it felt more like an ancient period battle.  After all command and control wasn't a huge feature in most ancients battles especially in the barbarian armies!

Armati does indeed restrict maneuver or to be accurate there are limits to what can be achieved while maintaining a unit's order.  Like ADLG it has 'hit points' for each type of unit and when these are gone so is that unit.  Unlike ADLG light troops don't count towards an armies break point and lights are quick killed by contact with certain heavy troop types, representing light troops being dispersed beyond recall rather than wiped out.  Movement is not directly linked to base widths although like ADLG and other games it does use the standard WRG base sizes.  There are restrictions on how many maneuver groups an army can have and different armies have different initiative modifiers.  In the game the Romans get to add 7 to a D6 roll us Germans only get to add 4.  The difference between the Greeks and Persians was less marked being 5 and 6 respectively.

On to the Games
The Roman game was played in 15mm using Peter Pig figures, which are really rather nice, its a shame they only produce a limited range of armies for the ancient world.  Trebian and Phil umpired and provided tactical advice and the remaining four us commanded the troops.  As I had been on the winning side last time out I elected to try out the German side as they are very much the under dogs when facing the cream of Rome's army.

Another interesting point in Armati is that after terrain is deployed a screen is used to allow table top deployment without either player seeing what the other is doing.  That actually works really well and it means deployments are never guaranteed to be optimal.

The terrain provided two areas of woodland on the front edge of the German deployment area and a small hill on the Roman right.  When the screen went into place we decided to deploy the heavy german foot with the ends of the line anchored within the woods, a cavalry heavy right flank and a lightly defended left as we expected a lot of Roman light troops in that area.  When the screen was removed we saw the Romans had deployed an infantry box in their  centre with horse in reserve behind that and light infantry out on their right.

The Romans won the initiative roll (they never lost this roll all game) and the game was afoot.  Long story short the germans moved forward to occupy the woods (Roman legionaries are at a hefty disadvantage in them) and pushed forward on the flanks.  The Romans elected to advance as well.  Once we had our Infantry lines set they stood to wait the oncoming storm.  We pushed our flank units of light infantry and cavalry forwards.  The Romans just kept on coming.  On the left we swept aside most of the Roman Light Infantry and sent our own Light Infantry up the low hill hill to pin down the single unit of Roman cavalry.  It worked for one round of shooting!  On the other wing the Roman Horse was pushed right back and they were forced to break a cohort of legionaries off the main assault line to protect the now open flank.  These were supported by auxilia.

The two centres clashed and the legionaries started to chew up the warbands.  However the flanks of their line were not doing so well and because Germans are cheaper than Romans there were more of us than them and we elected to turn our flanks inward to envelop the Roman Infantry.  This cost us initiative points as everytime you split a command your initiative bonus is reduced by one.

Long story short....the Romans broke our centre but we rolled up their flanks and won.  By one breakpoint!  The consensus was that if the Romans had coordinated their flanks and centre more efficiently the Germans would have been badly beaten.

In the second game it was obvious from the start that the Persians had a huge advantage in cavalry numbers while the Greeks had better infantry although in even numbers to the Persians.  The Persians flowed round the Greek left in jig time and swept away the horse and peltasts who were defending their then hit the hoplites in the flank once they were locked into combat with the Persian foot.  The line simple dissolved with rear and flank attacks providing quick kills on the otherwise powerful Hoplite line.  The Greeks lost 7 - 1!

Armati does give a good game and in these games at least it was clear that the game was lost by poor deployment and decisions as much as from the enemy making good decisions.  Deployment really matters as the ability to reset the line of combat troops (especially the close combat formations) is really restricted.  It is vital to try to guess at the potential deployment you will be facing when the screen is removed and deploy to counter those threats.  Oh and it helps to have an ex-world champion player on your team!
Wednesday, 15 May 2019

Another week another game

Apologies for another post without pictures.  I was so involved in the game that I forgot to take any photos.

In a personal best for consecutive games this century, Tuesday of last week saw me back at the gaming table.  this week for a game of Arte de la Guerre.  Now these are a set of rules I own and really wanted to like.  For those who haven't seen them (have you been off planet or something?) these are an extremely popular set on the competition circuit and get a lot of blog coverage.  Trebian hosted the game and has already posted a battle report over on Wargaming for Grown ups (Link to Wargaming for Grown Ups) so I'm going to stick to a quick personal view.

As I say I wanted to like these rules and I did.  Like all rule sets there are niggles but overall these are because of the basing conventions and are similar to those experienced in any game with DBx style element basing. What I did like was the use of cohesion points to give a bit of resilience to the units.  Heavy Infantry need to take four cohesion hits before being destroyed, most other units take three,  with light troops taking two.  Units with a single cohesion hit fight with a disadvantage which means that you have to think about screening melee troops and withdrawing the screening units before they are destroyed.  I'm less keen on the army lists which feel very competition focused and don't have the detail of the lists from DBM or DBMM.

The rules are translated from the French and the translation is very good but some of the concepts do need a moment or two before they click.  For example heavy troops are not better armoured than medium troops.  Instead its a measure of how close packed and how resilient they are.  I have settled for thinking of light troops as open order, medium as at deploying at order and heavy as being at close order.  Instead there is an option to give some troops the 'armour' capability giving them the chance to offset loosing combats effects.  To make things even more confusing Cataphracts and Knights are already 'armoured'.

All of that aside the game played well and allowed a battle to be played to a conclusion in under three hours.  It was tight and winning didn't harm my view of the rules either!

Thursday, 2 May 2019

1745 and all that

I am fortunate that on the two days when I am working from the office and have to spend a night away, I have an active group of wargamers close on hand.  Which means that on that night I can meet up with them and get a game in.  This week it was a Jacobite v Government game set in the 1745 Rebellion/Rising (depending on your point of view).

The game was put on by our host Graham (AKA Trebian of the excellent 'wargaming for grown ups blog' which I urge you to visit).  Graham is a keen researcher and writer of rules which as far as I have experienced tend to be reasonably simple but still hold a good period feel.  This game was no exception.  I hadn't played the rules before but by the end of the game I had a decent understanding of the rules mechanisms and how the tactics of the period are modeled.  As you might expect the Jacobites especially the Highlanders have a better chance in hand to hand while the Government troops prefer to stand off and use musketry.  This especially the case for regulars trained in platoon firing.

The basic model is that the two sides dice for initiative at the start of the turn with adjustments for the CinC's ability.  If the Jacobites win they must go first if the Government win they can choose to go first or second.  A flip in initiative to the Government player is deadly as it allows them to take two consecutive bounds which means two uninterpreted bounds of volley firing!  Most combats are based on the throw of a number of D6 with a 6 giving a 'hit'. This is adjusted where a unit is disordered or shaken.  Generals can also affect the dice by using one of two command decisions they have available each turn by either adding an extra dice or electing after the roll to add 1 to one dice roll.  There are other uses for these command points including attempting to rally broken troops and getting to units to charge to contact without taking a morale test first.  Its an elegant and simple method of creating command friction by reducing a general's options for action each turn.  I wish I had thought of it!

We had four players plus Graham as umpire.   Tim and I took the Jacobites with Steve and Richard taking the Government troops.  The Jacobites had 7 Highland Regiments and two infantry battalions trained in the French style ( basically volley and in with the bayonet tactics).  German George's Forces consisted of two Cavalry Squadrons, deployed one on each wing, with a centre of seven Infantry battalions deployed in two lines.  The Infantry was a mix of regulars with a couple of militia units thrown in.  Somewhere at the rear of their right was a single piece of artillery. 

As they seemed intent on standing on the defensive Tim and I had a lengthy and detailed discussion on tactics and after about two seconds decided upon a wild charge all across the board.  It seemed like the proper Highland thing to do.  We got two units into contact on the first bound breaking a battalion of regulars and pushing another back.  This was possibly the high water mark of the Jacobite cause for the day!  There were some moments of confusion on the Government side and then they decided to about face one battalion and volley into the backs of the highlanders who had pushed back their opponents and to launch both cavalry units forward. 

The highlanders shrugged off the ungentlemanly treatment of the vile back shooters and continued to push their opponents back ultimately breaking them.  The two cavalry attacks had mixed fortunes, on the Government left wing they pushed back a unit of highlanders but couldn't break them, while on the left they bounced and were forced to withdraw and spent the rest of the action covering that flank by trying to look menacing.  Meanwhile in the centre the Jacobite lines were starting to look a bit threadbare.  Victims of our own success as two highland regiments had been taken out of play pursuing defeated enemies.  Two more wild charges went forward but musketry disordered them on the way in and the resulting melees were indecisive.

Ultimately we were beaten by disciplined volley fire and a flip in initiative that allowed the Redcoats to pour fire in from point blank range for two turns without our being able to do anything but stand and take it.  I threw the two trained battalions out into line and by attaching my general to the Royal Ecoisse (I think that's how to spell it!) managed a volley and in attack.  It failed and I got my general killed.  At that point we stopped to checked breakpoints and it was found that the death of the general had tipped the doughty and valiant Jacobites to defeat.  All in under two and a half hours.  Next on offer is a game of Arte de le Guerre which I am looking forward to.