Sunday, 20 September 2020

Meanwhile back in the Dark Ages - Mercia 798AD

Its been a while since I last returned to the Dark Ages campaign. It's the downside of a solo campaign, my opponent tends not to pester me if I side-line things for a while!  In case you had forgotten the last post was >here<.  Wessex was feeling feisty and the Witan approved a plan to to test Mercian resolve by attacking Hwicce, a Mercian province across the Thames from Wilsaetan.  King Beorhtric considered that Mercia would be in flux following the death of Offa and that they would struggle to gather a large force to defend against his incursion.  He was wrong.  A few miles beyond the Thames he finds himself facing a significant Mercian army commanded by this years Mercian King Coenwulf (they tend to change quite rapidly post Offa, I blame the Danes).  This is a significant moment  as its the first time two Kings have faced each other across the battlefield in this campaign.  Both have brought a significant amount pf their manpower to bear and a serious defeat here will have a significant effect on troop numbers along the Thames Valley and for the Mercians the Welsh Borders for the next few years.

The forces are will be drawn up on the new "Acme Table Topper of Tactical Ineptitude" (TM pending) aka my new wargames table in 4 x 4 configuration.  The game is being played on a larger than normal area as the armies are BBDBA sized and "I have a table and I'm gonna use it" mode has been engaged.  The layout was experimental and didn't use the DBA terrain rules as I wanted the table’s first run out to look pretty!  The fields are just cosmetic and have no terrain effect the only 'true' terrain consists of a village, two hills (one gentle and one steep), the river, two woods and an area of boggy ground.  The village buildings are all from 2D6 miniatures and everything else is scratch built.

The Battlefield

Wessex has brought the men of Wilsaetan, Bearruc Scir, Hamptun Scir, Dorsaete and Sumersaetan almost their entire strength is here.  Facing them are men from Hwicce, Maegonsaetan, Tomsaetan, Wrocensaetan and Hendrica.  Which may make more sense if you check out the campaign master map at  https://elenderilsblog.blogspot.com/2020/05/the-dark-ages-campaign-some-background.html 

I will be using the Solo DBA amendments to run the Mercians, so tonight's job is to determine their deployment and tactical stance.  The West Saxons are already deployed in three bodies which is done before seeing the AI controlled force so as not to gain any unfair advantage.  I'm calling the other side the  AI but it is all done on dice and charts although it's not impossible that the dice may well be tactically smarter than I am.

More in a short while.

Monday, 7 September 2020

Making a wargames board part 3 Snagging and finishing.

I got side tracked from finishing the board off last week and only got back to it this weekend just gone.  I drilled the frames through on the long edges and bolted them together to ensure everything lined up and fitted snugly together.  This is one of those jobs where measure twice cut (or in this case drill) once is very much the thing.  It would have been easier if I had remembered to place all of the screws which hold the frame to the MDF table top the same distances apart.  What saved me was that I used 50mm deep battens and 20 mm long screws so that even allowing for 5mm as the depth of the counter sinks into the table top the screws only reach 25mm down into the batten.  That meant that I still had 25mm of the frame to drill into.  Live and learn as they say.

Framing all done.  Centre line battens are to help stabilise the end sections if they hang over the end of the banquet table a bit. 


Bolts help the sections butt up tight but mainly are there to stop sections moving apart in use.

I have bought 6mm diameter bolts with 50mm length.  So I drilled 8mm holes to give a bit of leeway. but I didn't really have any problems as the holes all lined up and the sections bolted together fine.  I do have some snags to deal with.  One section doesn't butt up as closely as I want.  This is either the batten not set square to the top so the bottom of the batten is leant outwards a little or the drill hole having to be tidied up a bit, but either way the application of a wood plane will sort the issue.

Some of the filler I used to hide the screw heads has shrunk and I need to add a second layer but that is a simple job to do before I apply the second coat of the green paint to the table top and paint the edging strip.  One more weekend's work should be sufficient to see it all done.  The only outstanding question is should I leave the table top the single shade of green or try to break it up a little?  I'm open to ideas here.

I haven't got it to the point of  gaming on it yet but while I was trying out the 6' x 4' combination I did deploy some 2mm ACW figures.  This was to give me a visual on the Altar of Freedom First Manassas scenario comment on this being a very large table for the small number of troops deployed, but it recreates the issues of command and control on the day.  I set up all the forces in the game's order of battle for First Manassas and it is clear that there is a lot of ground for them to cover.  Next step on that particular project will be to make the specific terrain called for to replicate the main features on the battlefield.  Some of my existing terrain can be used but there are some items I don't have or don't have enough of for the scenario.

You can see how lost the troops for 1st Manassas are on a 6 x 4 table

At the moment I have some Brigade models ACW small scale scenery buildings on the painting table.  These are slightly smaller than the figures and still wildly larger than ground scale but they work well enough in use.  I'm making some additional river sections especially for the scenario, first up are the numerous fords that allow crossings of Bull Run, then some additional hills.  More on those in coming posts.

Tuesday, 1 September 2020

Random Thoughts #8 - Anticipation isn't what I hoped it would be


These are the best hot cross buns for Easter - according to experts -  CoventryLive
The offending article, or should that be tempting?
Mrs E has been the sole shopper during the coronavirus lockdown period as I have tried to avoid contact with the general populace.  She is of the opinion that this is due not so much caused by social distancing as by anti-social tendencies!  So, not having been within the mystic portals of our local Tesco supermarket for some month's you can imagine my surprise when she brought home hot cross buns, in August!

Now I'm not complaining about being the recipient of nice toasted hot cross bun at all, I like a hot cross bun in it's season. Having them available all year round did make me wonder about the nature of anticipation though.  Once upon a time a hot cross bun was a seasonal delicacy available and enjoyed in the month or so before Easter and then gone for the rest of the year.  There was a delicious anticipation in knowing that the season of cinnamony and fruited goodness was about to dawn.  That is now denied to us but were they the better for being a limited availability treat or is a year around taste of springtime a welcome bonus and anticipation can go hang?

Anticipation or no, I will be eating these all year around, just don't get me started on adding chocolate chips in place of the fruit.  Biting into one those abominations when expecting fruit and spice and getting what is a sort of second rate chocolate brioche really does ruin the anticipation! 


Sunday, 30 August 2020

Making a wargaming board part 2

The MDF boards have all been framed which took the warpage out a treat.  Edging has been added to provide a small lip above the table surface to  prevent things like dice getting knocked off the table.  All the edges butt up nice and tight.  So far so good.  Next comes the painting of the surface.

Although I intend to use a cloth much of the time a coat of paint does two things, firstly it seals the MDF, which if I'd thought to do in the first place would probably prevented the warping.  Secondly it provides a base colour in case a cloth doesn't cover everything or I just want to get troops on a table with the minimum of setting up fuss.  So it was off the B&Q for some green paint, but which shade of green?

Green is a tricky colour to get right.  As its the predominant colour in our natural environment our eyes have evolved to distinguish really subtle differences in green's tone and shade. I settled on a shade made by Valspar called 'Absinthe Dreams' which is one of those shades that the store mixes for customers on the spot.  It's a good match for a generic grass green.  Now comes the bad news; its paint so it is all one shade, 'cos paint's like that.  Real world ground cover isn't all one shade, cos the real world is like that and the two don't really match up.  Having a table top all one shade of green simply doesn't look right.  It needs breaking up which I suppose is why many people use flock over terrain boards.

Image result for British landscape images
Look at the variation in shades of green in this photo of Cumbria from the BBC


The problem is made worse by the helicopter general effect.  By that I mean that when we look at our game tables we are looking down as if we were hovering over the battlefield.  We see what pretends to be a large chunk of landscape from a long distance (based on the scale of the terrain) which means we expect to see variation in the vegetation, pretty much as shown above.  Now my board looks like this after one coat of paint.

I have created a board of purest green, but it's not much like the photo above is it? 
I'm going to give it a second coat and then put it up as a three section 6' x 4' board and try out the look with some scatter terrain before I start trying to break up the green.  There are still a couple of things to do.  In no particular order I need to paint the sides which I will probably do in a pale grey and I need to drill holes through the frame to allow the sections to be bolted together.  I will probably do that tomorrow.

By the way Chez Elenderil doesn't normally look as messy as it does in the above photo!  This is the scene at the end of week four of building work to convert what was originally an outside toilet and a store room into a shower room. The rooms now open into the conservatory rather than the garden and for the last month the builders have been cutting and sawing, plastering, digging up concrete floors , drilling through brick walls and other Bob the builder style stuff, all of which makes dust and mess.  And that is my excuse, honest.


Friday, 21 August 2020

Making a wargaming board

In 50 some years of gaming I have played games on the floor, on various domestic tables but only once have I had a bespoke gaming board,   It was awful and I'm not just saying that, look for yourself.!
After the contours came off - ugh that green...just ugh!
I built a set of contoured  boards to create a 3D table for Bussaco (my only serious attempt to get onto Napoleonic's)back in 2007.  I ultimately only used a part of the full four part board and I only used that the once.  As a result four 2' x 4' MDF boards have sat unused in a succession of garages and sheds for over a decade.  I stripped the polystyrene ceiling tile hills off the boards and last weekend I started work on the gaming board.  I have two 6' folding banquet tables that I bought about 5 years ago for gaming use, which will be the supporting structure for the new table.  I intend to lay the boards over these for games so all I need to do is create the table top.  The plan is for everything to pack down into a small space when not in use.  The four boards will slot together and of course folding banquet tables fold up.

Here is how I did it, and trust me If I can do this anyone can do it.  It helps to have the right tools but it doesn't require a huge amount of skill.  On the subject of tools I used an electric drill, an electric screwdriver, some clamps, a mitre saw and block and one of those trigger gun applicators for the tube of glue plus an adjustable try square and a tape measure.  So not beyond the average home toolkit I don't think.

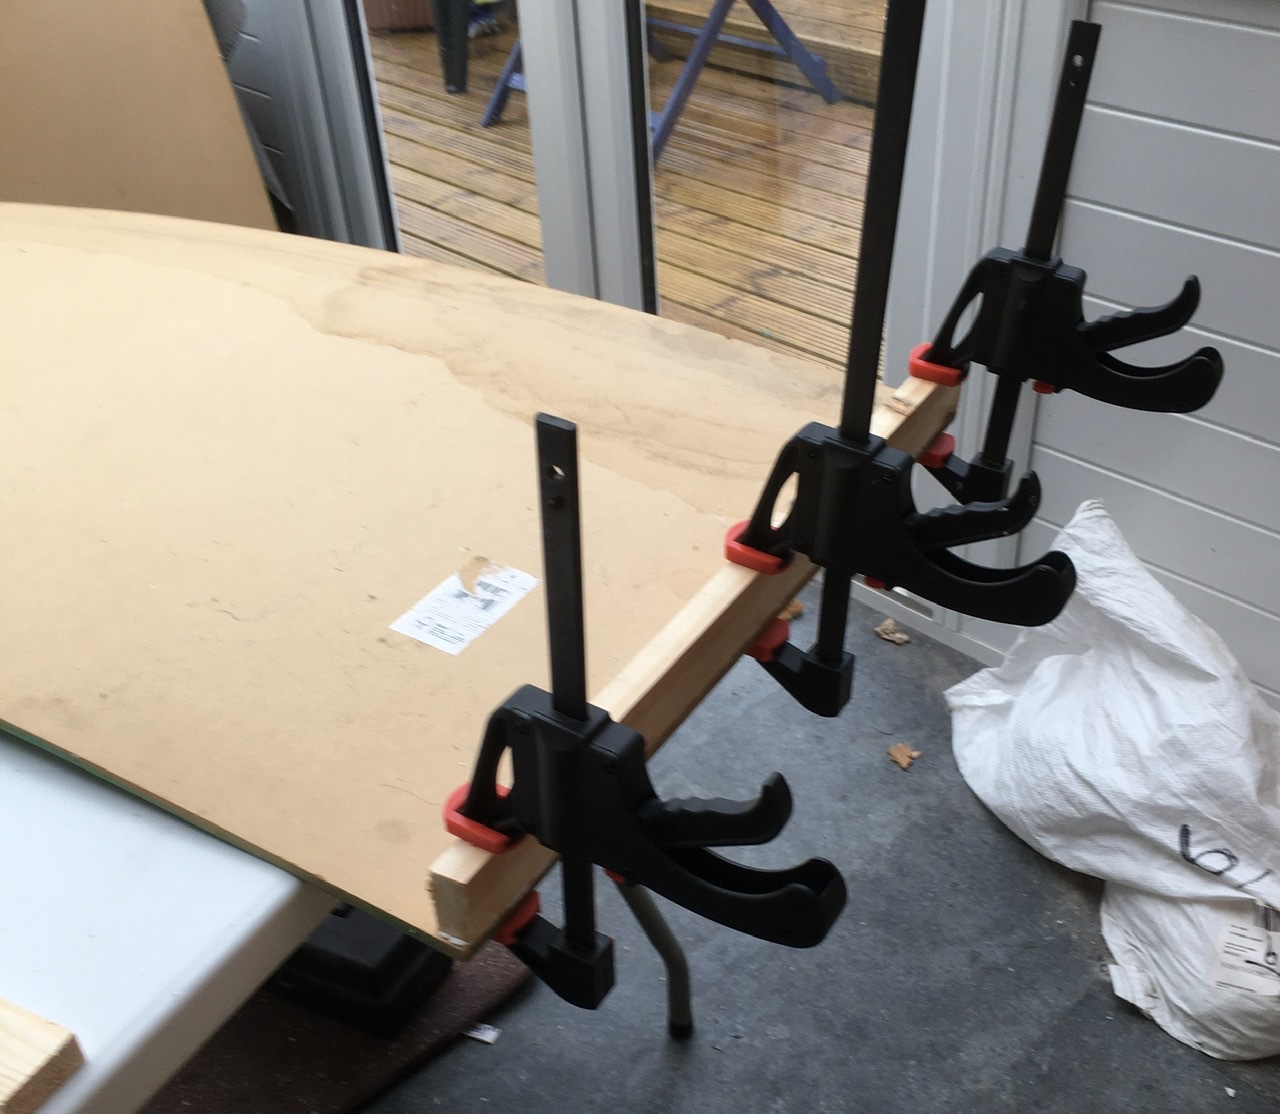
The MDF boards were pretty badly warped so I needed to use timber battens to pull them back into shape.  Fortunately I have a builder doing some work in the house at the moment and he kindly cut the battens to length with his chop saw which saved me a job.  If you want to avoid this most Do It Yourself stores will cut any  timber you are buying from them. I didn't bother mitring the joints at the corners of the boards.  Simple butt joints are fine for the frame.  I used 1" x 2" timber for this and glued the battens in place with 'No More Nails' one batten at a time.  I clamped them in place and them drilled pilot holes and screwed the battens into place (Screw and glue as us experienced woodworkers call it 😜) 

You can see the warping in this shot of a clamped batten
I remembered to countersunk the screwheads to keep them below the finished table top.  Lastly I used timber architrave to create a lip around the side of the table top.  If I use rubber mats under my drop cloth that will stop it sliding off the edge..  I have done that around three sides of the first board, I will be doing the same around the short ends of the next two and again around three sides of the last board.  That way I can alter the length of the board to create a 4' x 4' up to a 8' x 4' playing area as required.  Altar of Freedom only needs a 6' x 4' at most but as I had the extra MDF board why not go for it.

I filled the counter sinks with filler once the battens were screwed down and the glue dry
You can see how the boards butt together in the photo above.  I need to drill holes through the frames where they butt together so I can bolt the individual boards together.

Mrs E was very impressed that I was doing DIY especially as I was using grown up power tools and no trips to A&E were required.  She was less impressed that it wasn't anything she thinks of as being useful like a shelf!

Look I still have all my fingers!
I have a one litre can of a nice leaf green acrylic emulsion I got mixed for me at B&Q which I will paint the table top in.  The previous horrid mint green is safely hidden as the underside of the new boards.  To finish I need to find some of the builder's insulation foam that doesn't have plasterboard glued to it for use as formers for hills and make some more canopy woods (a lot of canopy woods) and I'm all set.


Tuesday, 11 August 2020

2mm buildings for Altar of Freedom


After a bit of Googling I have come to the conclusion that I need to scratch build some of the buildings I will need as no one seems to have all the buildings I want and some of the ones which are available may be incorrect.  Beware, what follows is the result of entire minutes of detailed web surfing so may not be accurate! 

That warning aside lets look at the first building I'm interested in Henry Hill House from the First Battle of Manassas/Bull Run.  A number of models of this house are available in different scales and mediums.  Below is the Leven Miniatures 6mm version in resin.

6mm Henry House
From the Leven catalogue - Henry House as most models show it

As with all Leven models it really is a lovely casting but sadly it is too big for 2 or 3mm use and it may not be as the house looked in 1861.  That is no reflection on Mick at Leven,  as every other model of this house is the same.  In fact I used the Leven version as an image as it is such a nice item.  Until an hour ago I would have unflinchingly accepted those models as accurate (damn you Google search).

All of the models I have seen are based on the building which sits on the site now.  The original was very badly damaged during the battle and demolished sometime before 1870.  According to the US Library of Congress >>Link<< the existing building was built on the site of the original property in 1870.  The Library of Congress site says that it was "Built of wood frame construction on a fieldstone foundation, the Henry House originally consisted of two rooms downstairs and two rooms upstairs, with an external chimney centered on the north gable. By 1883 an addition had been constructed at the north end of the house, adding another room to each floor, and including a cellar." 

The chimney is the key as the modern property has the additional two rooms beyond the location of the chimney.  Photo's of the present building clearly show that there is a join at that point with the pre 1883 extension to the left in the photo below.  So it looks as if the original house was smaller than the current one and so smaller than the available models. 

You can see the join in this shot.

Another factor is that several Civil War websites also have the drawing below listed as a drawing of the damage to the Henry House after the battle.  If that is accurate it does have the chimney on the outside of the gable but there are no windows to the upper floors as the roof comes down to sit level with what would be the ground floor rooms' ceiling.  (Source is the Civil War Wiki).  The upstairs rooms would have had to be in a loft or attic space.  Its side doesn't look like the Robinson House which has a prominent extension to the roof forming an attached rear room and porch and the only period photo I have found doesn't have windows in the end elevation of the building.

File:Henry-house-drawing.jpg
Is this really the Henry House after the Battle?

There is also this photograph which is also  described as the Henry House after the battle  But I'm not convinced by this either as it has two chimneys.  Clearly at least one of them must be wrongly identified and possibly both are wrong.

I'm almost certain that Henry House only had the one chimney not two, so where is this?

It can't be the Stone House as, .......well,  its clapboard not stone.  That leaves Sudley Sulphur Springs House which I don't know anything about so can't compare to this image. Of course it could be a different house on a different battlefield altogether.  Its a bit of a puzzle really.  So where does that leave me?  Personally I would go with the design of the current house but shortened and with an external chimney effectively removing the 1880's extension and be very happy with that.

In other small scale news I ordered the Brigade models pack of ACW buildings in 3mm yesterday so I will wait to see how those look and scale to the figures I made before deciding what to do.  All of which simply proves that sometimes I'm far too much of an accuracy nerd for my own good.

Monday, 10 August 2020

Back in front of the keyboard - what have I been up to?

 What have I been up to of late?  Well Mrs E and I took a short holiday, nothing fancy and mostly taken in our garden and then we have had some building work under way which has slowed down my blog output.  Oh and I was binge watching 'The Big Bang Theory' on Netflix as well.  The other thing (and probably of more interest to you) is the progress on the 2mm Altar of Freedom units.

I sent off an order to Irregular Miniatures, just after my last post, for some 2mm castings to cover the HQ elements, Artillery and and command bases and have painted these up and based them since last I posted.  The army command post casting  is really rather nice having tents, picketed horses and a couple of figures gathered around a table.  It comes with a flag attached to one of the tents but I clipped that off.  The rows of small tents are also very useful and the large tents add a bit of variety.  Throw in some covered wagons and all the components for the command stands are sorted!

As you can see from the pictures I have added some overscale flags to the HQ and command bases so they are easier to identify on the table.  I'm ignoring the fact that these are wildly out of scale as they will help show where the centres of operation are.

HQ and Command stands for First Bull Run/ Manassas 

I also bit the bullet and purchased the STL files available from Forward March Studios these only cost $15.00 and provide a huge number of files for troops from late renaissance through to the late 19th century along with some terrain items.  Once I have decided what I need I will arrange to get some  printed. I also lost some time playing with Tinkercad a 3D modelling software package.  This is free on line and although it's not a professional level package I think it will let me edit the STL files from Forward March should I want to.

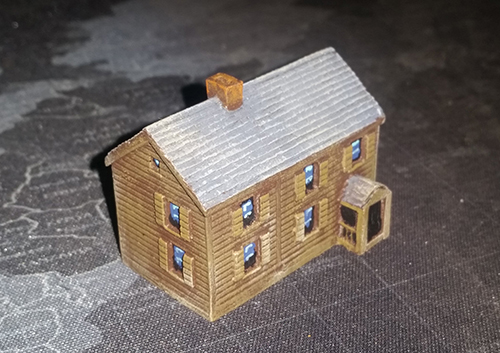
The thing which is slowing me down is the sourcing of 2mm ACW buildings.  The Altar of Freedom site provides some paper models for free covering some of the best known  buildings from the various Battle sites but although described as 3mm scale I found them a little over sized.  Nearer to 6mm then 3mm in fact.  Still reducing the size on the print settings easily solves that.  What it doesn't solve is the the fact that I find making a 1/900th scale paper building tricky with full scale fingers!  Brigade models do some ACW buildings which include some I can identify as being based upon those on the Bull Run Battlefield as well as from A few others.  They don't do the bigger buildings for say Gettysburg though and I can see why from a commercial perspective.  After all how many Lutheran Seminaries will I, or other ACW gamers, need to buy?  Demand would be limited so its never going to be a priority.  Which is where I was hoping 3D printing might help but 2mm and 3mm is not well catered for at present.

Picture
Nice production values for a free download

I have tried my hand at making some using some old house shaped pieces of hard wood from the bits box which are not too bad but don't look like any of the well known buildings.  They will work as generic buildings for towns and villages but I should really like to have a recognisable Henry House or Stone House available.

Most Altar of Freedom games are played on a 6' x 4' Table, with a very few using a 4' x 4' table.  I have been meaning to create a wargames board for a long time (If I'm honest that's a very, very long time) so I dug out the MDF boards that have been sat in garage since we moved in and stripped off the badly made Bussaco terrain they were covered with, to bring them back to a level surface.  They have warped slightly since I made the Bussaco boards back in 2007 so I need to batten them to take that out and then seal them.  I have four 2' x 4' boards so that's more than enough for what I need.  1" x 2" timber should be enough for the battens and I intend to drill through them and use kitchen unit connectors to fasten them together as required.  A coat of cheap emulsion paint and Bobs yer Mother's Brother and all that.