The Soviet force consists of three T-62 companies and two Infantry companies mounted in BTR-70s. Facing them is a Squadron of Chieftain mk5s and a company of Infantry mounted in FV432s. The infantry are already dismounted and in makeshift positions when the advancing Red Army formation is spotted. Two Chieftain troops and a company of infantry on the reverse slope of Hill 1 supported by a third Chieftain troop luring in the dead ground behind Wood B. A company of infantry dismounted in the flooded quarry area another on Hill 3 and the last in the rough ground west of Bad Heredaisse. No troops in the town as it was expected to be an artillery target.
The Soviets are attempting to use three axis's of advance towards the town. a company of T-62s spearheading the advance down each road from the east table edge each with a company of BTR-70s following up and a third tank company to the North flank. The Table is 6 feet by four feet so there is a lot of ground for the Russians to cover.
Rules are the free version of a Fistful of Tows 3 but with the 'average' modern vehicles replaced with period specific ones from the excel data sheet on the game website. The game scale is one model represents a troop/platoon and one inch is 100 yards on the table.
The schematic of the table above shows the key features the oblong and triangle areas are rough ground. All other fields and hedges are there for the look of things but don't have any effect. Black rectangles represent built up areas they are difficult ground but most are small enough to work around.
 |
| 1. The Table. East is at the Top. |
The schematic of the table above shows the key features the oblong and triangle areas are rough ground. All other fields and hedges are there for the look of things but don't have any effect. Black rectangles represent built up areas they are difficult ground but most are small enough to work around.
 |
| 2. The table from the BAoR end |
Turn one.
The Soviets move first as the attacker and push forward with their three companies of T-62s backed up by the BTR 70s as the second echelon. As they break into the open ground to the east of their objective British Chieftain main battle tanks move forward from their hidden defensive positions and open fire at long range. All four chieftain troops engage and each destroys a T-62 platoon. This doesn't look as though it's going to be a good day for the Red Army.
 |
| 3. Initial NATO positions on Hill 1 |
 |
| 4. The Soviet's initial set up |
 |
| 5. The first shots from long range find their mark. Scratch four T-62 Platoons |
Turn two.
In response the Soviet commander calls down a major barrage of artillery on and around Hill 1 but it is singularly ineffective. Only one Chieftain troop is suppressed all of the other strikes are ineffective. The surviving T-62s rush the forward British defensive position on the Hill closing to within 400 yards before engaging. The sheer volume of fire destroyed two of the forward Chieftain troops. However the push to close the range brings them within reach of the infantry on the hill. They are on overwatch and take out one of the attacking T-62s with their Charlie G (MAW in game terms).
After which they evacuate their position and retire towards town covered by a troop of Chieftains.
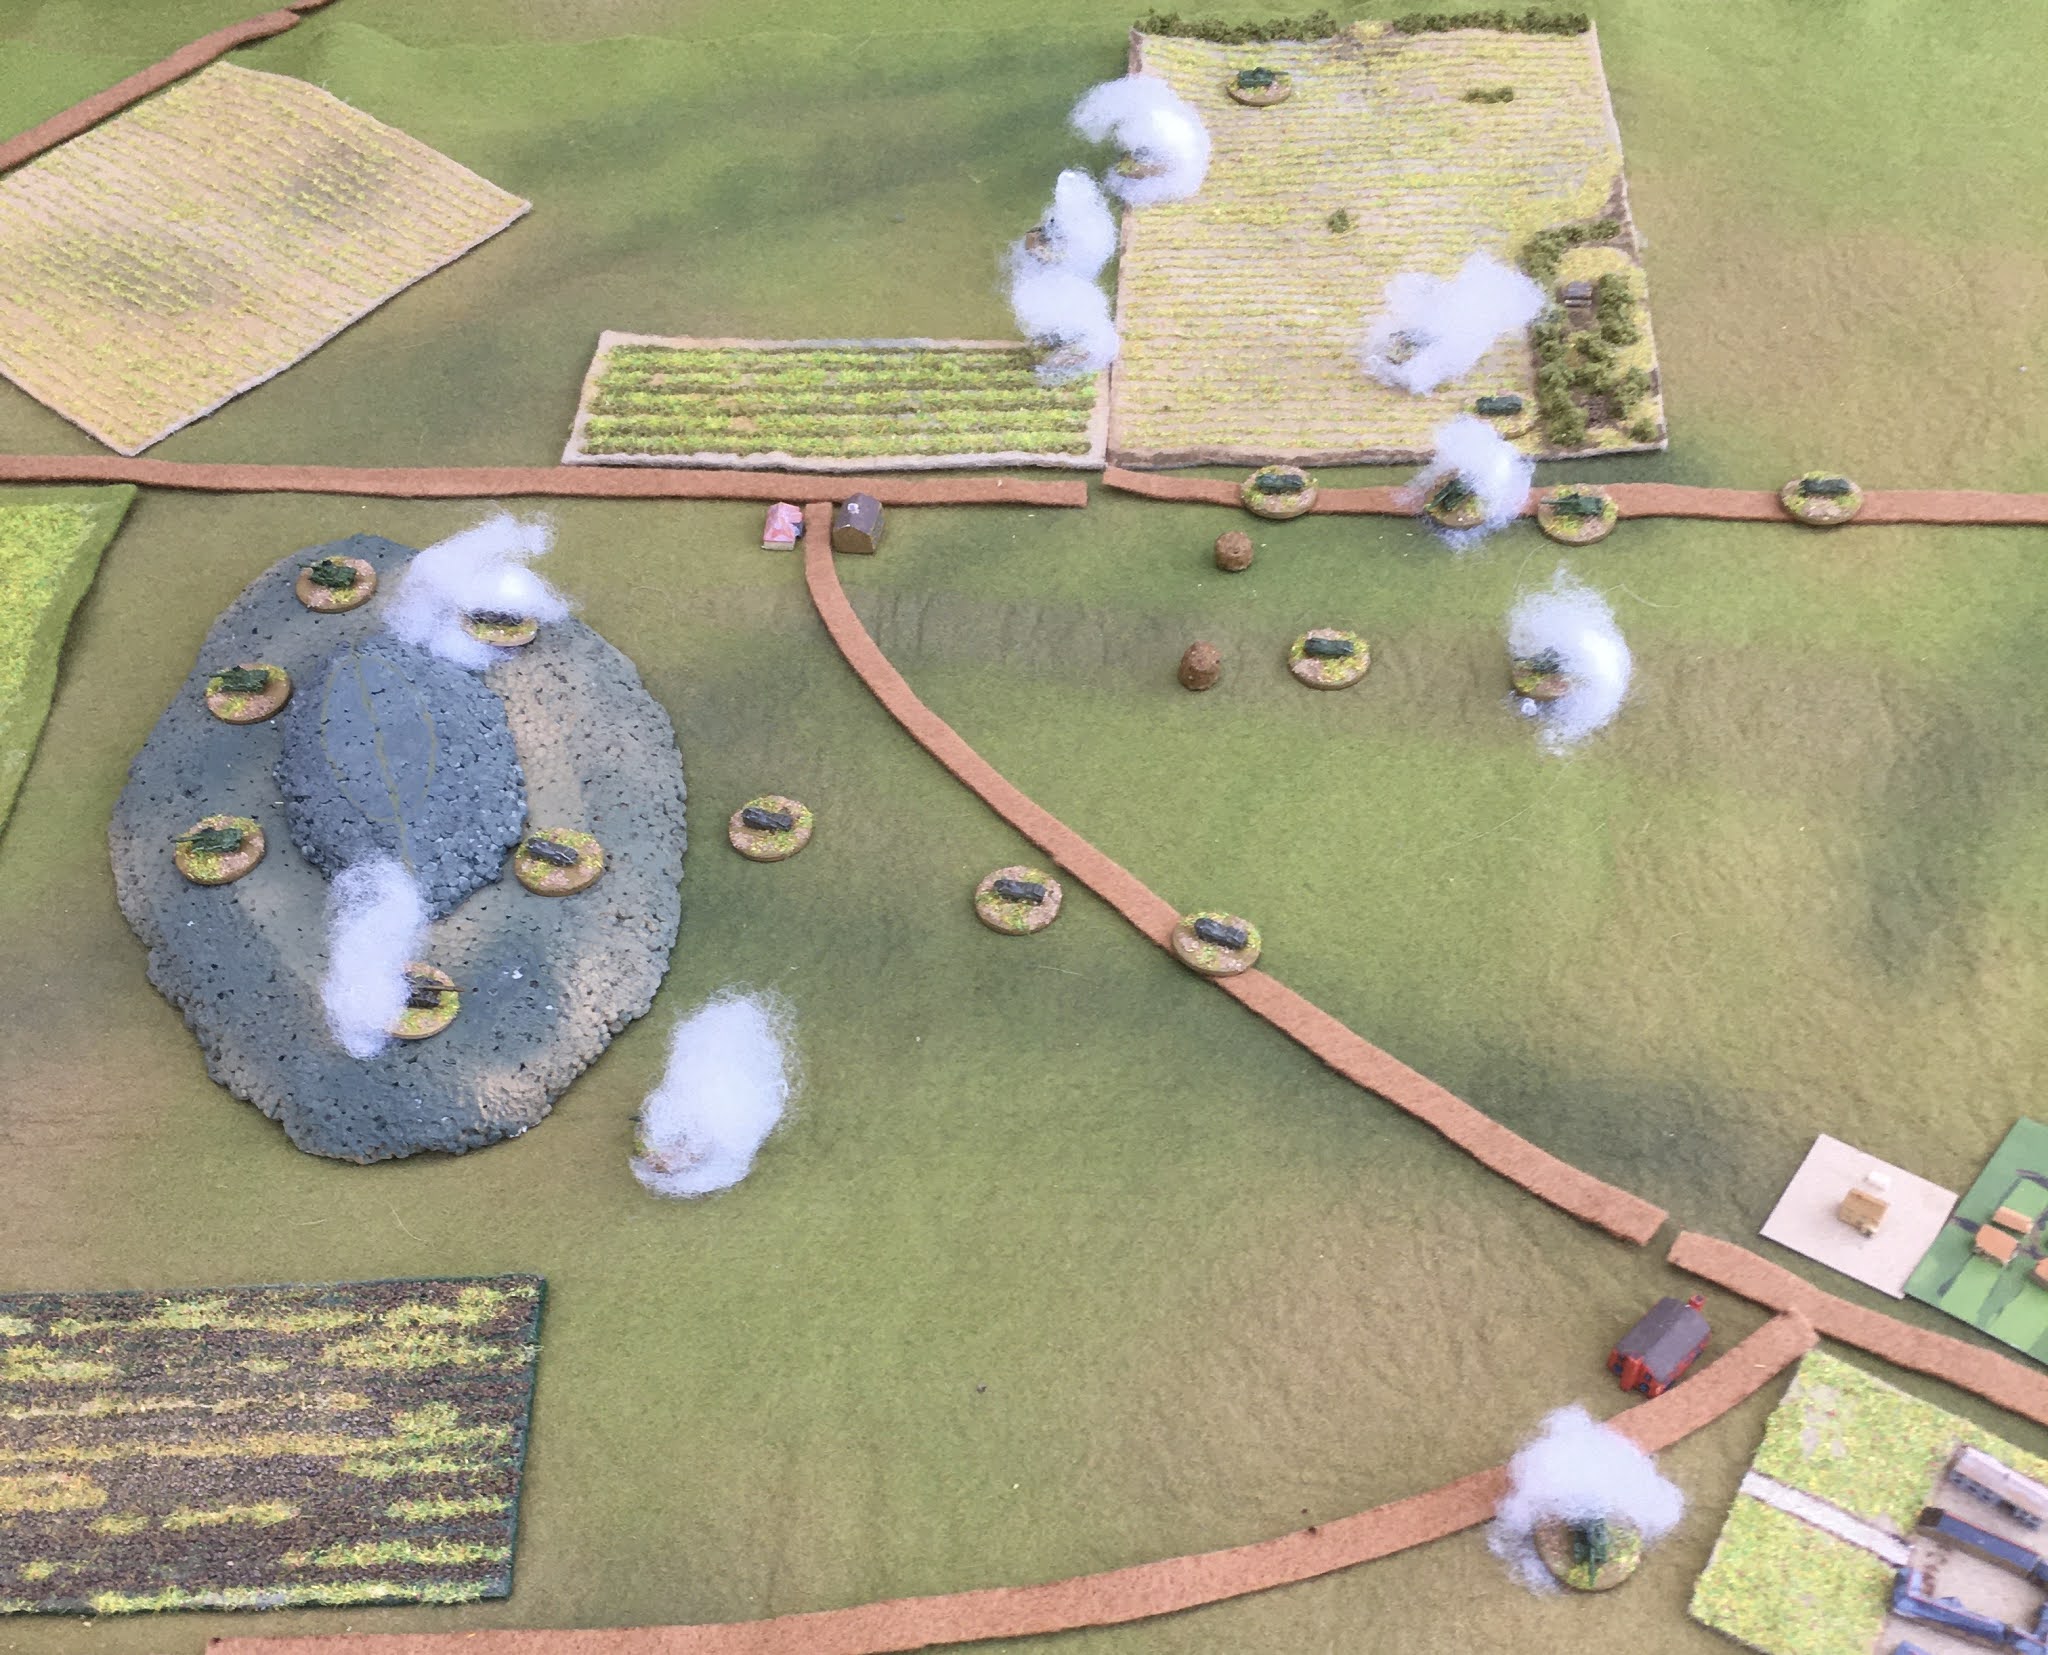 |
| 6. Soviet Infantry and Tanks on Hill 1 while tanks burn all around. |
A second round of long-range anti-tank fire is laid down by the two surviving Chieftain troops. Again the impact of the 120 mm guns is devastating and the northernmost and southern Soviet tank companies are reduced to one platoon each they fail the resulting quality test and are rendered combat ineffective.
Turn three.
Soviet artillery so far has been remarkably ineffective so far so the Soviet commander calls in a pre-planned interdiction barrage to the west of the objective hoping to dissuade the British from moving troops forward into the town. One BTR company occupies Hill 1 while elements of the second push into the town and debus. Not all of these make it as a Chieftain on overwatch destroys one of the APC platoons. The infantry onboard survive but now reduced to moving on foot are not going to play any real role in the rest of proceedings. The Soviet tanks are now concentrated on the west slopes of Hill 1 and destroy both the retreating FV432 platoon and it's mounted infantry as well as the Chieftain troop covering them.
The BAoR force is now reduced to one troop of Tanks and three companies of Infantry all of who are in positions around the town. The Soviets are down to one platoon of T-62s and one full company of Infantry and one which has lost a platoon transport.
 |
| 6. Russian infantry deploy into defensive positions in town |
End Game
I called the game at this point. Unsupported Russian Infantry were not going to get away with an APC charge for the end of the table and two of three tank companies had failed quality tests so only one tank platoon was still in action. Despite threats from the political officer the commander decided to hold what they had and let the second wave pass through them to take the next objective.
British forces stayed on the hills overlooking the town and in the quarries to the North but would struggle to push the dismounted Red Army infantry out of Bad Heredaisse. I'm agreeing with the political officer here and calling this a victory for the progressive forces of the People's Red Army as they took the initial objective. In military circles it is said that the Soviet commander commented that with a few more such stunning victories they could loose the war.
 |
| End game. Soviet Infantry hold the town The east is littered with burning armour. |
The rules
The introductory set play very fast and are bloody. If a tank is in range they have a very good chance of killing an enemy tank. The Chieftain even at long range is pretty much guaranteed a kill against a T-62. That may in part be due to the simplified game mechanics. The Russians really have to weather the storm and close to normal or even short range but when they do they too are in the "if I can see it I can kill it" zone. That said I'm not certain that this is wrong and if it is there are simple tweaks that can be made to reduce the efficiency of tank direct fire. The game does mirror the long held view of western superiority in technology as the balance to Warsaw Pact numbers. My only issue is that in the introductory rules at least the "I shoot, I score" issue removes some of the supposed Western superiority. I suspect things like gun stabilisation and engaging multiple targets each turn would swing things back the other way in the full rules. Despite these slight reservations I will be buying a set of the full rules based on this play test. The reasoning is simple one set of rules mechanisms to cover everything from World War One to ultra Modern conflicts makes life really straight forwards.
Last but very much not least, the 3mm toys looked really good on the table. Small enough to avoid the hub to hub deployments from other games which is forced by the discrepancy in figure to ground scale but big enough to be clearly seen as models not counters. Vehicles and infantry are Oddizial Osmy buildings a mix of Brigade models and scratch built.
PS Bad Heredaisse....bad hair days, get it? Oh come on it wasn't that bad!
Splendid, I might have to give FFT another look.
ReplyDeleteRegards,
Paul.
They are very fast to play and the mechanics are very straightforward to grasp. ASs I said above 'the see it kill it' thing is my only issue. If the main rules are the same then the West German design philosophy of speed rather than armour for the Leopard 1 will come into it's own!
DeleteLoved that mate. The village buildings are ace. Will we be getting a campaign?!
ReplyDeleteI need to order the full rules first before I commit to something longer term. If not a campaign it will be at least a series of linked games. As for the villages most of the buildings are Brigade but they are slightly under scale compared to the troops. I may have to scratch build something closer to the size of the vehicles. Plus no one seems to do things like petrol stations or supermarkets in 3mm.
DeleteNice set-up. The tanks and other vehicles look good against your terrain. The very picture of the North German Plain. Those red roofs look very Germanic.
ReplyDeleteThe game seemed to play out according to what I understand was the expectation at the time. BAOR would give Warpac forces a bloody nose but would get quickly chewed up by superior numbers.