Tuesday, 2 May 2023

Shacking up

What De Lancy doesn’t currently have are any homes. Not everyone lived over the store or out on the range so I need some homes. Period photographs show that in frontier towns these were often little more than shacks. So I thought about it a bit and came to the conclusion that I could make shacks especially run down ramshackle ones!

The basic shape of the floor and sides is all one piece

I decided on card clad with coffee stirrers.  Foam would be good for adobe buildings but I wasn’t fully happy with the material when I made the De Lancy store model as the walls felt too thick.  Strangely the card and cladding technique felt much more robust than the foam method.  The recycled card used in a lot of pet food packaging is great for this as it is thicker than cereal box cardboard.  Fortunately we have a dog so there is usually plenty around awaiting recycling.

Sides clad and assembled, roof under way (but wonky)

The card is easy to cut and fold the tricky bit is drawing up the building plan, and even that isn’t really too hard.  Cutting the stirrers would be easier with a mini band saw but a sharp Stanley knife and a cutting mat works OK.  Corner cladding was more card with everything glued together with PVA wood glue.  to finish I gave a liberal coat of brown ink (I wanted a darker look than the timber of the bath house to suggest tarred or creosoted wood.  The flat roof is the card with a coat of Vallejo German Grey to look like tar paper.   A thinned red wash for door and window frames with a white ink wash to give a distressed look and voila it's done.

The finished article (with lurking bad guy)

The build didn't take too long all complete in probably 4-6 hours, not certain as I did it in short bursts between other stuff.   The next one will be easier now I have established the technique, I might try a shotgun house next, or even a dog run house, (honest those are real styles) or I may just make more shacks.

Sunday, 30 April 2023

Let's clean up this town!

Cleanliness is next to Godliness or so they say, and as De Lancy has no church yet I thought that a bath house might be a half way decent alternative. I also had a couple of ideas on how to make some of the tented temporary buildings which often sprang up as a town was growing, so the bath house is located in just such a structure.

Basic framework done

The core of the building is made of cardboard with a balsa and coffee stirrer frontage.  The external timber footings are also coffee stirrers and the canvas is printer paper laid over the card and soaked in PVA wood glue.  A nice simple construction technique.  As always the key is to measure twice and cut once.  In this case that meant drawing the front elevation at full scale and then measuring the sides and sloped top on the drawing so I knew the dimensions to make the card tent top and sides.  I was still out by a small amount but the papier-mache covering hid that.  The trickiest part was gluing the front and back to the top and sides piece, but I got there in the end.  To create the illusion of a frame I cut some thin strips of card and glued them to the tent shape which worked rather well.  I put a groove down the centre of the coffee stirrers (length ways) to make each one look like two narrower planks and added some grooves for the ends where planks butted up against each other.

Frontage added along with 'canvas'

Painting was fairly basic; a wash of GW Agrax Earthshade over the wood work and to create the impression of shadows in folds in the 'canvas'.  I searched the web and found some useful signage that I reduced in size so it was roughly to scale. After gluing them to the frontage I added a wash of Windsor and Newton white acrylic ink to the top of the false front and some rolled up PVA soaked loo paper as rolled canvas over the doors.  and a half open curtain inside the doors.  I'm really quite pleased with the result.

First stage of painting completed

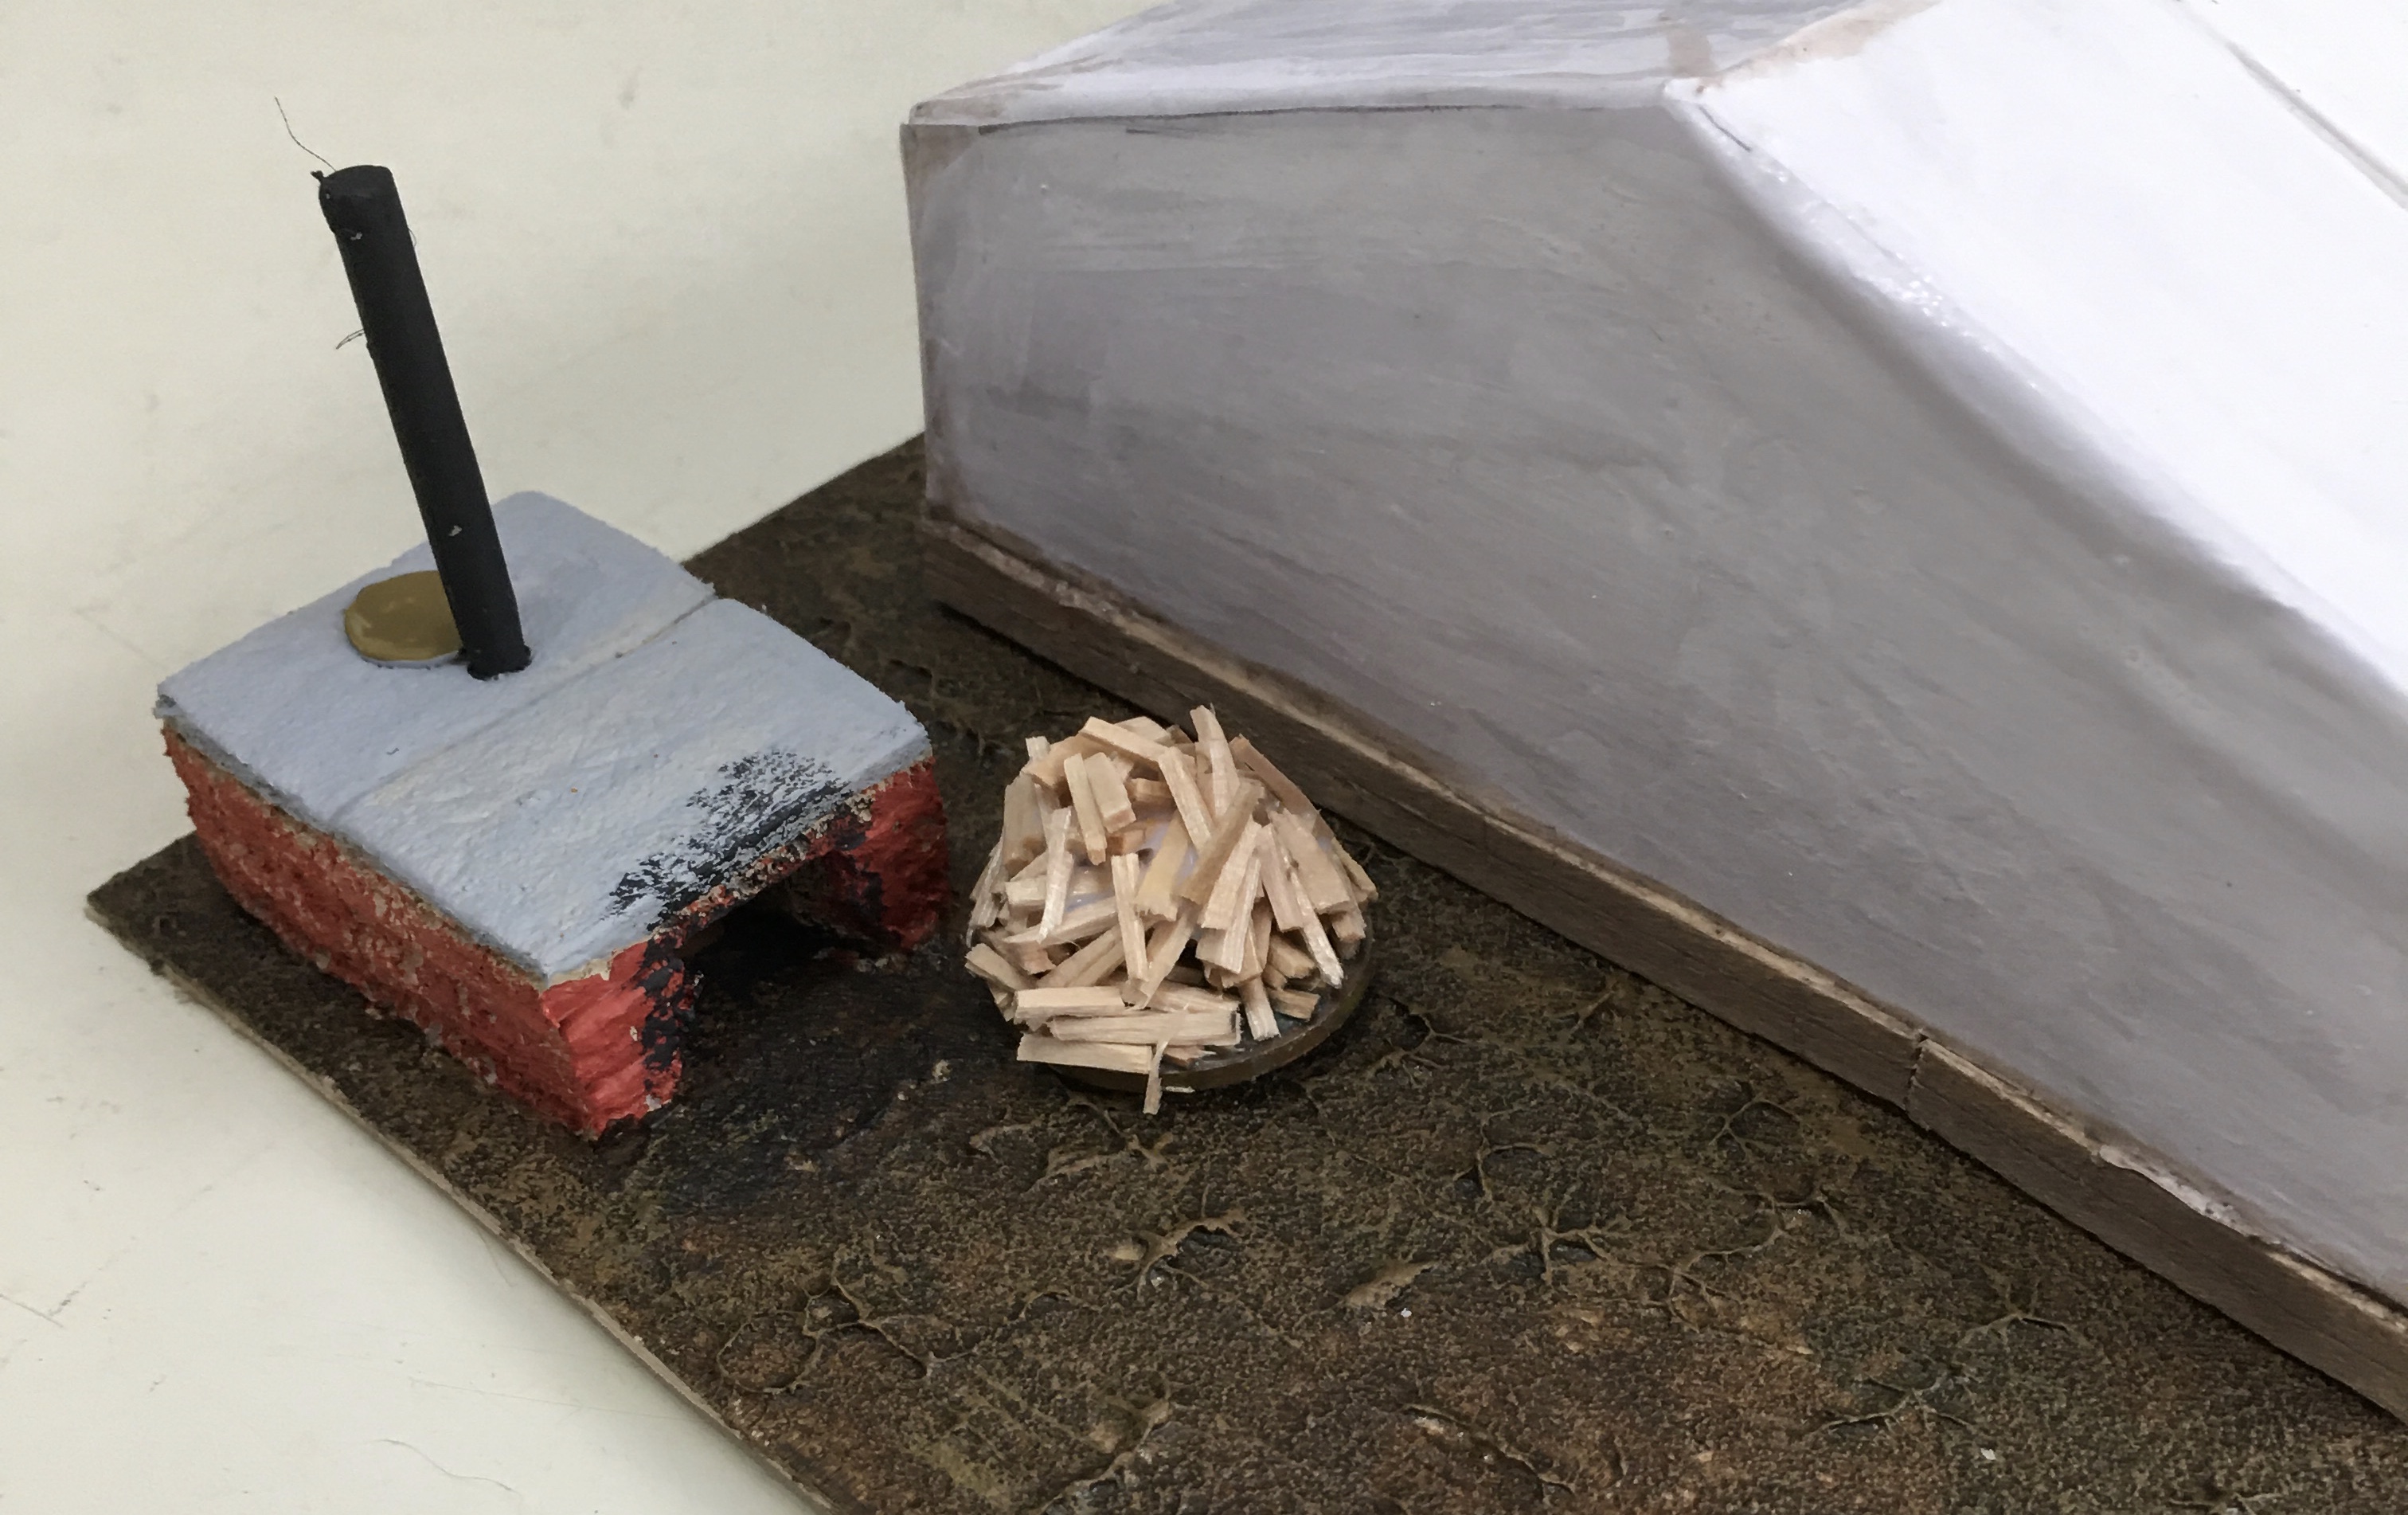
This being a bath house means that hot water would be available (for a small extra fee) so I needed to create the means of heating water.   Further Google searching gave me an example of wood fired water heating used in the 19th Century that looked easy to create.  This is a brick box with a door for fuel and an enclosed cauldron above it.   This was made from three layers of 5mm insulation foam, a skewer and the head of a roofing nail as the caldron lid. 

Around back is the water heating system and fuel

Closer view of the frontage

To flesh out the town I have also been making more fences.  There are going to be quite a few of these so to aid with that chore I created a framing tool to line everything up and mark sizes and fence post locations.  It isn't exactly high tech but it does the job.

The fence framing jig in all it's low tech glory
 
Of course you didn't expect me to stop at one new building did you?  No I didn't think so.  I have started work on a very basic shack or maybe it's going to be an outside store.  Either way it's an extra building.  As you can see in this case measure twice cut once didn't work!  Fortunately dog food card packaging is pretty forgiving and a new false floor hides a multitude of sins (and Tesco branding).  Cladding the exterior walls is a slow job and I need to go find a new Stanley knife blade as the current one is now very blunt so that's it for this post.   

Next up is a very basic shack

Wednesday, 12 April 2023

Have I mentioned that I hate rebasing

I really hate rebasing, really, really hate it. You think you have done a decent job on some bases and either they are the wrong size for the latest ruleset or you realise that they aren't as nice as you thought they were! In this case it's the latter situation, I based some 6mm micro armour and now I don't like the basing material I used, its a cardstock and has warped over time. So it's time for a slightly bigger and more robust base in MDF or mounting board.

You can see how this base has warped....bah!

The vehicles in question are mostly for the 1940 WW2 project which has lain unfinished (possibly they have been languishing, to be honest I haven't looked that closely in the storage box to check) for a couple or five years.  There are also some mid war Eastern Front models which were bought even longer ago, pre internet probably, as the German stuff is in Panzer grey not Dunkelgelb.  The main thing is that I need to do something with them and to finish painting the ones which are still in bare metal and to get on with rebasing the rest.

Painted 1940 German stuff, all for a rebase!


Mid war Germans for a repaint and rebase

Also from way back when is the Soviet contingent a mix of GHQ and Heroics and Ros (I think).  The hulls and the turrets could very well be miss matched!

Soviet armour, including two with lost turrets!

The Russian vehicles will do with a quick touch up and (the dreaded) rebasing.


Soviet artillery support SU-76s and an unidentified gun


Lend/Lease half tracks for Ivan probably H&R


The British Armour is mostly done with just some highlighting and shading to complete and tracks to paint.  Some of the German stuff is not even started, then their is the infantry and artillery to do.  


British Armour (GHQ) and some German transport (H&R)

Lastly I have several bags of Infantry, a battery of 25pdrs with tows, a battery of Hotchkiss 25mm AT guns and Austin tow trucks and a platoon worth of Universal Carriers to do something with.  So much lead, so little time! 

Thursday, 6 April 2023

The Painting table - March 2023

I took a bit of a break from painting and modelling during March, so the report is a bit sparse this month. As regular readers will already know I finished the 2mm ACW project early in the month and towards the end of March I took a paint brush to two of my Vapnartak western shootist purchases but didn't completely finish either one. I also took a look around the various unfinished projects that litter the hobby room and decided that I would have to rebase the 6mm 1940 stuff as part of bringing that project to a conclusion, although I'm not sure that planning counts for the purposes of this monthly update!

One thing I have rediscovered is that my 6mm painting technique really doesn't cut it for 28mm stuff.  I was never a great painter at that scale and my old technique based on Humbrol enamels as used on 25 mm Hinchcliffe ancients doesn't look right, so it was back to basics.  I'm not 100% happy with my results but I'm hoping that with practice that will improve.

I have found the Galloping Major style of sculpting slightly easier to paint than the Empress figures as the folds in the clothing are more pronounced which makes shading easier.  I will have figures from both ranges completed soon and you will be able to make your own minds up as to which you prefer.

Galloping Major's 'Soldiers Free' figure

Wednesday, 15 March 2023

2mm ACW project - finished Federals

Sound the trumpets and roll the drums!  I actually finished a wargaming project, the first I have totally completed in over fifty years of wargaming!  The last of the Federal units has rolled off the production line.  All I need to do now is actually play some more games of Altar of Freedom with them.

The final fourteen Federal bases - all artillery

The very last base completed

The final unit totals are:

Confederates

39 Infantry Brigades

7 Cavalry Brigades

14 Artillery bases

8 (each) Generals and HQs

Federal

54 Infantry Brigades

9 Cavalry Brigades

18 Artillery bases

10 (each) Generals and HQs

That's a lot of American man power and horse flesh even in 2mm.   

Next projects up will be to finish the western shoot out figures and then for a change of pace complete a project which has been ignored for a couple or three years (make that about ten!) early WW2 covering France 1940/fictional Operation Seelowe in 6mm. 

I still have lots of unpainted lead in the pile so don't worry about the consequences of getting everything painted!  It's not going to happen anytime soon.


Sunday, 5 March 2023

2mm ACW project - The Confederacy is done

Well painting their troops is anyway.  I now have all the bases completed which are required to field the Confederate side in any scenario for Altar of Freedom.  That is to say I have the maximum number of bases for each type, Infantry, Cavalry, Artillery, Generals and HQs which I could need in any of the listed scenarios.  I made one change to the standard rules when building the army, I have mounted my artillery on 60 x 30mm bases rather than 30 x 30mm ones.   However, this messes up their firing arcs, so I had to calculate the firing arc based upon the assumption that the base was actually 60 x 60mm (the optional alternative base size) and using the standard firing arc under the rules of one rear corner to the opposite front corner.  Not particularly difficult but it makes a difference.


So having sorted that out, McClellan like I had to stage a grand review of the troops!  

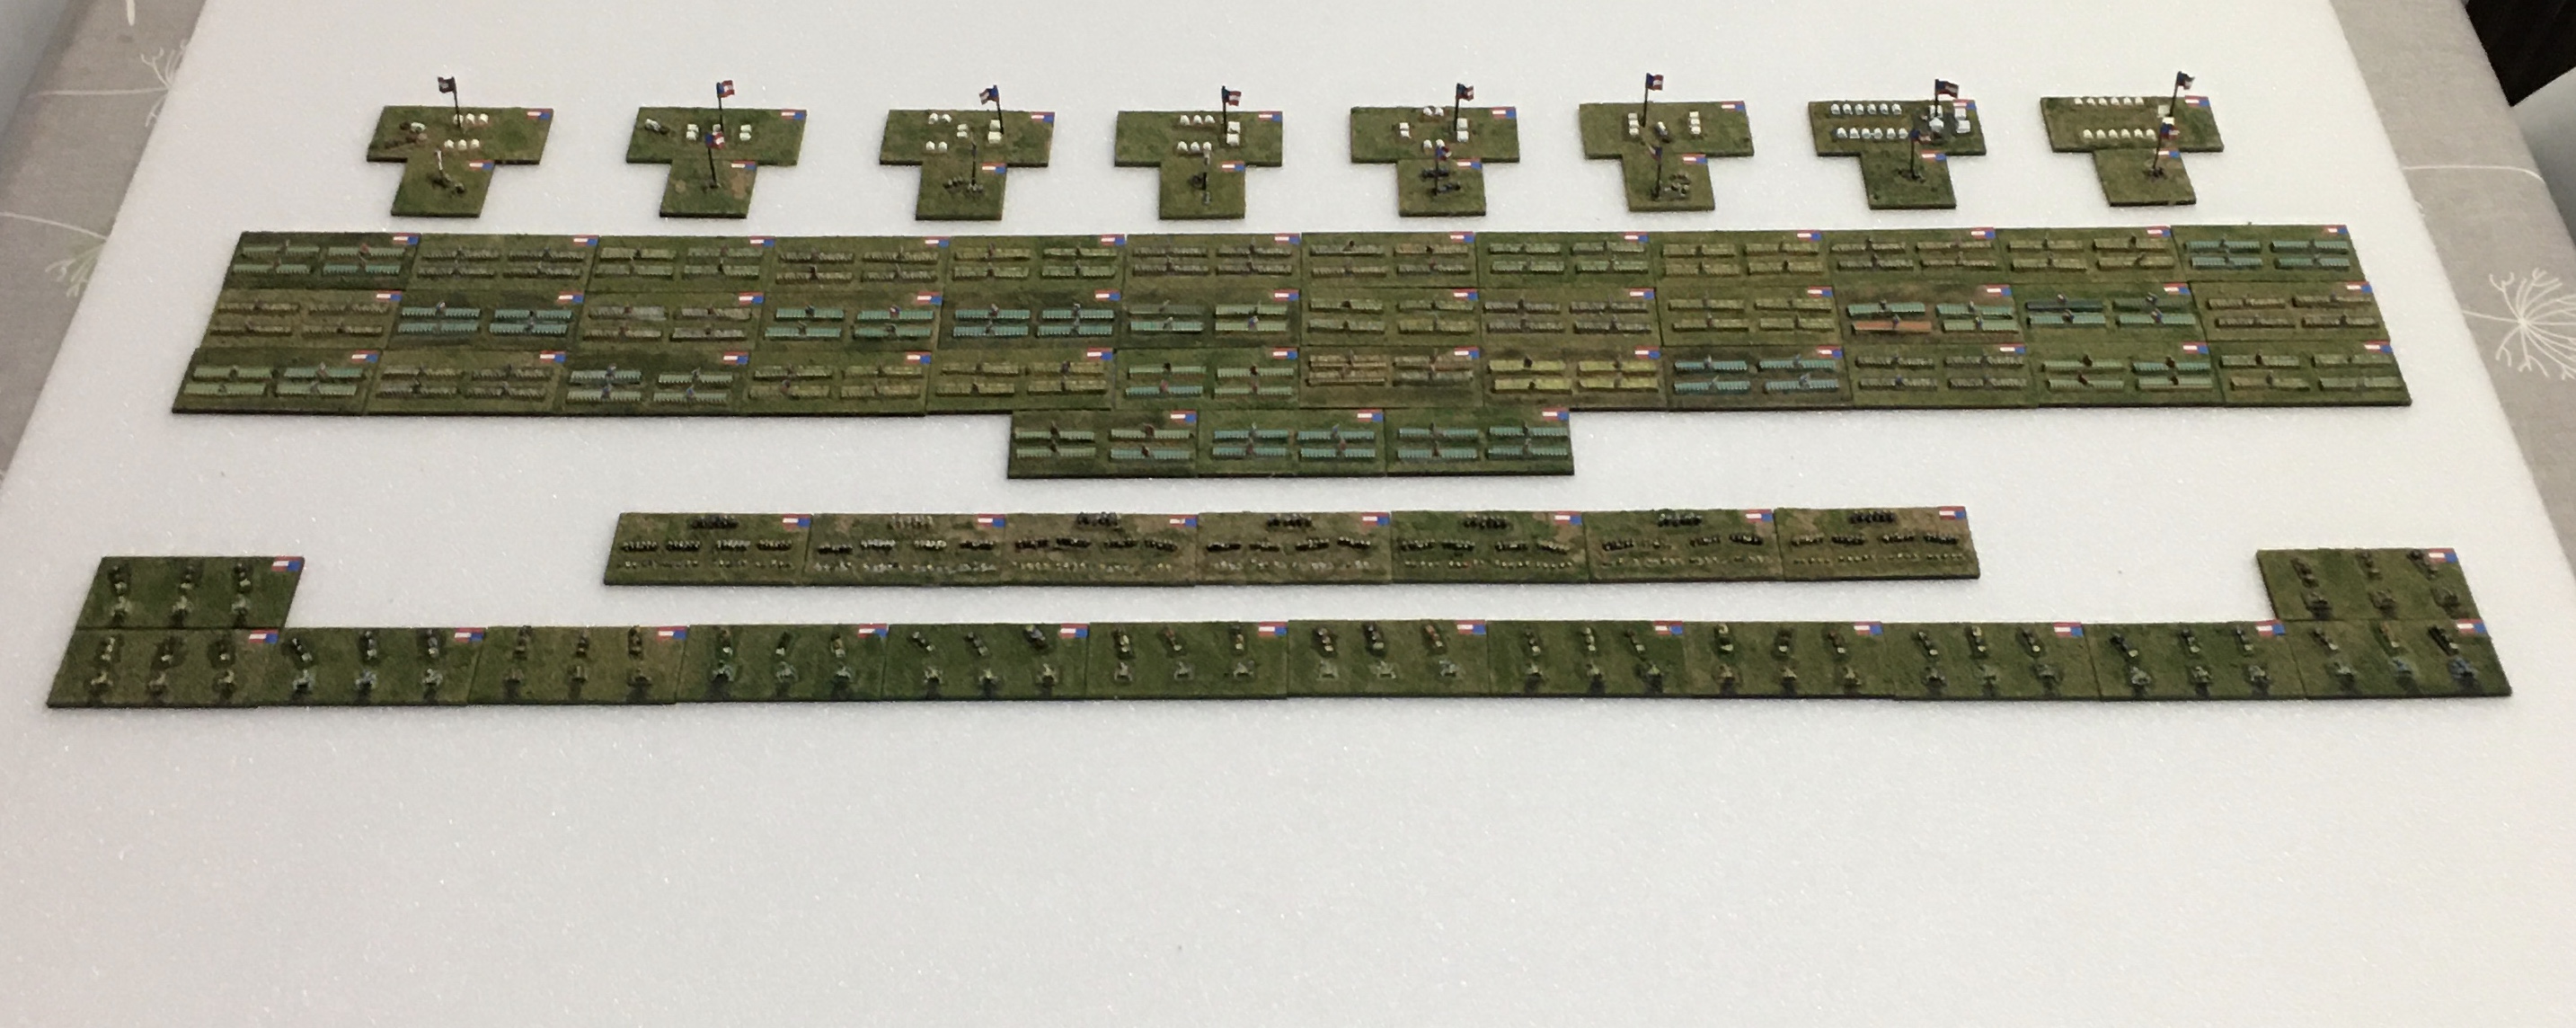
All the Confederates you're ever likely to need

In the above picture we have (from furthest to nearest) eight HQ bases, eight Generals, thirty-nine Infantry brigades, seven Cavalry brigades and lastly the fourteen Artillery bases.

I have the balance of the Federal forces, amounting to a final 14 artillery bases, on the painting table at the moment.  Those should be completed in the next day or two at the present rate of progress.  So watch this space for the equivalent grand review of the Northerners.

Wednesday, 1 March 2023

The Painting Table - February 2023

I managed to move up a gear this month with progress on the 2mm ACW backlog and three MDF kit builds completed.  I also undercoated and mounted the 28mm gunfight figures I bought at Vapnartak ready for painting.  Even so there is still an embarrassing amount of lead on the table but at least projects are moving along.

You have already seen the completed kits for the saloon, forge and cart in earlier posts so no pictures of those in this blog.  I have based all of the remaining 2mm ACW units and completed a Federal Cavalry brigade and three HQ bases, which finishes off those parts of the army.  Two artillery bases were added to the Rebel forces.  

February's figure output, not great but it's something

The remaining Confederate artillery is part painted and just needs some detailing.  The Federal Artillery arm is lacking 14 bases which I have made a start on. I have glued the castings to the bases, added the sand texture and put a base coat of green on them.

This is the last of the 2mm ACW artillery it should be done in a couple of days

There has been no further progress on the 28mm Old West figures or the 6mm ancients.  The current oldest inhabitants of the painting desk are some Baccus Sassanids who are going to proxy as Justinian Byzantine Infantry.  They have replaced the Huns as my main point of shame!  In fact things have gotten to the point where I have a painting table upstairs in my office and a tray downstairs (where the light is better in the evenings this time of year) as it reduces the clutter in the office.  The objective for March is to complete the 2mm ACW project and start back on to the Old West figures, so no more buildings for a bit.

The table is a bit bare by my standards - mainly because a lot of stuff is downstairs

Not strictly painting table related but stage one of the office tidy up was carried out on Monday.  I cleared some storage space by moving some Vinyl LPs (ask Grandad he will explain what those are) into the loft and my Bike leathers and boots are in the back bedroom while I debate what to do with them as they don't fit any more!  I have decided that the 15mm Napoleonic troops should really look for a new home as it isn't a period I will ever contemplate doing in that scale, so I have to decide how to them on. The next step in the tidying up project will be to sort the bookshelves out.  We (that's Mrs E and myself not the 'Royal We') have been here for five years now and still don't have my Science Fiction novels in alphabetical order by author!  Not that I'm anal or anything.  So still lots to do