I have a been interested in photography for most of my life, ever since my Grandfather gave me an old box brownie when I was a child (no they had not just been invented, thank you very much!). I worked my way up to shooting slides with an SLR camera before digital became a thing. Mostly I use my phone now a days which is simply for convenience. I do have an old Fujifilm digital SLR that does everything I need but I only use it for special events, or when I want to look like I know what I'm doing! All the pictures to date on this blog have been taken on various mobile phone cameras. Because I have an interest in photography and toy soldiers both, I tend to read about anything to do with taking shots of miniature subjects. That's when I became aware of the idea of a light box.
A light box is exactly what it sounds like, a box that lets light in. More accurately it controls the way light falls on the model by diffusing the light to give a more even light across the subject. Studios do that with big lamps, reflectors and similar expensive kit. We don't need that, all we need is a cardboard box, greaseproof paper and some sticky tape. If you want to go high tech you can buy cheap(ish) LED daylight strips as a source of illumination.
I used a cardboard box I found at the supermarket that was roughly the size of a box of printer paper. To start cut the front off the box (assuming it hasn’t already been done. You will want to get a good clean cut flush to what will be the base so it doesn’t interfere with photographing the model sat inside. Next cut windows in the sides and top but not the back, so that’s three in total. Mine are roughly 7 inches by 4 inches which is around 80% of the area of the sides of my box. Cover these with grease proof paper and secure with the sticky tape. Last but not least use a sheet of printer or artists paper to create a monochrome back drop. This should line the base and back of the box but not be pushed into the right angle between those two walls of the box. You want a nice curve between the two surfaces so that light reflects evenly. I currently use a sheet of white printer paper which is why I wanted a box about the size that printer paper comes in. I have also seen black paper used which works really well.
 |
| The 'windows' are to the sides and top. |
 |
| The front has two edges left as supports |
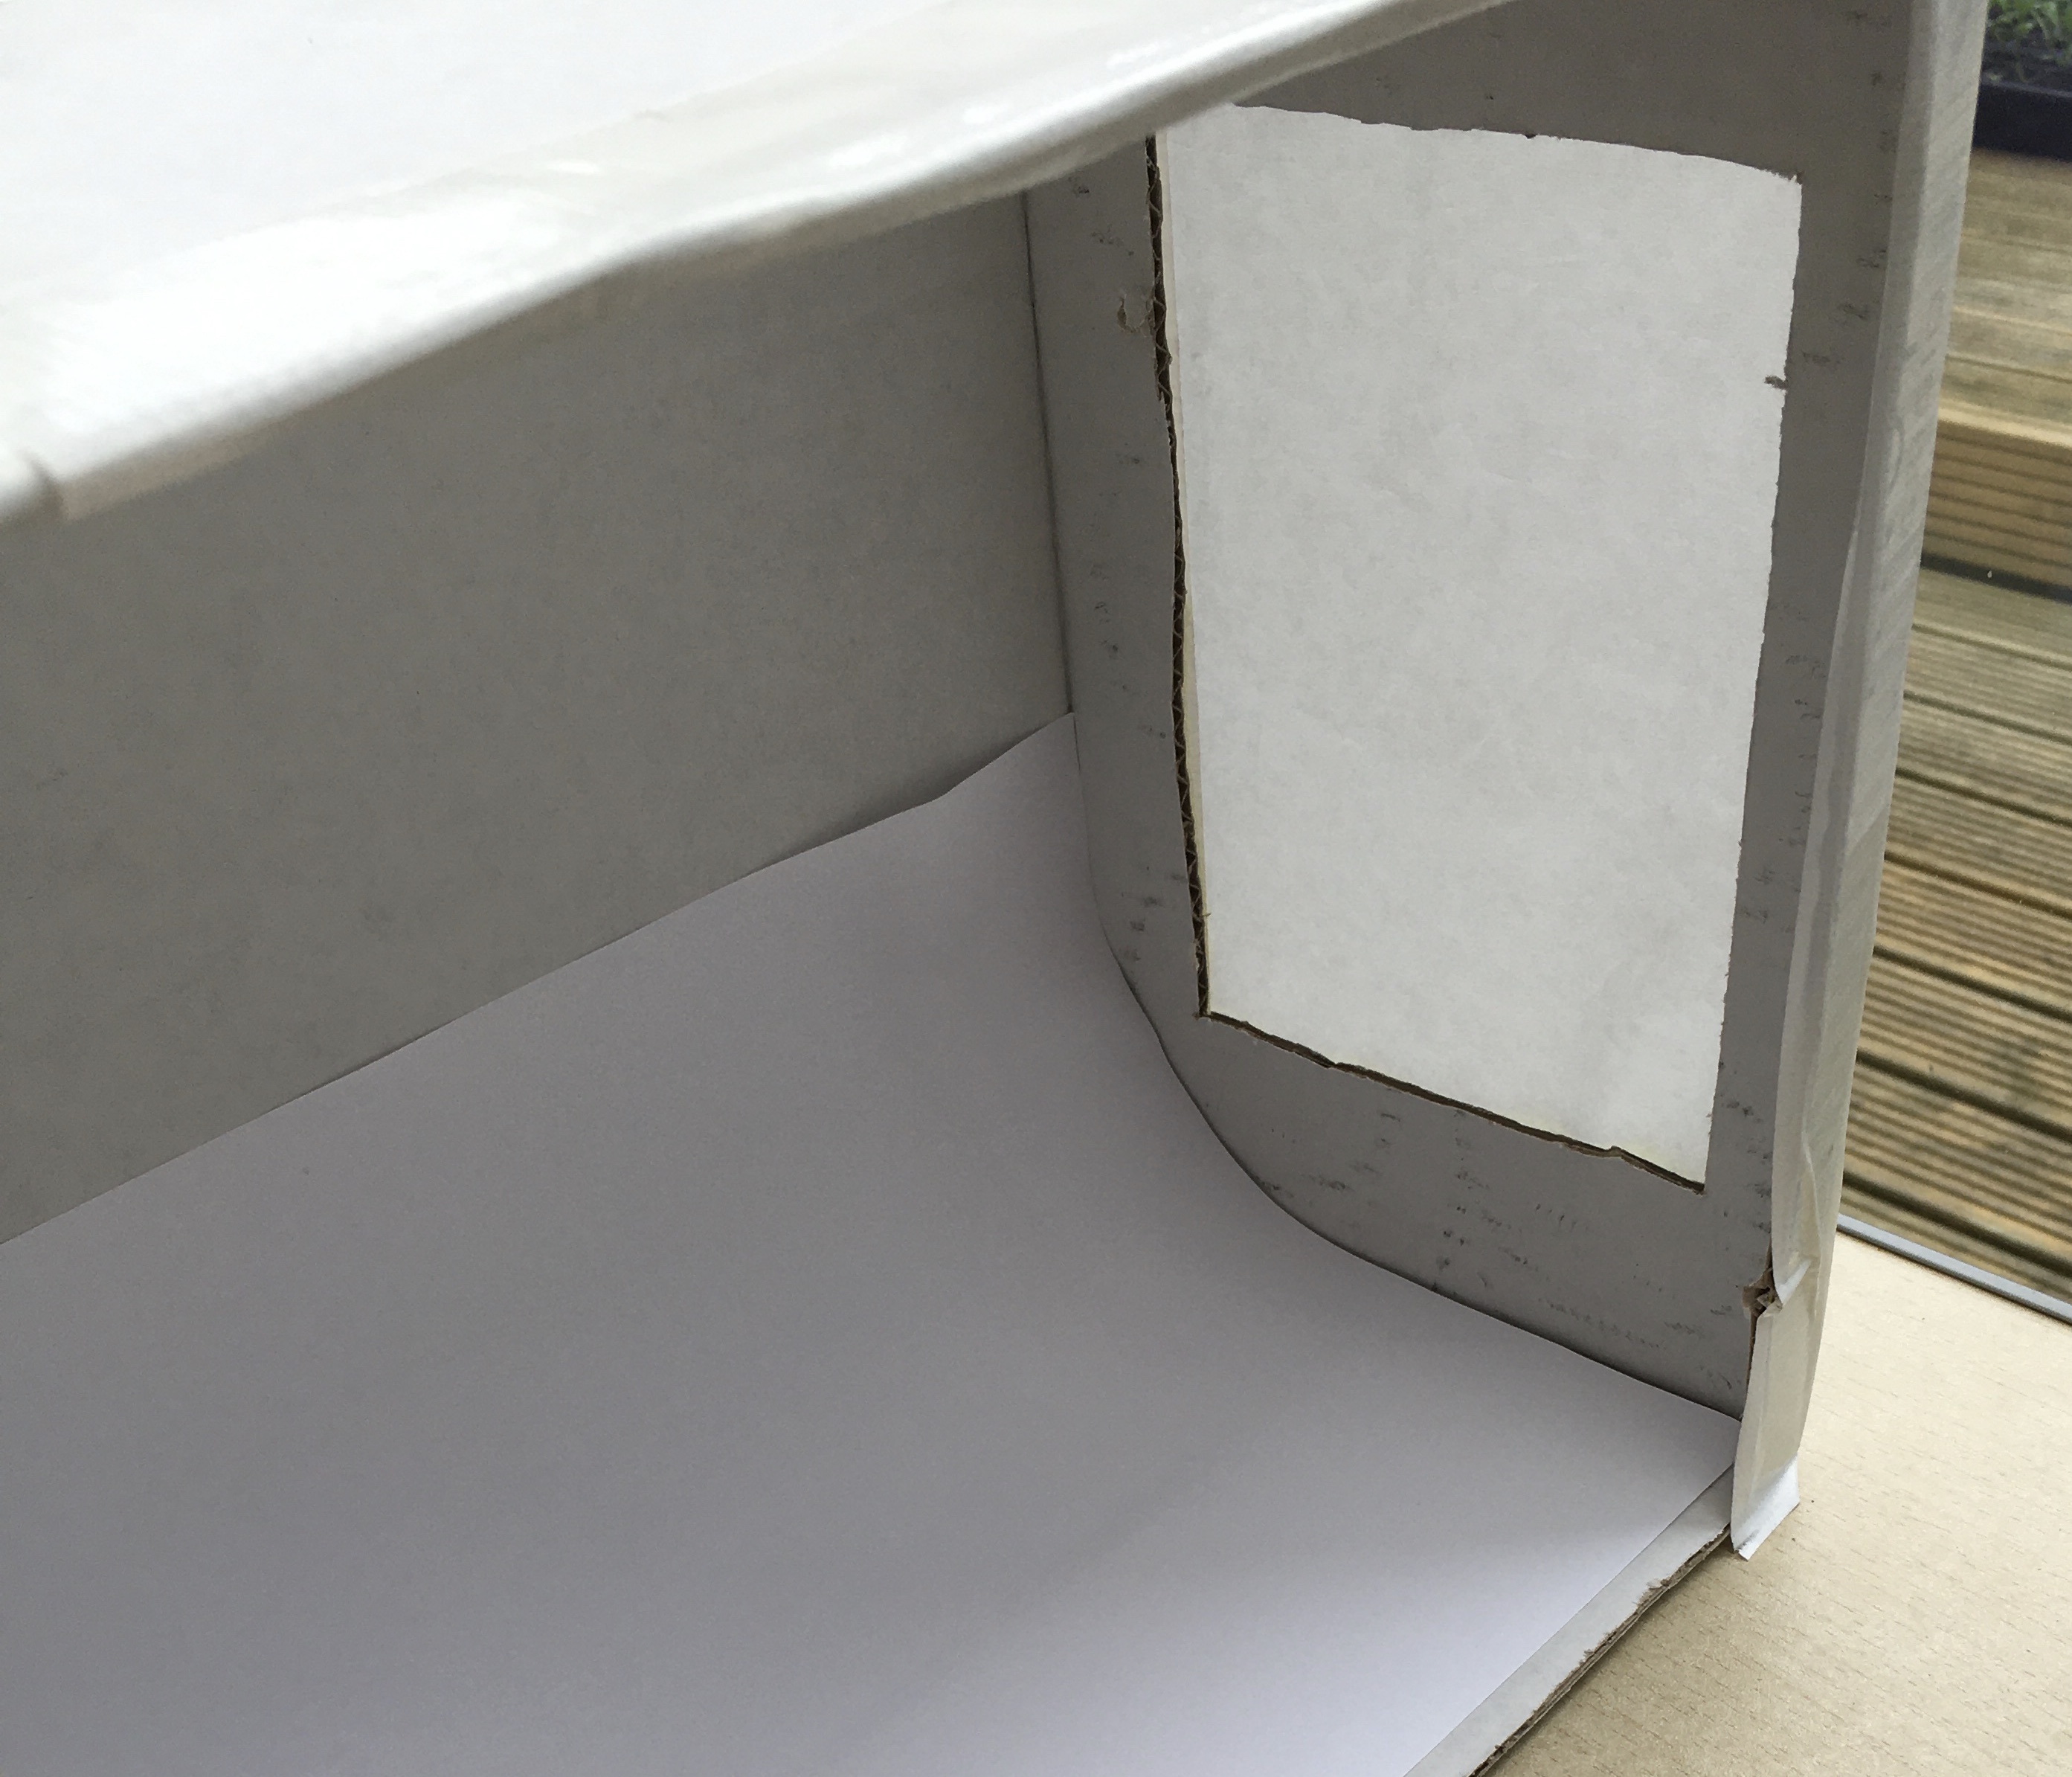 |
| The paper diffuses the light as you can see here. The curve in the backdrop is also visible |
The result is not exactly pretty (see above) but it does what it needs to do.
The monochrome background removes anything the camera might auto focus on so that it should latch onto the model as the thing to focus upon. The box will give you even illumination with no harsh shadows the rest is down to you.
 |
| 6mm figures taken from a distance by camera phone |
 |
| Taken closer in with the same phone |
To take your photos place a decent light source over the box. I use my daylight painting lamp. If you buy a set of LED daylight lamps place one shining into each window so the are all roughly the same distance from the model. With a 'proper' camera try using a long lens from a distance so that the entire model is in the field of focus. With a camera phone you might have to play around to get everything into focus. Then crop the resulting photograph to get a good tight image with your model in pride of place. You will find the right distance and light level with practice. As you can see from the two shots above I'm still playing with distances to get the look I want.
That's a really good idea which I may try - thanks!
ReplyDelete